Are you standing in front of your pellet grill chicken legs in hand wondering exactly how long they need to cook? You’re definitely not alone. Getting that perfect balance between juicy, tender meat and crispy, flavorful skin can feel like a culinary tightrope walk. Too little time and you’re risking food safety issues; too long and you’re serving up dry, overcooked chicken.
I’ve spent countless weekends experimenting with chicken legs on my pellet grill, and I’m excited to share everything I’ve learned about timing, temperature, and techniques to help you achieve grilling perfection Let’s dive in!
Quick Answer: Chicken Leg Cooking Time on Pellet Grill
For those who want the straightforward answer:
- Temperature: 375°F (190°C)
- Cooking Time: 35-45 minutes
- Target Internal Temperature: 165°F (74°C)
But of course, there’s more to mastering chicken legs than just these numbers!
Why Pellet Grills Are Perfect for Chicken Legs
Before we jump into cooking times, let me tell you why I love using my pellet grill for chicken legs. Pellet grills offer a unique combination of convenience and flavor that’s hard to beat. They use wood pellets as fuel, which gives your food that amazing smoky flavor while maintaining precise temperature control.
Here’s what makes pellet grills so special:
- Consistent Temperature: The automated feeding system maintains steady heat
- Flavor Versatility: Different wood pellets create distinct flavor profiles
- Convenience: Set the temperature and let the grill do the work
- Even Cooking: Fan circulation ensures heat distributes evenly
My pellet grill has completely changed how I cook outdoors, and chicken legs are one of the foods that benefit most from this cooking method.
Preparing Your Chicken Legs for the Pellet Grill
The journey to perfect chicken legs starts well before they hit the grill. Proper preparation is crucial for flavor development and even cooking.
Thawing Your Chicken Legs
If your chicken legs are frozen, you’ve got two safe options:
- Refrigerator Thawing: Place in fridge for 24 hours (safest method)
- Cold Water Method: Submerge sealed chicken in cold water for 1-2 hours, changing water every 30 minutes
Never thaw chicken at room temperature! This can allow bacteria to multiply rapidly.
Marinating for Maximum Flavor
I always marinate my chicken legs for at least 30 minutes, but longer is better! My favorite basic marinade includes:
- 1/4 cup olive oil
- 2 tablespoons vinegar (apple cider or red wine)
- 3 cloves minced garlic
- 1 tablespoon of your favorite herb blend
- Salt and pepper to taste
The oil helps carry flavors into the meat while the acid in the vinegar helps tenderize. For really special results, marinate overnight in the refrigerator.
Seasoning Options
If you’re short on time, a good dry rub works wonders too. I recommend a balanced blend of:
- Salt and black pepper
- Garlic powder
- Paprika (smoked paprika adds extra flavor)
- Onion powder
- A touch of cayenne if you like heat
Apply your seasonings generously, making sure to get under the skin where possible for maximum flavor impact.
Cooking Time and Temperature Guide
The magic formula for perfectly cooked chicken legs involves balancing time and temperature. Let’s break it down in detail:
Temperature Settings
Here’s a handy reference table showing how temperature affects cooking time:
| Grill Temperature | Approximate Cooking Time | Final Internal Temp |
|---|---|---|
| 350°F (177°C) | 40-50 minutes | 165°F (74°C) |
| 375°F (190°C) | 35-45 minutes | 165°F (74°C) |
| 400°F (204°C) | 30-40 minutes | 165°F (74°C) |
I personally prefer the middle option – 375°F for about 40 minutes usually hits that sweet spot of juicy meat and crispy skin.
Factors That Affect Cooking Time
Several variables can change how long your chicken legs need to cook:
- Size of the chicken legs: Larger legs naturally take longer
- Starting temperature: Cold chicken straight from the fridge takes longer than room temperature
- Bone-in vs. boneless: Bone-in legs (which I recommend for flavor!) take slightly longer
- Your specific grill: Every pellet grill has slight temperature variations
This is why using a meat thermometer is non-negotiable for perfect results every time!
Step-by-Step Cooking Process
Let me walk you through my foolproof method for cooking chicken legs on a pellet grill:
-
Preheat your pellet grill to 375°F. This usually takes about 15 minutes.
-
Choose your wood pellets. For chicken legs, I love apple, cherry or hickory pellets for their complementary flavors.
-
Place the chicken legs directly on the grill grates. Position them with a bit of space between each piece for even air circulation.
-
Cook for approximately 35-45 minutes. If possible, flip them halfway through cooking for more even results.
-
Check the internal temperature using a digital meat thermometer. Insert it into the thickest part of the leg, avoiding the bone. You’re looking for 165°F minimum.
-
Let the chicken rest for 5 minutes after removing from the grill. This allows juices to redistribute throughout the meat.
Pro Tips for Amazing Chicken Legs
After dozens of grilling sessions, I’ve discovered some tricks that make a huge difference:
Use a Water Pan for Extra Juiciness
Placing a small aluminum pan with water in your grill can create a moisture-rich environment that helps prevent the chicken from drying out. This is especially helpful if you’re cooking at higher temperatures.
Try the 2-2-2 Method
For super crispy skin AND juicy meat, try this technique:
- Cook at 225°F for 30 minutes (for smoke flavor)
- Increase to 350°F for 30 minutes (for cooking through)
- Finish at 450°F for 5-10 minutes (for crispy skin)
Apply Sauce Strategically
If you’re using barbecue sauce or a glaze, apply it during the last 10-15 minutes of cooking. Adding it too early can cause burning due to the sugar content.
Rest Your Meat!
I can’t emphasize this enough – let those legs rest for 5 minutes before serving. This simple step makes the difference between good and great chicken legs.
Troubleshooting Common Issues
Even experienced grillers run into problems occasionally. Here are solutions to common chicken leg challenges:
Problem: Skin Isn’t Crispy
Solution: Finish with a few minutes at high heat (425-450°F) or pat the skin dry thoroughly before cooking.
Problem: Meat Is Dry
Solution: You likely overcooked the chicken. Next time, remove it from the grill when the internal temperature reaches 160°F – it will continue cooking to 165°F while resting.
Problem: Uneven Cooking
Solution: Make sure your chicken legs are similar in size or position larger pieces closer to the heat source.
Delicious Chicken Leg Recipes to Try
Now that you know the basics, here are two of my favorite flavor profiles to try on your pellet grill:
Honey Mustard Glazed Chicken Legs
Mix equal parts honey and Dijon mustard with a bit of minced garlic and cayenne. Apply during the last 15 minutes of cooking for a sweet and tangy glaze that caramelizes beautifully.
Lemon Herb Infused Chicken Legs
Marinate in lemon juice, olive oil, minced garlic, rosemary and thyme for at least an hour before grilling. The citrus notes complement the smoky pellet flavor perfectly.
Final Thoughts
Cooking chicken legs on a pellet grill combines the best of both worlds – the convenience of modern grilling with incredible wood-fired flavor. The key to success lies in proper preparation, maintaining the right temperature, and monitoring doneness with a reliable meat thermometer.
Remember that the 35-45 minute timeframe at 375°F is a guideline, not a rule. Your specific cooking time may vary based on your equipment and the size of your chicken legs. Always cook to temperature (165°F), not to time.
Frequently Asked Questions
Q: Can I cook frozen chicken legs on a pellet grill?
A: While possible, it’s not recommended. Frozen chicken cooks unevenly and takes significantly longer. Always thaw for best results.
Q: How many chicken legs can I cook at once?
A: This depends on your grill size, but leave at least an inch between pieces for proper air circulation.
Q: Do I need to flip the chicken legs while cooking?
A: It’s not absolutely necessary on a pellet grill due to the convection-style heating, but flipping once can help with even cooking and browning.
Q: What’s the best wood pellet flavor for chicken legs?
A: Fruit woods like apple and cherry offer mild, sweet smoke that complements chicken perfectly. Hickory provides a stronger, more traditional BBQ flavor.
Q: Can I add vegetables to cook alongside the chicken legs?
A: Absolutely! Just add vegetables that have similar cooking times or add longer-cooking vegetables earlier in the process.
Happy grilling!

How to Make Smoked Chicken Drumsticks on a Pellet Grill
Making the smoked chicken drumsticks is a quick and simple process. You will need to begin by assembling all of the ingredients, as well as your Z Grills and cooking grate.
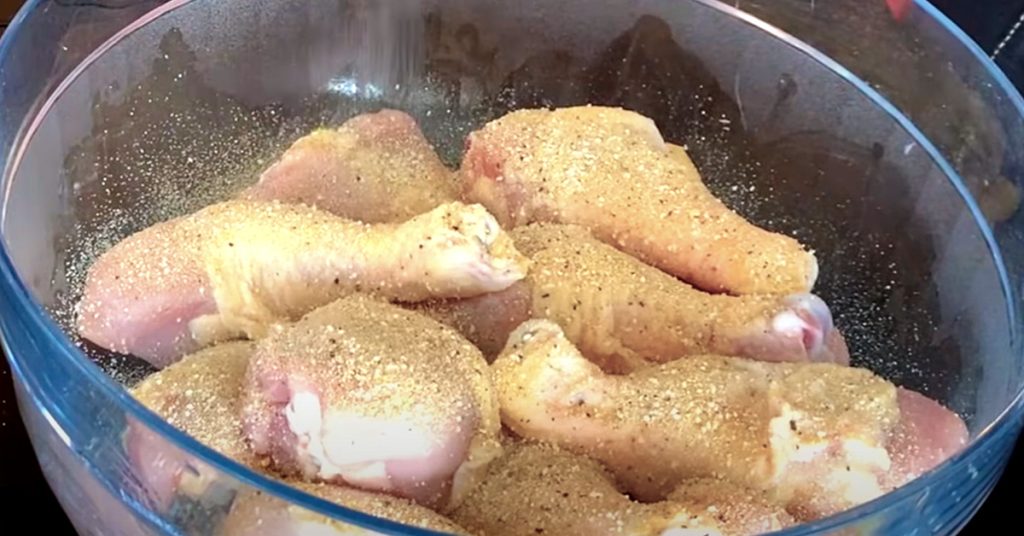
1. Begin with a large bowl. You will want to ensure that the bowl is big enough to hold all 12 of the chicken drumsticks comfortably.
2. Place the chicken drumsticks inside of the bowl, spreading them out as evenly as possible.
3. Add the vegetable oil. The amount that you use may vary, but it should be enough to lightly coat all of the drumsticks evenly.
4. Add the Lane’s BBQ Sweet Lemon Pepper Rub/Seasoning. Once again, the amount that you use may vary. Apply the seasoning to taste, ensuring that each drumstick has an adequate amount of coating across it. With how great this rub tastes, many people find that adding more can provide a wonderful flavor boost.
5. With a pair of gloves, rub the seasoning over the chicken drumsticks and toss until they are evenly coated.
6. Move your grates close to the bowl for easy transportation of the chicken drumsticks to the grates.
7. Using a fresh pair of gloves to avoid contamination and mess, carefully grab each chicken drumstick one drumstick at a time and set them down in a simple and organized fashion on the grate. Be sure to avoid putting the chicken drumsticks too close together, and try to separate them evenly.
8. Preheat your Z Grills to 275 degrees using Competition Blend Pellets. This will provide your smoked drumsticks with an added flavor that blends nicely with the seasoning.
9. When the Z Grills is up to temperature, add the chicken by carefully spreading out the grates inside the grill.
10. Close the lid of the Z Grills to ensures even cooking.
11. To begin, check on your chicken drumsticks after 1 hour to assess how they are cooking.
12. Using a meat thermometer, determine the internal temperature of your chicken. The ideal internal temperature for your chicken drumsticks is 180 degrees. Your reading should come from a thick piece on the chicken to get an accurate gauge of the internal temperature of other pieces. You will need to do this step each time that you make these smoked drumsticks since cook times can vary from one batch to the next.
13. It is possible that at this time your internal temperature might be fairly close to the desired temperature. Continue to cook the chicken in 5 to 10-minute intervals in order to see how they are progressing, testing the internal temperature each time.
14. When the chicken drumsticks meet or pass the desired temperature, remove them from the pellet grill and place them on the counter or a comparable clean surface.
15. Turn off your Z Grills pellet grill, then get ready to enjoy your chicken drumsticks.
16. Be sure to let the drumsticks cool down to some extent to avoid burning your mouth prior to eating. Remember that the chicken drumsticks that have more meat will take more time to cool and will remain hot for longer than the others.
17. Enjoy your smoked chicken drumsticks!
Knowing how long to smoke chicken drumsticks is an important step. The cook time for these chicken drumsticks is roughly 1 hour. After the first hour, you will begin to check the temperature of the drumsticks for 5 to 10-minutes to ensure that the ideal internal temperature is reached.
Estimated Cook Time: 1 Hour
When cooking these drumsticks, you will need to consider two important temperatures. Your Z Grills should be set to 275 degrees for cooking. When your chicken drumsticks are done cooking, they should be 180 – 185 degrees.
Cooking Temperature: 275 Degrees
Internal Temperature for Drumsticks: 180 Degrees
Ingredients for Smoked Chicken Drumsticks
To make a standard amount of delicious smoked chicken drumsticks, you will need a few essential ingredients in addition to your preferred Z Grills model. The recipe calls for only three ingredients to create its incredible flavor.
- Chicken Drumsticks (12)
- Seasoning (to taste—don’t be shy!)
- Vegetable Oil (amount may vary)
The incredible flavor behind these tasty smoked chicken drumsticks is Lane’s BBQ Sweet Lemon Pepper Rub/Seasoning. This delicious seasoning blends together lemon, pepper, and a hint of honey that provides a surprising amount of flavor. Even better, it can be used on a variety of foods with different results—not just smoking chicken drumsticks!