How to Cook Chicken Breast Without It Getting Tough: The Ultimate Guide
As a home cook, I know the frustration of cutting into a beautifully browned chicken breast only to find it dry and chewy. For years, I struggled to cook juicy, tender chicken breasts. But after lots of trial and error in my kitchen, I’ve mastered the techniques for consistently delicious results. In this comprehensive guide, I’ll share everything I’ve learned about how to cook moist, tender chicken breasts every time.
Chicken breast can easily become tough and dry because it is very lean Without fat to keep the meat moist during cooking, overcooking causes the proteins to squeeze out water and tighten up But don’t worry – with the right preparation and cooking methods, you can enjoy perfectly tender and juicy chicken breast for any meal.
Here are my top tips for cooking chicken breast without it getting tough
Choose Bone-In, Skin-On Chicken Breasts
Opt for bone-in, skin-on chicken breasts whenever possible. The bones and skin help retain moisture and prevent the delicate breast meat from drying out. If using skinless breasts, brush them with a little oil before cooking to provide some moisture protection.
Pound to Even ThicknessOne of the biggest mistakes I see is failing to pound chicken breasts to an even thickness Thinner sections overcook before thicker parts are done, leading to dry spots. Pound breasts between plastic wrap to about 1/2-inch thickness for uniform cooking.
Brine for Added Moisture
Brining chicken is a game-changer! Letting chicken soak in a saltwater solution plumps up the breast meat so it retains more moisture during cooking. Dissolve 1/4 cup salt + 1/4 cup sugar in 4 cups water. Submerge breasts, refrigerate 30 mins – 2 hrs.
Keep Temperatures Low and Slow
High cooking temperatures cause proteins to contract, squeezing out moisture. Low, slow methods like poaching, baking, or sous vide allow chicken to cook gently without overtightening proteins. Aim for 150-165°F internal temperature.
Monitor Temps with Meat Thermometer
Speaking of temperatures, always rely on an instant-read thermometer for doneness, not appearance. Chicken is safe at 165°F but pulling it at 160°F and allowing carryover cooking gives the juiciest result every time.
Allow Resting Time
Carryover cooking isn’t the only reason to rest chicken after cooking. Resting allows juices that were forced toward the center during cooking to redistribute evenly through the meat for better moisture. 5-10 minutes of resting makes a huge difference.
Use Gentle Cooking Methods
The cooking method makes a big difference too. Gentle poaching, baking, and sous vide styles prevent overcooking better than harsher methods like grilling or pan frying. If pan frying, go low and slow. If grilling, marinate first and keep a close watch.

How to Cook Chicken on the Stove

Step 1: Flatten the Chicken
Place the chicken in a plastic bag, then use a meat mallet or rolling pin to pound. Shoot for about ½ to ¾ inch thickness. I find that anything over 8 ounces will end up being too wide after flattening, so you may need to cook in two batches.
Chicken breasts are admittedly a challenge to cook evenly because of their shape. They are thicker on one side and thin out and taper on the other. Flatten the thick end so that the entire piece is level.
Experimentation Encouraged: Another option is to slice the chicken in half horizontally lengthwise to create two cutlets out of one piece. This technique works nicely if the meat is very thick, 1 inch or bigger.
Pro Tip: If the tenders are still attached, they add bulk, making it harder to flatten. I like to pull them off and make baked chicken tenders for the kids. They love it!

Step 2: Dry the Surface
After flattening the meat, dry both sides with paper towels. This process wicks up any extra moisture on the surface that could cause it to steam instead of brown. We want to kickstart the flavor and color development in the pan.

Step 3: Season the Meat
Combine salt, black pepper, garlic powder, onion powder, and Italian seasoning. A little goes a long way! Sprinkle the chicken evenly with the seasoning blend, about ½ teaspoon per side.

Don’t let the concentrated dry rub sit on the chicken too long. The salt will draw moisture to the surface. If this happens, blot it with a paper towel before adding it to the pan.
Tips for Perfect Execution: I use paprika for its deep golden hue and earthy flavor, opting for sweet, smoked, or spicy varieties to add complexity. Use it sparingly and maintain moderate heat to prevent burning. Skip the paprika and herbs for a darker golden brown color so they don’t char.

Step 4: Pan-Sear the Chicken
Make sure the oil is nice and hot but not smoky. Once the pieces go in, press them down for better contact with the surface, then do not move. I repeat, let it sear! Keep a close eye on the color change while the chicken develops a crust, about 5 to 7 minutes. This will make it easy to flip over. Begin cooking on medium-high heat, then lower to medium after flipping.
A cast iron skillet or stainless steel pan helps create a golden-brown crust. The trick to using them correctly is to preheat the pan and heat the oil before adding the meat. This process creates a better nonstick surface. Since we are using moderate heat, using a nonstick pan is also okay if you feel more comfortable.
Ingredient Chemistry: The preheated fat and moderate heat drive off any excess moisture from the meat.

Step 5: Baste with Butter
Butter is optional, but it’s such a good idea! After flipping, I add a tablespoon. Let the fat melt, then baste with it. The process coats the surface to prevent the meat from drying out. Throw in some sprigs of rosemary or thyme to infuse fresh herb aromatics into the dish.
Use an instant-read thermometer to check the internal temperature on the thickest part of the breast. It’s okay if the juices run slightly pink, but the meat should not be raw in the center. I poke it parallel into the meat for the most accurate result. It should be between 160 to 165ºF (71 to 74ºC).
Ingredient Chemistry: When the milk solids brown, they add more color and a nutty flavor that sticks to the meat. It’s delicious! I wait until after the initial sear because I don’t want the water in the butter to interfere with browning or the solids to burn.

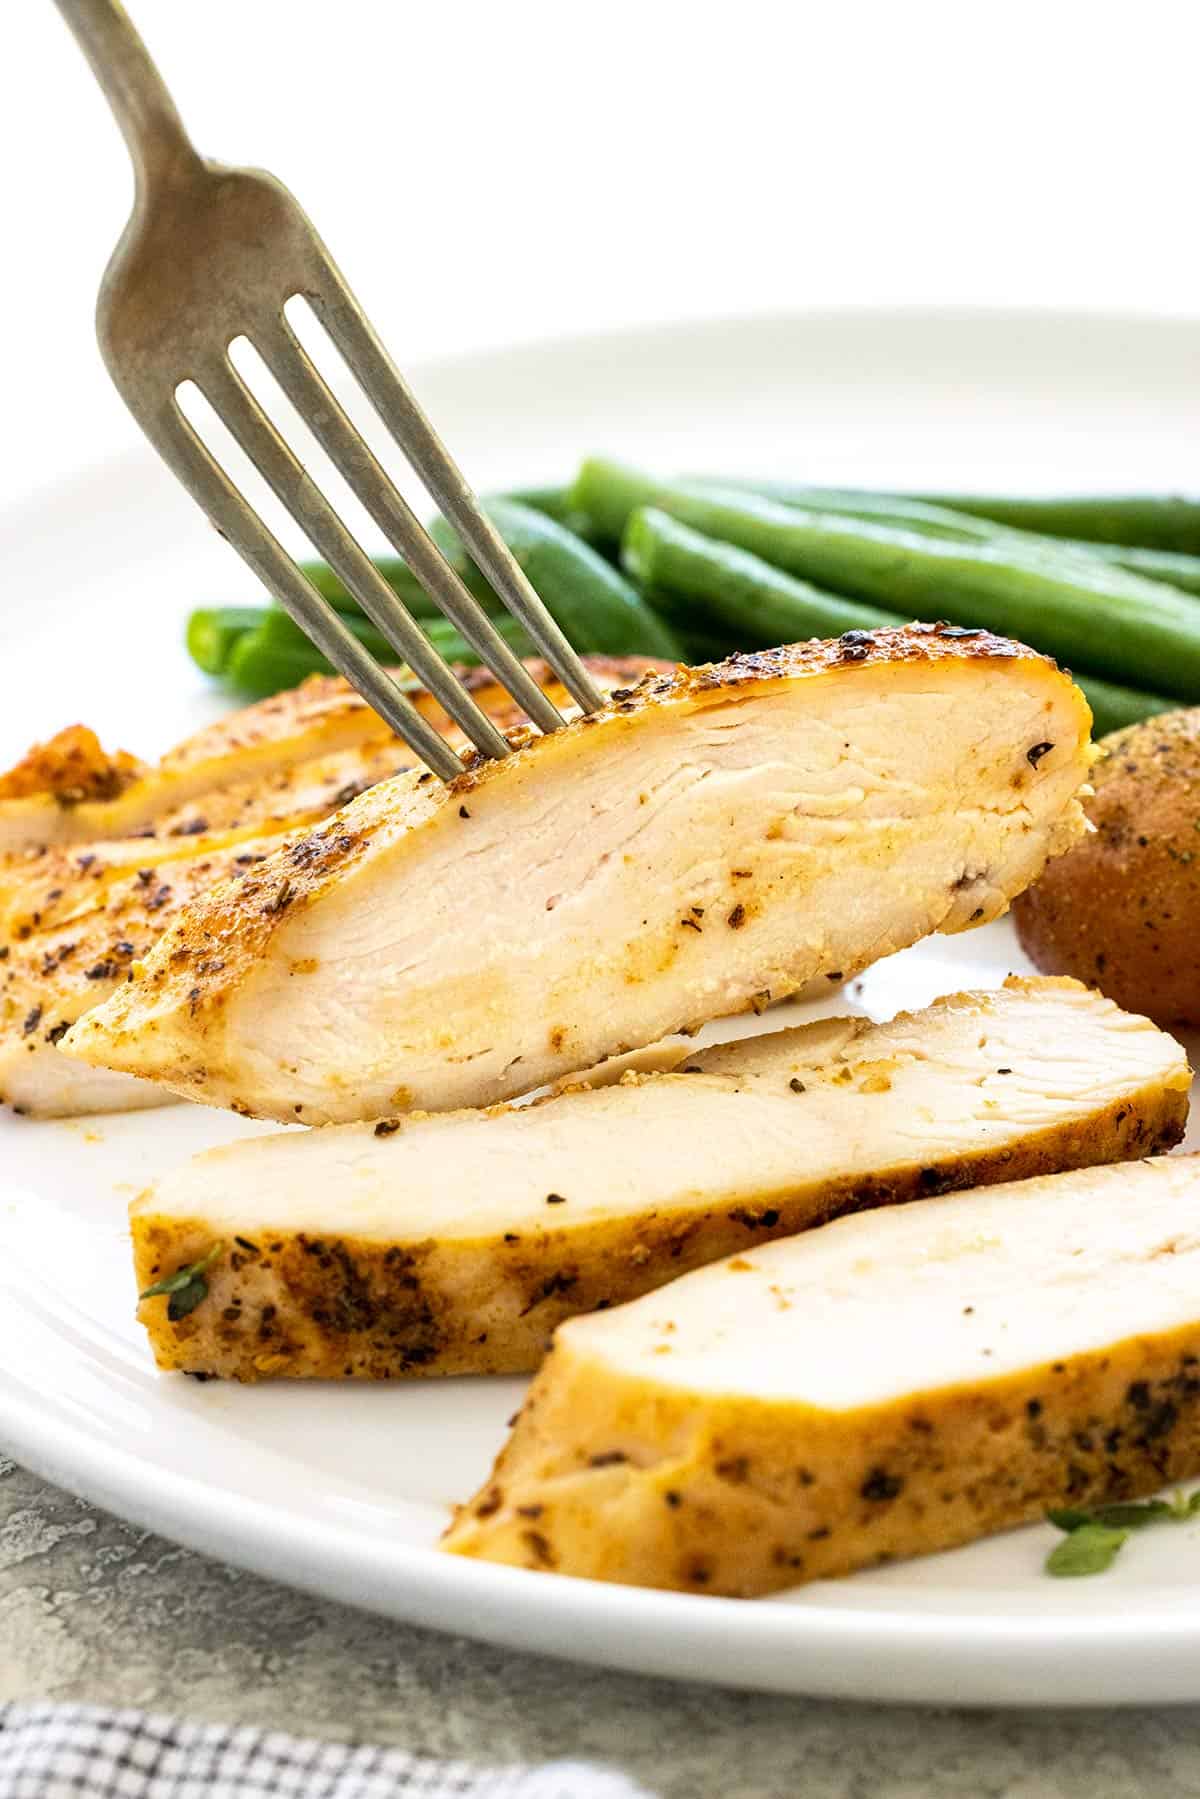
Step 6: Rest, then Slice
Give the chicken about 5 minutes to rest before serving to allow the flavorful juices to redistribute into the muscle fibers. Resting keeps the meat moist instead of running out onto the cutting board. Serve the chicken as whole pieces, slices, or dice to use in chicken recipes.
Yes! What does brining chicken do? The salt solution increases the seasoning and juiciness. Dissolve 2/3 cup kosher salt or ½ cup of table salt in 2 quarts of water. Add the chicken and refrigerate for at least 30 minutes or up to 24 hours. Dry the surface well before cooking.
For more flavor dimensions, add a chicken marinade. The citrus juices, salt, and aromatics like garlic and soy sauce increase the savory umami taste. With acid in the marinade, you only need 30 minutes or up to 1 hour. The meat may turn mushy in texture if left longer. Pat dry before cooking.
Use a simple pan-searing technique. This involves high-heat browning in a skillet and then transferring it to the oven to gently finish cooking. However, you can use just the stovetop if you flatten the chicken first. This step ensures even cooking, and using moderate and consistent heat is critical to preventing the meat from drying out. If the cooking oil is preheated, the chicken will get brown and juicy.
Chicken breasts flattened to about ½ inch thick and cooked in a preheated pan over moderate heat, about 5 to 7 minutes per side. Larger pieces of chicken will take longer to cook. Target an internal temperature of 160 to 165ºF (71 to 74ºC).
Absolutely! The flavorful fond left in the skillet from the juices and cooked bits is excellent for making a pan sauce or homemade gravy. Use the drippings from the pan, or add 1 tablespoon of butter if previously omitted, plus 1 to 2 tablespoons of flour to make a roux. Add 1 cup of chicken stock or broth to thin out the sauce, whisk, and cook over medium-high heat until thickened.
Now that you know How to Cook Chicken on the Stove, please leave a star rating and let me know how it went in the comments below!
Jump To a Section
Chicken is a classic dinner-time staple but can quickly become dried out and bland. To avoid that, I’m sharing my go-to juicy stove top chicken breasts recipe. I utilize a simple pan-sear method that adds flavor to the surface while ensuring moist and tender meat. The key to success is heat management.
You’ll need to give the protein enough time for the exterior to brown, then reduce the intensity to gently finish cooking. Once you master this simple technique, the possibilities are endless. Get creative with entree portions, kick up the protein level for salads, or shred up pieces to use in soups and casseroles.

- Chicken: I recommend using boneless, skinless chicken breasts between 6 to 10 ounces.
- Oil: The best cooking oil for stovetop chicken breasts is olive oil for a slightly fruity taste.
- Butter: The flavorful fat is used to baste the chicken right before serving. The extra lipid coating keeps the chicken moist.
- Seasoning: I season the chicken breasts with a concentrated and bold spice blend. I use a combination of salt, black pepper, paprika, garlic powder, onion powder, and Italian seasoning.
See the recipe card below for all ingredients and measurements (US and metric).
If you cook chicken breast often, you’ll want to switch up the flavor profile to keep each meal exciting. It’s easy to customize!
- Chicken Options: For bone-in chicken breasts, sear both sides, then transfer to the oven and ake at 350ºF (177ºC) until fully cooked. Depending on size, this could take 20 to 30 minutes of cooking time. If you prefer dark meat, boneless or bone-in chicken thighs can be used. The doneness should reach about 170ºF (77ºC) to tenderize the tougher muscle fibers.
- Oil: If you prefer a more neutral-tasting oil, use a high smoke point oil like avocado, vegetable, or canola oil.
- Butter Swap: For a dairy-free option, use margarin or other plant-based butter. For a browned butter taste, use ghee.
- Herbs: To infuse the butter with an herbaceous flavor, add a few springs of thyme or rosemary to the pan as you baste. Garnish the chicken with freshly chopped herbs like parsley, basil, tarragon, or chives.
STOP making dry chicken breast! This is HOW you make JUICY chicken #shorts #viralshorts #chicken
FAQ
How to cook chicken breast so it doesn’t get tough?
- Flatten the chicken breasts. …
- Season the chicken breasts. …
- Heat the pan. …
- Cook the chicken breasts over medium heat for 1 minute without moving. …
- Flip the chicken breasts. …
- Turn the heat down to low. …
- Cover the pan and cook on low for 10 minutes. …
- Turn off the heat and let sit for an additional 10 minutes.
How to prevent chicken breasts from being tough?
The absolute best way to prevent a dry chicken breast is to use a meat thermometer. Remove chicken from heat as soon as the thickest part of the chicken reaches 165°F (74°C). You can also place a pad of butter on top of the chicken while cooking to help keep it moist.
Why is my chicken breast so tough after cooking?
However, if the chicken is cooked for too long, it can become tough. This is because the proteins continue to coagulate and squeeze out moisture.Oct 11, 2024