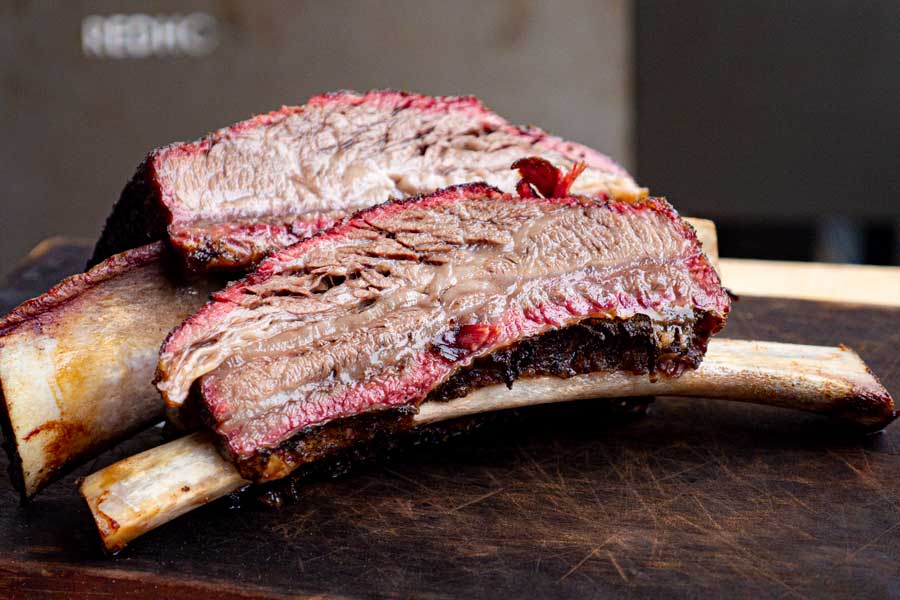
When most people think about barbecue ribs, they think pork baby backs or spare ribs. If you want to up your barbeque game, you have to try smoked beef short ribs. Short ribs have big bones, are very tender, and taste rich and beefy. They also look great on the dinner table with the bones still in. They have become more popular over the years, both at barbecues and in restaurants.
Beef short ribs are a tasty cut of meat that can be made very tender and juicy if it is cooked right. But the first thing that needs to be done before cooking short ribs is to clean them. By cutting off the extra fat and membrane, you can make sure that your ribs cook evenly and soak up the flavors correctly.
While it may seem intimidating at first, cleaning short ribs is easy to do at home with just a few helpful tools and these step-by-step instructions In no time, you’ll be ready to cook succulent beef short ribs to perfection. Let’s get started!
Benefits of Cleaning Short Ribs
Taking the time to clean short ribs provides several advantages:
- Prevents uneven cooking from thick fat pockets
- Allows seasonings to better adhere to the meat
- Removes unpleasant textures from membrane
- Produces ribs that are juicy rather than greasy
- Makes for a nicer presentation with exposed bones
What You’ll Need
Before beginning, gather:
- Beef short ribs
- Sharp knife (boning or fillet knife ideal)
- Paper towels
- Large plate or baking sheet
Step-by-Step Cleaning Process
Follow these simple steps for perfectly cleaned short ribs
1. Rinse and Pat Dry
Rinse the ribs under cold water and pat dry thoroughly with paper towels.
2. Trim Excess Fat
Use your knife to trim away any thick chunks of hard fat until you reach the thin membrane underneath.
3. Remove Silverskin Membrane
Slide your knife under the thin, silver membrane and slice it off the ribs.
4. Cut Away Meat and Cartilage
Scrape your knife against the bones to remove any meat or cartilage remnants.
5. Rinse and Pat Dry Again
Give the ribs another quick rinse, then pat dry with fresh paper towels.
6. Chill Until Ready to Use
Place the cleaned ribs on a baking sheet or plate, wrap, and refrigerate until ready to cook.
Handy Cleaning Tips
-
Chill ribs in freezer 10-15 mins before cleaning to firm up fat for easier removal
-
Trim fat down to about 1/4 inch thickness for best texture and cook time
-
Leave any meat between bones attached for flavor and moisture
-
Use paper towels for better grip when peeling off membrane
-
Cut ribs into portions before cleaning for better maneuverability
Common Questions
What knife is best for cleaning ribs?
A sharp, narrow boning knife allows precise trimming and membrane removal. A fillet knife also works well.
How much fat should be trimmed?
Trim thick, hard fat deposits down to around 1/4 inch thickness. Some marbling can be left intact.
Should the membrane be removed?
Yes, peeling off the thin silverskin membrane improves tenderness and allows better seasoning absorption.
Can short ribs be cleaned in advance?
Absolutely. Cleaned ribs can be tightly wrapped and stored in the fridge for 2-3 days before cooking.
Can I skip any cleaning steps?
It’s not recommended – each step contributes to the quality and taste. At minimum, trim fat and remove membrane.
Achieve Ribs Worth Bragging About
While it requires some upfront effort, properly cleaning beef short ribs sets you up for outrageously delicious results every time. With tender meat, exposed bones, and concentrated beefy flavor, your guests will be begging for your secret. Just follow these simple steps, and you’ll have ribs worth bragging about!
How to prepare beef short ribs
Start with some bone-in short ribs. You’ll notice a layer of fat across the top of your ribs. The “silverskin” is a thin layer of connective tissue that has a silvery sheen. It lies under the fat and on top of the meat. The silverskin should be taken off because it is not made of connective tissue that breaks down over time.
Start by trimming the fat down to the silverskin, then with your sharp knife remove it. There is also a heavy membrane on the backside of the beef ribs. It’s better to leave this membrane on because the meat might fall off the bone while it’s cooking. Once you cook the ribs, the membrane is easily cut away. When you smoke pork ribs, on the other hand, you should take off the membrane on the back of the ribs.
How many ribs are there on a steer?
There are thirteen ribs on a side of beef. The first five are on the chuck primal, which is the shoulder. The next seven are on the rib primal, and the last one is in the middle of the back on the short loin. It is between the twelfth and thirteenth rib where the side is separated into two pieces.
This is also the spot used to determine the USDA grade of beef. Prime grade cattle are young, well-fed, and have a lot of marbling. The meat also has a lot of white fat flecks running through it. Only 2-5% of all cattle grades out to be Prime. Choice grade beef will be moderately marbled and the most readily available in the market. Select grade will be slightly marbled and the lowest quality.