Rotisserie turkey, with crispy brown skin and juicy tender meat, is a showstopping centerpiece for any holiday table. But getting that gorgeous bird to spin evenly on the rotisserie requires some work – you need to truss up the turkey into a tight, balanced package.
Tying up a turkey’s floppy wings and legs so they stay snug against the body is key for rotisserie success. Follow these tips for trussing a turkey that will rotate beautifully and cook evenly from all sides.
Supplies Needed for Trussing a Turkey
Before you start trussing gather these supplies
- Whole turkey, 12-20 lbs, rinsed clean and patted dry
- Kitchen string or butcher’s twine
- Trussing needle (optional)
- Herbs, olive oil, spices for seasoning
Steps for Tying a Turkey for the Rotisserie
-
Tuck in the wings Fold the turkey’s wings under its body and tie them in place This prevents the wings from dangling down into the heat
-
Tie the legs together: Cross the drumsticks and tie them snugly with kitchen string. Wrap string around the ends of both drumsticks in a tight knot.
-
Close up the cavity: Thread string through the turkey just below the breastbone. Wrap string around the body and tie off to close up the cavity neatly.
-
Cinch the breast: Tie a loop of string around the breastbone to pull it into a compact oval shape. Knot it tightly under the breast.
-
Check your work: Make sure the wings, legs and breast are tied up securely so the turkey will rotate evenly as it cooks.
-
Season the trussed turkey: Rub the tied-up turkey all over with olive oil, herbs, spices, etc. Season the cavity as well.
-
Attach to the rotisserie spit: Carefully push the spit through the center of the turkey, just off-center from the breast. Secure it onto the rotisserie.
-
Cook and baste: Turn on the rotisserie and cook as recipe directs, basting frequently with pan drippings for maximum flavor and moisture.
-
Let rest before carving: Allow the cooked turkey to rest for 20-30 minutes before removing the strings and carving. This lets the juices redistribute.
Turkey Trussing Tips
- Use fresh kitchen string or butcher’s twine – old string may break.
- Check ties periodically to ensure legs and wings stay secured.
- Do not over-tighten cavity area or skin may tear – leave slight play.
- Balance turkey evenly on spit so it rotates smoothly as it cooks.
- Rub herbs, oil, marinades on after trussing to keep skin intact.
- Remove all string before serving turkey for beautiful presentation.
- Let turkey rest before carving so juices have time to redistribute.
With proper trussing, your holiday turkey will turn out moist, tender and golden brown with no floppy parts. Enjoy the compliments on your perfect rotisserie roasted bird!
Remove Product? Are you sure you want to remove the following product from the cart?
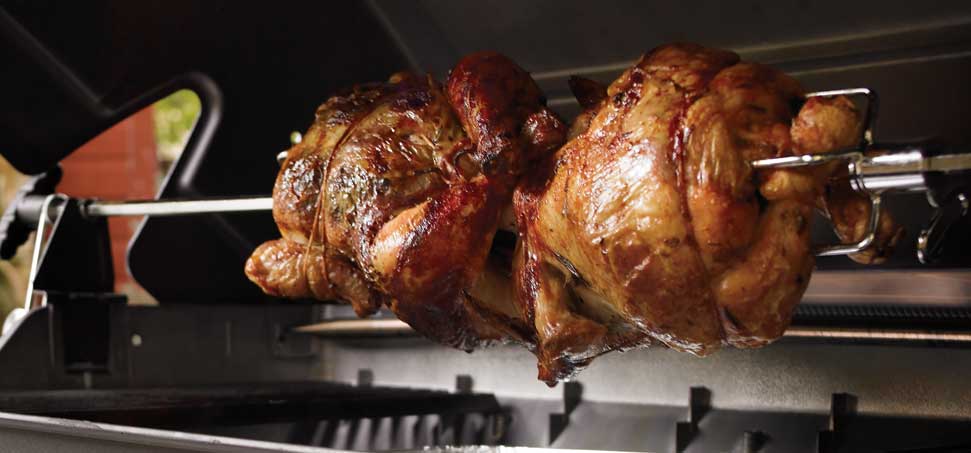
Rotisserie chicken, with crackling skin and tender meat, is one of the best things you can cook on your grill. Now, rotisserie chicken is a little extra work – the bird has to be trussed into a tight package and secured on the rotisserie spit – but a great chicken it is worth the effort.
Trussing a chicken is a little tricky. There are wings, legs, and drumsticks sticking out everywhere, and they need to be locked down. Flopping wings and wobbly legs will pull the bird loose from the spit forks as the meat cooks and tenderizes.
Oh, and one trick to tying the knots when trussing – use a double loop to start the knot. This adds extra tension when you pull tight, and holds the first tie in place while you complete the second tie to finish the knot.
Note: I’m using chicken as my example, but this trussing technique works on all types of poultry, from the smallest Cornish hen up to the largest turkey. The only difference is size.
Cut a piece of twine four times the length of the bird.
Fold the wingtips tight under the bird; this locks them in place, so they won’t flop around on the grill.
Set the bird on its backbone, with the drumsticks pointing at you and the breast and wings away from you.
Find the middle of the piece of twine, reach around to the front of the bird, and loop that middle over the nub of the neck.
Wrap both sides of the twine around the breast, just above the wing, and bring them together at the cavity behind the bird.
Tie a knot at the cavity – remember, start the knot with a double loop – and pull the knot tight to plump up the breast.
Next, tie the drumsticks. Take the ends of the twine in both hands and bring them down between the knobs of the drumsticks. Loop them out and up to catch the knobs, then pull the knobs of the drumsticks together by tying the double loop and pulling tight. Keep tightening the knot and pushing on the knobs until they cross, forming an X.
Continue to tighten the knot and push the knobs towards the cavity until the drumsticks are up against the first knot.
Finish off the knot and trim any extra twine.
Tighten the first spit fork on the spit.
Run the spit through the bird, starting at the cavity in the back, and sink the forks into the thighs.
Slide the second spit fork on to the spit and push the fork into the bird’s breast meat just above the wings. Keep pushing until the bird is squeezed between both forks.
Make sure the bird is centered on the spit, then tighten the second fork to lock the bird in place.
That’s it – the bird is ready for the rotisserie.
Adapted from: Rotisserie Grilling by Mike Vrobel. Visit Mike at DadCooksDinner.com.
How to Truss and Spit a Turkey for the Rotisserie
FAQ
What does it mean when a recipe says to truss a turkey?
Trussing is a method of keeping all the poultry’s meat as close to the center as possible: A compact shape facilitates more even cooking so that the breast and leg meat are done at around the same time.
How do you tie a rotisserie turkey?
Here are some rotisserie turkey tying tips: Use fresh sturdy kitchen string or butcher’s twine. Check ties periodically to ensure legs and wings stay bound. Do not tie cavity overly tight or skin may tear. Allow for natural expansion. Balance turkey evenly so it rotates properly on the spit. Add herbs/oil/marinade after tying so skin stays intact.
Should you truss a rotisserie turkey?
While rotisserie roasting benefits most from trussing, it can also improve turkeys for other cooking methods: Oven Roasting: Ties wings and legs close to the body so they don’t overcook. Prevents skin tenting away from breast meat. Grilling: Stabilizes floppy limbs and contains stuffing on a grill grate. Minimizes flare-ups from drippings.
How do you make a trussed turkey ready for rotisserie?
Follow these handy tips for a perfectly trussed turkey ready for the rotisserie: Use fresh twine each time. Old twine can break down and unravel. Tie legs above the cavity so stuffing doesn’t fall out. Loosely secure wings so the string doesn’t pinch them. Wrap breast string where turkey is thickest for support.
Can You rotisserie Cook a thawed Turkey?
You should only rotisserie cook turkeys that weigh 12 lbs. or less. Remove the giblets and neck from a thawed fresh turkey. The turkey should be completely thawed for even, safe cooking. Drain juices and blot with paper towels. Do not stuff your turkey. Cook stuffing separately in a casserole dish in the oven.
How do you tie a turkey wing to a drumstick?
Wrap the string around the turkey wing to secure it to the body, then tie the string to the turkey legs. This prevents the wings from dangling down where they could burn. Cross the turkey legs and tie them snugly together with string. Wrap the string several times around the ends of the drumsticks and knot securely.
Can you cook rotisserie chicken on a grill?
Rotisserie chicken, with crackling skin and tender meat, is one of the best things you can cook on your grill. Now, rotisserie chicken is a little extra work – the bird has to be trussed into a tight package and secured on the rotisserie spit – but a great chicken it is worth the effort. Trussing a chicken is a little tricky.