It’s Thanksgiving time again and you’ve got a beautiful turkey thawing on your counter. You go to season it up and get it ready for the oven when you notice a strange plastic piece wrapped around its legs. What is that thing and should you take it off before cooking your bird?
Don’t worry, you’re not alone in wondering about that plastic band around your turkey’s legs. Lots of home cooks get confused when they find this surprise in their holiday bird. Let’s break down exactly what that plastic thing is, whether to remove it or not, and the best techniques for getting it off.
What is the Plastic Piece on a Turkey’s Legs?
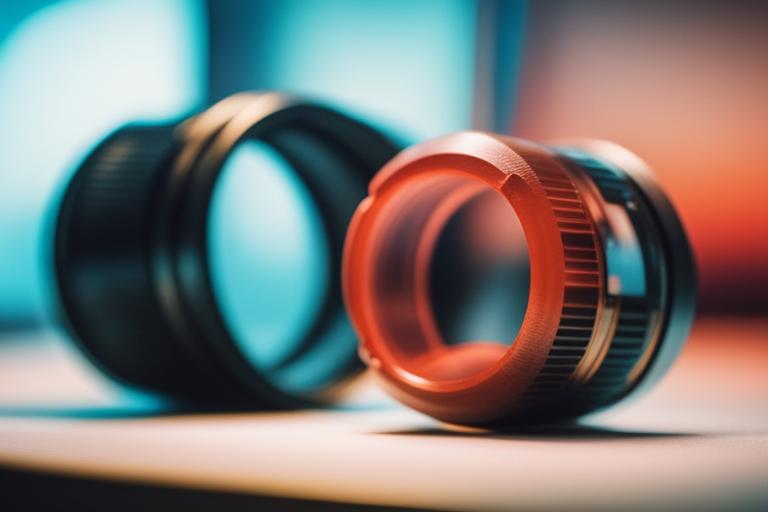
The odd plastic piece encircling your turkey’s legs is called a hock lock or poultry stirrup. It’s a band made from heat-resistant nylon that keeps the drumsticks together neatly. Turkey processors started using hock locks years ago to replace old-fashioned metal clips or string for trussing up the legs.
Hock locks serve several purposes:
- Maintain the turkey’s shape for attractive packaging
- Prevent the legs from flopping around during transportation
- Hold the legs closed to allow for more even cooking
- Provide a tidy, uniform appearance
So while it may seem strange, that plastic band is totally normal and safe to find on your store-bought turkey. It’s not meant to be removed before roasting, unlike the bag of giblets which must always be taken out
Should You Remove the Hock Lock?
While hock locks are designed to stay on some cooks prefer taking them off for a few reasons
- Inspect the cavity thoroughly
- Apply seasonings evenly to the legs
- Stuff aromatic ingredients into the cavity
- Truss the legs with kitchen string instead
- Allow for crispier skin through greater air flow
- Adapt legs to specific roasting positions
So while not mandatory, removing the hock lock can provide more control and access for preparing your turkey.
How to Remove a Turkey’s Hock Lock
Taking off the plastic hock lock is a quick and simple process:
What You’ll Need:
- Turkey
- Kitchen shears or sturdy scissors
- Oven mitts
Step-by-Step:
-
Put on oven mitts to protect your hands from the raw turkey.
-
Place the turkey breast side up on a clean work surface.
-
Locate the thick plastic hock lock around both drumsticks.
-
Use kitchen shears to cut through the hock lock near its base. Apply firm pressure when cutting to snip the tough plastic.
-
Remove the cut hock lock and discard it.
-
Thoroughly wash the shears before using again.
And that’s all it takes! Just a couple snips with sturdy scissors, and that plastic band will be off. Your turkey’s legs will now be freed up for any trussing, rubbing, or stuffing.
Trussing Up Turkey Legs
Once the hock lock is removed, some cooks like trussing up the legs with kitchen string or silicone bands. This serves both practical and visual purposes:
- Holds legs neatly in place
- Maintains the turkey’s shape
- Allows for even cooking of legs and breast
- Provides crispy skin through air flow
- Gives a tidy, uniform presentation
Make sure to remove any trussing before carving and serving the turkey.
Key Turkey Safety Tips
When handling raw turkey and preparing to roast, keep these food safety guidelines in mind:
- Always remove the giblet packet from inside the cavity before cooking.
- Do not wash the turkey, as this can spread bacteria. Pat dry with paper towels.
- Use a meat thermometer to ensure the turkey reaches 165°F internally.
- Refrigerate leftovers within 2 hours and use within 3-4 days.
- Reheat turkey fully to 165°F before eating leftovers.
Follow these tips and your holiday turkey will cook safely with delicious results!
Frequently Asked Questions About Turkey Hock Locks
Here are answers to some other common questions about dealing with those plastic bands on turkey legs:
Is it safe to bake a turkey with the hock lock left on?
Yes, hock locks are made of heat-resistant nylon that can withstand normal oven temperatures up to about 500°F. Leaving it on during roasting is perfectly safe.
Can I microwave a turkey with the hock lock still attached?
No, always remove the hock lock before microwaving a turkey. The plastic could melt or release chemicals when exposed to microwave energy.
What if my turkey doesn’t have a pop-up timer?
Don’t rely solely on the pop-up timer; use a meat thermometer to double check doneness. Cook the turkey until it reaches an internal temperature of 165°F in the thickest part of the breast and thigh.
Can I stuff ingredients under a hock-locked turkey?
It’s difficult to stuff anything into the cavity when the legs are clamped shut. Remove the hock lock first for full access.
Does brining make the hock lock harder to remove?
No, brining has no effect on the hock lock. Just pat the turkey fully dry first before cutting and removing it.
What do I do if the legs won’t stay together without the hock lock?
Tie the legs together with 100% cotton kitchen string or silicone bands to hold them in position for roasting.
Get That Plastic Off and Roast Your Bird
As you prepare your turkey this holiday season, have no fear about removing that mysterious plastic piece around its legs. Just use sturdy kitchen shears to snip it off before rubbing on seasonings or trussing up the legs. With the hock lock removed, your turkey will roast up beautifully for a festive centerpiece. Gobble gobble!
Cleaning out the Turkey’s Body Cavity
-
 1 Locate the body cavity between the back legs. The butcher will have cut a large hole between the legs, inside of which you can see the giblets and neck if they are there. The body cavity is fairly large and hard to miss.[5]
- If you don’t immediately see the package of giblets, it might be underneath the neck.
- If there isn’t a body cavity, you will have to gut your turkey, which is a more involved process than simply removing the giblets.
- 2 Reach into the body cavity to pull out the giblets. Butchers will usually wrap the giblets in paper or plastic and store them in the front cavity of the turkey. Reach into the body cavity and remove the package.[6]
- Ready-to-cook whole poultry is required to be packaged with giblets in the US. If the giblets might be missing, the poultry processor has to mark the package “giblets may be missing.”
- 3 Pull the neck out of the body cavity, if necessary. Even if there are no giblets in the body cavity of your turkey, the neck might still be there. Butchers will either put it in the body cavity or the front cavity. The neck looks like a long rod.[7]
- You can use the turkey neck to make gravy, soup, or smoked turkey neck.[8]
- You can also just throw the turkey neck away.
- 4 Check the front cavity for giblets as well. Sometimes, the butcher will store the package of giblets in the front cavity instead of the body cavity. Look at the top of your turkey, between the wings. There will be a hole where the neck once was. Pull open the hole so you can look inside. If there’s a package of giblets there, pull it out.[9]
- If the package claims there are giblets in the turkey, but you don’t see them, check again.
- 5 Set aside the giblets for cooking or toss them. You can use giblets in gravy, stock, or side dishes. Some people like to cook the turkey with the giblets directly underneath, to give a richer flavor to the gravy. However, if you don’t want to bother, you can just toss the giblets.[10]
- If you throw out the giblets, make sure to take out the trash within a few hours so the smell doesn’t get bad.
- 6 Pat the turkey dry with paper towels. Take a handful of paper towels, and pat dry the entire outside of the turkey. Turkeys roast much better when they are dry. Remember to throw out the paper towels immediately.[11]
- It’s better to pat rather than rub so that the paper towels don’t shred onto the turkey.
- 7 Wash your hands and work surfaces with hot soapy water. Wash your hands with warm water and soap, scrubbing for at least 20 seconds before rinsing them with running water. Also, scrub your counters, utensils, cutting boards, sink, trays, and anything else that touched the raw turkey with warm soapy water.
- Do this is as soon as you’re done cleaning out the turkey, because bacteria from raw meat is dangerous.
- You can also sanitize the surfaces with bleach and water to be extra safe. Make a diluted mixture of bleach and water, with a ratio of 1 tablespoon (15 mL) bleach to 1 gallon (3.8 L) water. Let the bleach mixture sit on the counter for 2 minutes and then wipe it off.
- 8 Cook your turkey with your favorite method. You can roast, smoke, grill, or deep fry your turkey. You can get fancy with the spices or even wrap your turkey in bacon.[12]
- Don’t leave your turkey sitting around – if you’re not going to cook it immediately, put it back in the fridge.
Advertisement
StepsPart
- 1 Thaw your turkey in the fridge if it’s frozen. It takes about 24 hours to thaw for every 5 pounds (2.3 kg) of turkey. Check if the turkey is completely thawed by inserting a thermometer into the breast at a few different places. The temperature should be between 32 to 40 °F (0 to 4 °C).[1]
- For example, it will take about 3 days for a 15 lb (6.8 kg) turkey to thaw.[2]
- You can also thaw it more quickly in ice water. Put the wrapped turkey in a plastic bag and submerge it in a bucket of cold water. Change the cold water every 30 minutes. It will take about 30 minutes per 1 pound (0.45 kg).
- Don’t leave your turkey to thaw at room temperature.
- 2 Place your turkey on a sheet tray or in the sink. Don’t put the turkey in a roasting tray yet, because it will drip a lot of juices as you open it up that you don’t want to cook with. Instead, put the turkey on a sheet tray or in the sink.[3]
- Keep in mind that you will have to clean and sanitize whatever surface comes in contact with raw meat.
Advertisement
- 3 Remove the wrapping from the turkey. Flip the turkey upside down, and make a slit in the wrapping with a knife. Peel open the wrapping around the turkey to totally remove it. Throw the wrapping directly in the trash since it had contact with raw meat.[4]
- It’s best to open the turkey packaging from the back, so that if you accidentally slit the skin you won’t cut into the breast meat.
- If the turkey legs are hooked together with a plastic piece, you can leave that on during roasting.
Advertisement Part