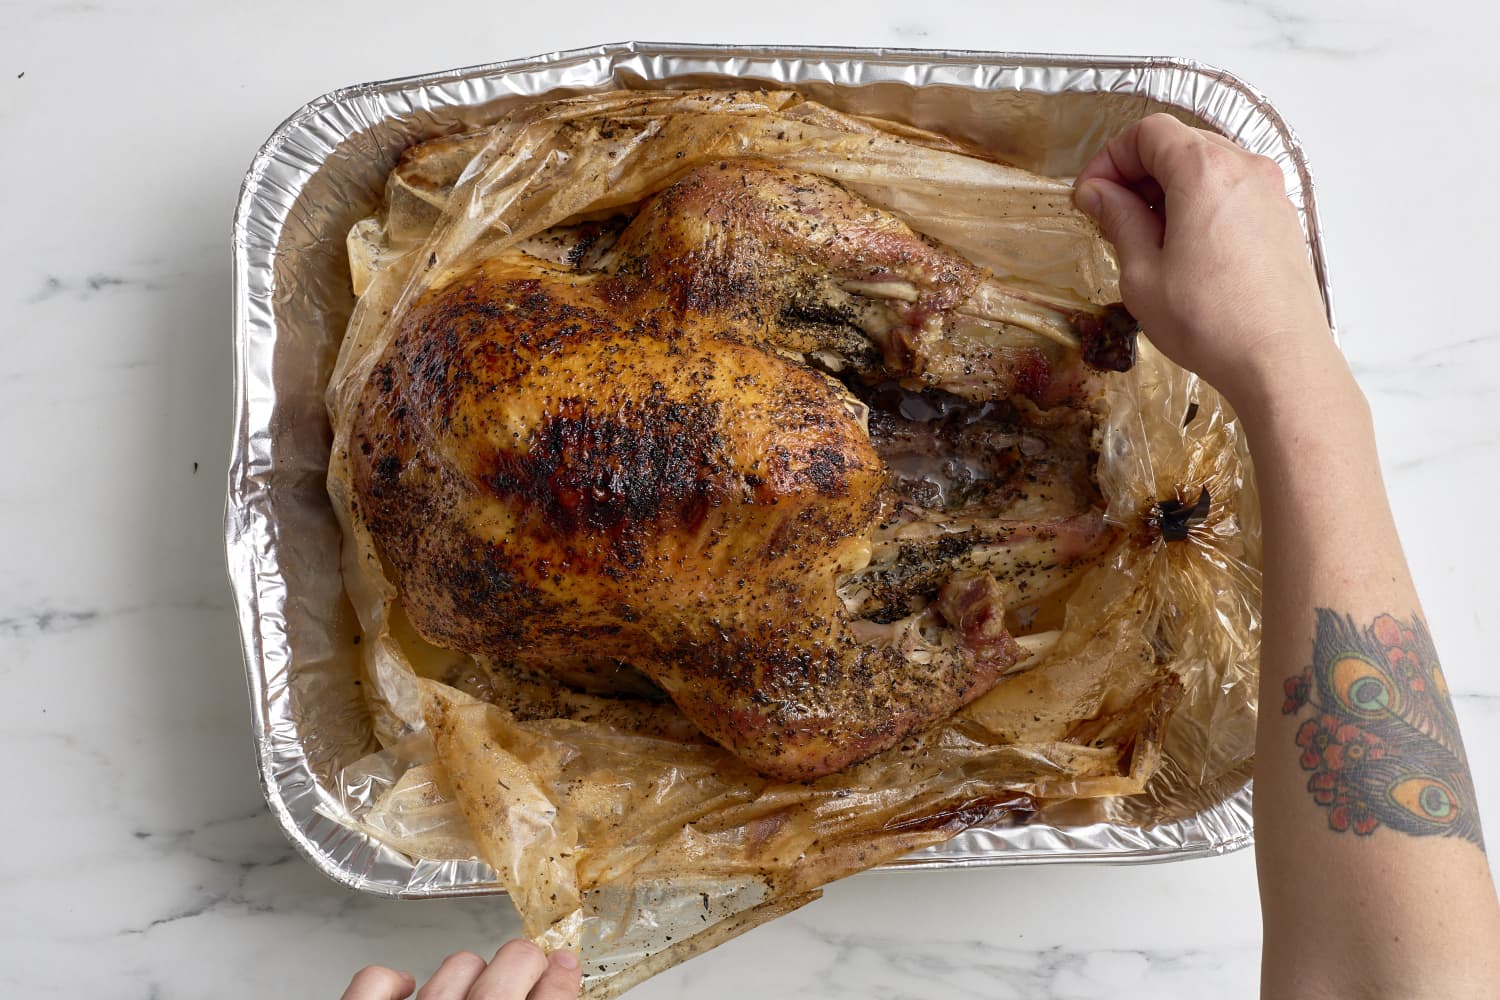
A miraculous way to roast a turkey that uses butter-covered aluminum foil to protect the breast from the high heat while basting it. The foil is removed at the end so that the skin can crisp up. This article also talks about brining and whether or not you should do it. It also has a lot of tips for roasting a turkey perfectly.
You probably know that my parents owned and operated restaurants when I was growing up. What you might not know is that they also did a lot of catering. We estimate that they’ve catered over a thousand turkey dinners, with each dinner requiring numerous turkeys. Their dinners have always gotten great reviews, and now I’m going to show you how my mom roasts a turkey perfectly. We will first talk about what size turkey you need, and then we will talk about how to cook it (basting and crisping the skin with butter!) so that the meat is perfectly cooked and juicy. Even the breast meat is juicy.
Cooking a turkey can be intimidating, especially if you don’t have the right equipment. But have no fear – with some aluminum foil, a roasting pan, and these simple steps, you’ll have a delicious, juicy turkey on your table in no time.
Why Cook a Turkey in Foil?
There are a few reasons why cooking your turkey in an aluminum foil pan is a great option:
-
No Mess: The foil pan contains all the drippings and makes clean up a breeze. No need to scrub cooked-on turkey grease off your roasting pan.
-
Juicy Turkey The foil tent helps keep moisture in and prevents the turkey skin from drying out as it cooks
-
Easy Transport Foil pans are lightweight and disposable – perfect for taking the cooked turkey to a friend’s house or holiday potluck.
-
Mimics a Roasting Pan: A heavy-duty foil pan works great if you don’t actually own a roasting pan.
Step 1: Choose a Heavy-Duty Foil Pan
You’ll want to use the thickest, heaviest duty aluminum foil pans you can find. Lightweight foil will likely buckle and bend under the weight of the turkey. Look for pans that are at least 2 inches deep.
The pan should be large enough to fully contain the turkey with a little extra room. Allow about 1 pound of turkey per person, and add a couple extra pounds. For example, if cooking for 10 people, choose a pan that can hold a 14 lb turkey
You can find disposable foil roasting pans at most grocery stores or order them online. They’re often sold in packs around the holidays when people are cooking large turkeys.
Step 2: Place Foil Pan in a Roasting Pan
For stability, set your foil pan inside a sturdy roasting pan or rimmed baking sheet. The roasting pan will support the foil pan and catch any leaks or spills. It also makes it easier to pull the entire setup in and out of the oven.
If you don’t have a roasting pan, you can place the foil pan on a baking sheet. Or even set it directly on the oven rack, taking care when removing hot drippings.
Step 3: Prepare the Turkey
Remove the giblets from the turkey cavities. Rinse the turkey inside and out, and thoroughly pat dry with paper towels. Generously season the inside of the turkey with salt and pepper.
You can rub the skin with oil or butter and season the outside with your favorite herbs and spices. Carefully place the seasoned turkey, breast side up, in the foil pan.
Step 4: Tent Foil Over Turkey
Tear off a large sheet of heavy-duty aluminum foil, long enough to generously cover the turkey. Tuck the foil loosely around the turkey, covering the entire bird. Try not to compress the foil too tightly against the skin, which can lead to steaming.
Leave a little air space between the foil and turkey skin to allow air flow. Tent and seal the foil so no steam can escape but you’ll still be able to insert a meat thermometer.
Step 5: Insert a Meat Thermometer
Use a thin sharp knife to carefully cut a small slit in the foil. Insert a meat thermometer deep into the thickest part of the turkey thigh, taking care not to puncture the foil.
You want the thermometer tip to be centered in the thick meaty part of the thigh, not touching bone.
Step 6: Roast the Turkey
Place the roasting pan with foil-wrapped turkey on the lowest rack in the oven. Roast at 325°F, until the thermometer reads 180°F in the inner thigh.
For approximate roasting times per pound, allow:
- 13-15 minutes per pound for an unstuffed turkey
- 15-18 minutes per pound for a stuffed turkey
For example, a 12 lb unstuffed turkey will take about 2.5-3 hours to reach 180°F. Let the turkey rest about 30 minutes before carving.
Step 7: Make Gravy from Drippings
Once turkey is cooked, carefully transfer the foil pan to stovetop (on a burner cover). Use a spoon to scoop out excess fat from the turkey drippings in the pan.
In a saucepan, whisk together 2 tablespoons cornstarch and 1 cup broth or wine. Heat turkey drippings over medium and slowly whisk in slurry until desired gravy thickness is reached.
Turkey Foil Pan Tips
-
Be very careful when removing the hot foil pan from the oven – use sturdy oven mitts.
-
To prevent dryness, continously baste the turkey by spooning juices from the foil pan over the top.
-
If the foil tears or leaks, reinforce with another layer of heavy duty foil.
-
Let turkey rest 30 minutes before slicing for juicier meat.
Cooking a whole turkey in an aluminum foil pan is mess-free, budget friendly, and super easy. Follow these simple steps for a tender, flavorful holiday bird the entire family will love.

Step #3: Season And Butter The Turkey
Next you’ll be seasoning liberally with salt and pepper, all over. But, there’s no seasoning in the below picture because this turkey was brined. If you have brined your turkey, don’t add anything to it here.
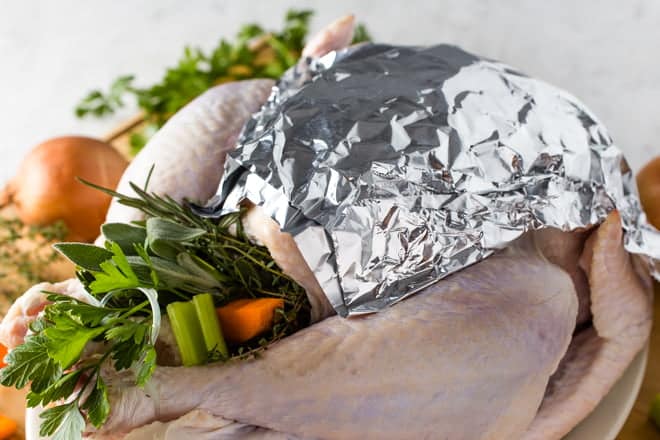
Brined or not, what you’re going to do is to take a big piece of aluminum foil. You’ll want a piece bigger than in the below picture. Let me explain. I forgot how my mom did it when I was taking these pictures. I thought she only put foil over the breast meat. She has since told me that I was wrong. So, get a piece of foil big enough to cover the whole bird. If you need to, you can use two pieces that overlap. Then smear one side of the foil with a lot of softened butter or margarine. You want a good cup (that’s two sticks) of butter spread on there.
Note, I think it’s best to use unsalted butter, especially if you’ve brined the turkey. Or just keep in mind that there’s salt in your butter when you’re seasoning the turkey. You can make the butter taste better before putting it on the foil if you want to take this butter thing to the next level. This is my recipe for Compound Butter for Turkey. Putting it on the foil before roasting is one way to use it, and adding little bits of it to sliced turkey that is already cooked is another way to use it.

Then, take that foil and put it butter side down onto the turkey. Press the foil against the turkey skin so that it’s making contact all over. The breast meat won’t dry out because of this foil, and the tasty butter will stay on the turkey for a lot of the cooking time. It will also drip into the roasting pan, leaving you with tasty baste juices and great drippings for your gravy.
STEP #2 – Stuff The Cavity With Aromatics
Don’t stuff the turkey with stuffing or dressing. I know that to some people this may seem sacrilegious. I understand. But really, don’t stuff the turkey. That makes it take longer to cook, which means the turkey is drier, and it has also been linked to more infections. Instead, you’ve got to try my mom’s stuffing recipe. She bakes it in muffin tins, which makes the portions look so cute. The recipe is classic, and the bread is soft on the inside and slightly crispy on top.
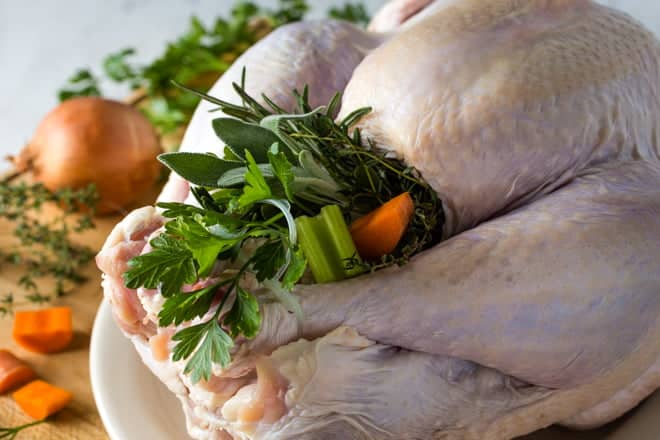
Instead of filling the turkey with stuffing or dressing, you can put some aromatics in there. I really don’t think it’s necessary, especially if you used the dry brine or the very flavorful wet brine I talked about earlier. But if you really want to, you can. Fresh herbs, carrots, onion, celery, orange wedges, lemon wedges, and garlic cloves all work well. You don’t need very much though. It should be really loosely tucked into there. I think for this picture, I had too much. You also don’t really want it sticking out like that. I did that to make the picture look pretty, I think. But, it’s better to have it all tucked in.

Tent vs. Wrap: Turkey Tips with Reynolds Wrap® Heavy Duty Aluminum Foil
FAQ
Can you cook turkey in an aluminum foil pan?
Does it take longer to cook a turkey wrapped in foil?
Should I line my turkey roaster with foil?
Should I cook the turkey on a rack or directly on the pan?
