Spatchcocking also known as butterflying, a turkey before grilling is a game-changing technique for getting deliciously moist flavorful results with crispy skin every time. While this method works great on both charcoal and gas grills, using a gas grill offers some advantages. With proper heat control, you can achieve perfect doneness, juicy meat, and crispy skin on your spatchcocked turkey.
What Is Spatchcocking?
Spatchcocking involves removing the backbone of the turkey so it can lay flat on the grill This allows for more even and faster cooking compared to roasting a whole intact turkey
Here are some key benefits of spatchcocking a turkey before grilling:
-
Cooks faster – Removing the backbone cuts cooking time almost in half compared to roasting. A 12 lb spatchcocked turkey cooks in about 1.5 hours.
-
Promotes even cooking – Flattened shape allows all parts to cook evenly, preventing dried out breast meat.
-
Better browning – More surface area exposed to grill grates means better browning and crisping of the skin.
-
Easier to carve – With backbone removed and breastbone spread, carving is much simpler.
-
Enhanced flavor – Increased exposure to smoke and spices benefits flavor.
So spatchcocking ticks all the boxes for a foolproof turkey with juicy meat, crispy skin, and great taste!
Step-by-Step Guide to Spatchcocking a Turkey for the Grill
Get your tasty spatchcocked turkey ready for the grill with these simple steps:
Supplies Needed
- Turkey (10-15 lbs is ideal)
- Sharp kitchen shears or knife
- Cutting board
- Spatula for handling turkey
Prep Steps
-
Remove giblets and neck from turkey cavity. Rinse turkey and pat dry.
-
Place breast side down on cutting board. Using shears or knife, cut along both sides of backbone from tail to neck to remove it.
-
Flip turkey over. Firmly press on breastbone to flatten. You’ll hear it crack.
-
If needed, cut in the cartilage by the thigh joints so legs lay flat.
-
Tuck wing tips under breasts so they don’t burn.
Your spatchcocked turkey is ready for seasoning and grilling!
How to Grill a Spatchcock Turkey on a Gas Grill
Grilling the spatchcocked turkey on a gas grill results in tender, juicy meat with a smoky flavor and crispy skin.
Supplies Needed
- Gas grill
- Meat thermometer
- Spatula or tongs
- Spray bottle with oil or water
Grilling Process
-
Pat turkey dry and coat all over with olive oil. Season generously with salt, pepper, and other spices.
-
Preheat gas grill to 400-425°F. Leave center burner off for indirect heat.
-
Place turkey skin-side up over center of grill, above unlit burner.
-
Grill 1.5-2 hours until thighs reach 165°F, rotating occasionally for even cooking.
-
In last 15 minutes if skin isn’t crispy enough, move to direct heat. Watch closely to avoid burning.
-
Let rest 15 minutes before carving.
Handy Tips
-
Spray skin with oil/water halfway through grilling for extra crisping.
-
Add a smoke tube, wood chips or pellets to gas grill for enhanced flavor.
-
Use marinades and rubs for added flavor. Inject marinade into thick parts.
-
Invest in a good meat thermometer for accurate temperature monitoring.
-
Allow turkey to rest before carving so juices redistribute for moist, flavorful meat.
With the right prep and grilling technique, you’ll have the juiciest, most flavorful and crispiest spatchcock turkey off your gas grill! It makes for a spectacular centerpiece at Thanksgiving or any outdoor dinner. Give it a try and impress your guests.
FAQs About Spatchcock Turkey on a Gas Grill
What size turkey is best for spatchcocking on a gas grill?
A 10-15 lb turkey is ideal. This allows ample room for indirect cooking on the average sized gas grill.
How long should I grill a spatchcocked turkey?
Plan on about 1.5-2 hours total grilling time. A 12 lb spatchcocked turkey takes around 1.5 hours at 400-425°F.
What temperature should I cook the turkey to?
Cook until the thickest part of the thigh reaches 165°F on a meat thermometer. The breast should reach 160-165°F.
Can I use a turkey breast instead of a whole turkey?
Yes, spatchcocking a whole bone-in turkey breast works great. Grill about 1-1.5 hours until it reaches 160°F.
How do I get crispy turkey skin on the grill?
Spatchcocking exposes more skin to the grill grates. Grill over direct heat at end if needed. Mist skin lightly with oil/water midway through.
Spatchcocking a turkey before grilling results in the most tender, juicy and flavorful turkey with crispy skin your guests will rave about. Give this game-changing technique a try on your gas grill for a turkey everyone will gobble up!
Why Spatchcock?
Since the advantages of butterflying a turkey have been laid out in-depth, Ill keep this pretty brief. The long and short of it is that by removing the backbone of the turkey, pushing the breasts flat, and splaying out the legs and thighs, you can create a more ideal shape for cooking a whole bird. The even height created by butterflying makes for more even and faster cooking in return.
:max_bytes(150000):strip_icc()/__opt__aboutcom__coeus__resources__content_migration__serious_eats__seriouseats.com__s__2014__11__20141121-grilled-spatchcocked-turkey-process-joshua-bousel-7dec13ead5ce493f9130a98c36a3a425.jpg)
So I went about the process of butterflying my 14-pound turkey and then rested it on a wire rack set in a baking sheet. I seasoned the turkey liberally with salt and pepper and let it dry brine in the fridge overnight—I like taking out this insurance policy, knowing that Ill get moist results even if I accidentally slightly overcook my bird.
:max_bytes(150000):strip_icc()/__opt__aboutcom__coeus__resources__content_migration__serious_eats__seriouseats.com__s__2014__11__20141121-grilled-spatchcocked-turkey-stock-joshua-bousel-93e0b16ef2a347ffa2401119a37bf41d.jpg)
The extra bonus of spatchcocking the turkey is getting the backbone to use in a rich stock, which is easily turned into a white wine and mustard gravy.
How to Grill a Butterflied Turkey
:max_bytes(150000):strip_icc()/__opt__aboutcom__coeus__resources__content_migration__serious_eats__seriouseats.com__s__2014__11__20141121-grilled-spatchcocked-turkey-coals-joshua-bousel-399e6893d8f24031bbe14e69540bea45.jpg)
When it came time to grill my beautiful beast, I lit up a full chimney of charcoal. After the coals were covered with gray ash, I spread them out in a crescent moon shape along one side of the charcoal grate. While I let my covered grill warm up, I considered putting a foil tray with stock and vegetables on the cool side of the grill to collect the turkey drippings, but then decided against it. In the past, these dripping collected ash and gained a smoke flavor a little too harsh to be usable for gravy. I could have jury-rigged a solution that let drippings into the pan while keeping most ash out, but I had already made a really delicious gravy by using the backbone and neck and just dropped the idea to focus more on getting a perfectly cooked bird this time around.
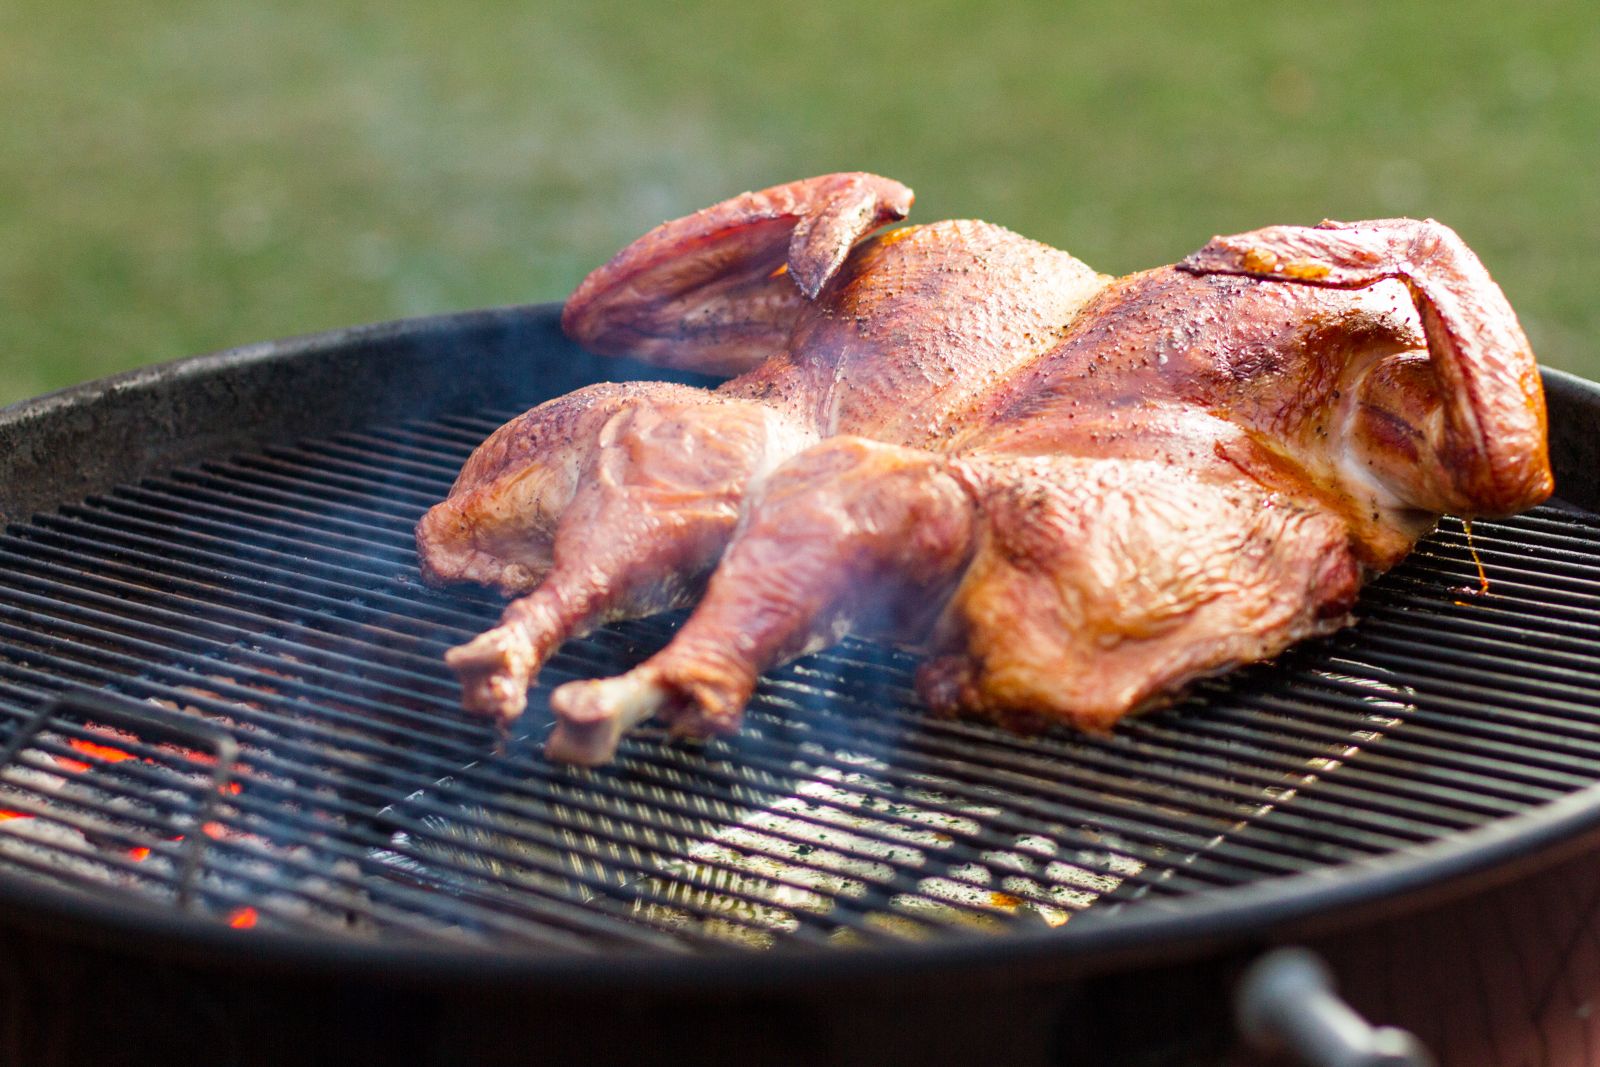
:max_bytes(150000):strip_icc()/__opt__aboutcom__coeus__resources__content_migration__serious_eats__seriouseats.com__s__2014__11__20141121-grilled-spatchcocked-turkey-on-grill-joshua-bousel-c8acedb7e6744578a7da0a58b31137b4.jpg)
Once sufficiently warmed, I added one chunk of apple wood to the fire; everything was a go for turkey liftoff. As I sat with the giant bird, considering the perilous transfer to the grill, I decided to make life easy on myself and just put the entire wire rack on the grill, which worked great, allowing me to move the bird around without danger of it falling apart or tearing the skin.
I situated the turkey so its legs and thighs were closest to the fire, with the majority of the breast meat as far away from the heat as possible. With the crescent moon arrangement of coals, this meant the legs and thighs were all well surrounded by fire without being directly on top of it.
:max_bytes(150000):strip_icc()/__opt__aboutcom__coeus__resources__content_migration__serious_eats__seriouseats.com__s__2014__11__20141121-grilled-spatchcocked-turkey-temp-joshua-bousel-0ed41d50a70c4a0089cf4c1a8e648536.jpg)
I monitored my turkey pretty constantly after the first 45 minutes to ensure my suspicions would play out. My goal was to keep the breast meat cooking at a slower rate than the legs and thighs, and I found that throughout the cook, this proved true. About an hour in, the breasts were registering a solid 10°F below the thigh meat. At this point, I added half a chimney of new coals to keep the bird roasting at a medium-high temperature—around 425°F (220°C), give or take 25°F (5°C).
:max_bytes(150000):strip_icc()/__opt__aboutcom__coeus__resources__content_migration__serious_eats__seriouseats.com__s__2014__11__20141121-grilled-spatchcocked-turkey-finished-cooking-joshua-bousel-729844d56a724ce1bc482e500a94ba5d.jpg)
Another 30 minutes in and that new batch of coals helped the legs and thighs cook even faster. They were now just above 165°F (74°C), while the breast meat was at my ideal 150°F (66°C). In just 1 1/2 hours, I had this turkey done to perfection, temperature-wise at least.
I let it rest for 20 minutes at room temperature and began carving. After separating the legs and thighs, I cut the breasts away from the bone and sliced them up, exposing glistening meat that even had my white-meat dissing self eagerly awaiting the chance to eat it. I sliced up the thighs next, which had gotten a nice rosy hue around the edges of the meat from the smoke theyd picked up.
:max_bytes(150000):strip_icc()/__opt__aboutcom__coeus__resources__content_migration__serious_eats__seriouseats.com__s__2014__11__20141121-grilled-spatchcocked-turkey-with-gravy-joshua-bousel-54d243c771f747b4b1d67323d3cd1e5d.jpg)
Every piece of meat from this bird was moist and flavorful. The breasts had a delicate kiss of smoke and were juicy enough that they didnt need any enhancement, although gravy never ceases to be a requirement for me. The dark meat was smokier, which worked with the relatively more intensely flavored meat (and made for the most delicious parts of bird in my opinion). Ive cooked a lot of turkeys over the years, and this was the first that required absolutely no Band-Aids like bacon, injections, herbs, rubs, etc. to cover up deficiencies.
This is a bird thats absolutely perfect in its simplicity.