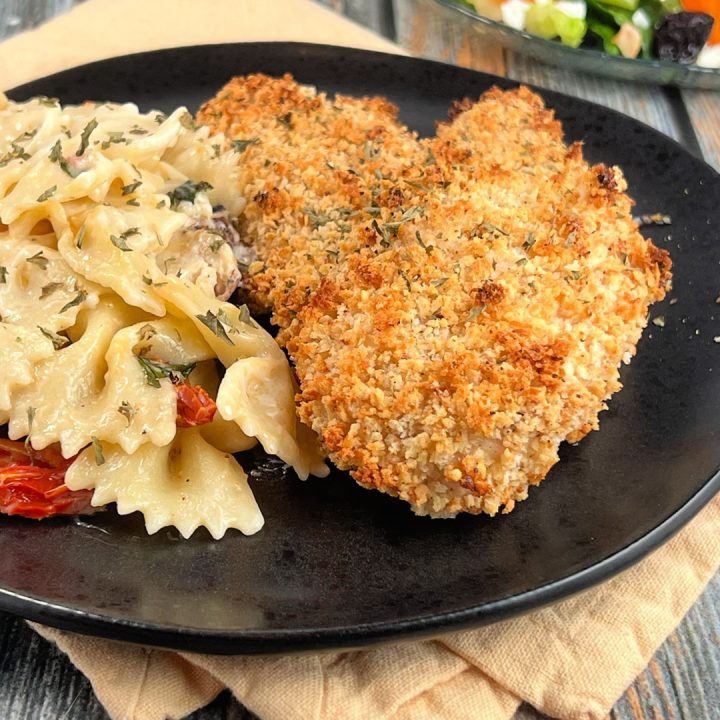
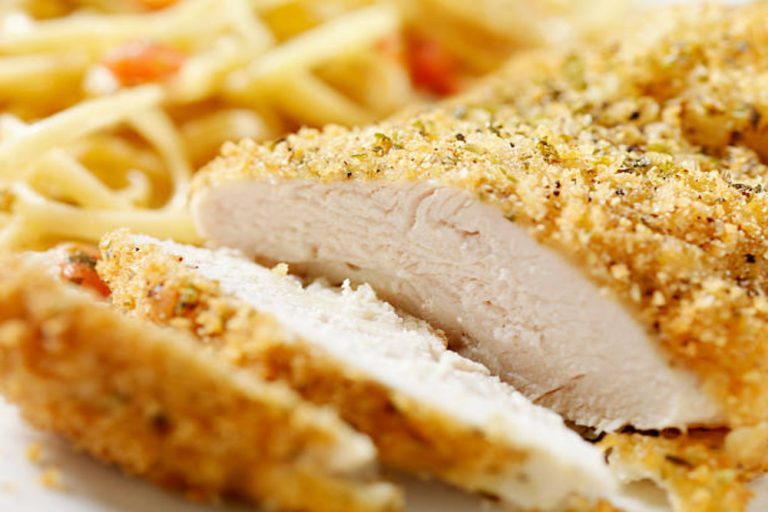
Panko chicken has become a beloved dish in households across America. With its irresistibly crunchy crust and juicy, tender chicken, it’s easy to see why this Japanese-inspired dish has gained such popularity. But what exactly is panko chicken and how do you make it? In this comprehensive guide, we’ll cover everything you need to know to master the art of cooking panko chicken.
What is Panko?
Panko is a flaky breadcrumb that originates from Japan It’s what gives panko chicken its signature crunch Unlike regular breadcrumbs, panko is made from bread without crusts that is baked using an electrical current. This unique process yields large, irregular breadcrumbs that don’t absorb as much oil.
The result is a light and crispy coating that stays crunchy longer than typical breadcrumbs. Panko’s airy structure leads to optimal crispiness. While you can use regular breadcrumbs panko is ideal for achieving that delicate crunch we love in panko chicken.
Why Choose Panko Chicken?
There are several reasons why panko chicken has become such a crowd-pleaser:
-
Satisfying crunch – The panko crust provides a wonderfully crispy texture that contrasts the moist, tender chicken. This crispiness stays intact, even with leftovers
-
Less greasy – Panko absorbs less oil than regular breadcrumbs, so panko chicken won’t be overly greasy.
-
Easy to make – Simple ingredients and preparation make panko chicken an accessible weeknight dinner.
-
Versatile – Panko chicken works as an appetizer, entree, topping, or snack. Adapt it to suit your needs.
-
Kid-friendly – With its fun crunchy coating, panko chicken is a hit with kids and adults alike.
Panko Chicken Ingredients
Panko chicken requires just a few simple ingredients:
- Chicken breasts or tenders
- All-purpose flour
- Eggs
- Panko breadcrumbs
- Seasonings of your choice (salt, pepper, paprika, garlic powder, etc.)
- Oil for frying
The key is quality ingredients. Opt for fresh, boneless chicken and authentic Japanese panko for best results.
How to Make Panko Chicken – Step by Step
Making panko chicken is easy, but proper technique is key. Follow these steps for perfectly cooked panko chicken every time.
1. Pound the chicken
For even cooking and thickness, pound chicken breasts between plastic wrap with a mallet to about 1⁄2 inch thickness.
2. Bread the chicken
Set up a 3-bowl dredging station:
- Flour seasoned with salt, pepper, spices
- Beaten eggs
- Panko breadcrumbs
Coat chicken thoroughly in flour, egg wash, then panko crumbs.
3. Pan fry
In a skillet over medium heat, heat 1⁄4 to 1⁄2 inch oil. Fry chicken pieces for 4-5 minutes per side until golden brown. Drain on a paper towel-lined plate.
4. Bake
For a healthier version, coat chicken and bake at 425°F for 20-25 minutes, until browned and cooked through.
5. Air fry
For another healthy cooking method, spray coated chicken with oil and air fry at 375°F for 12-15 minutes, flipping halfway.
6. Allow to rest
Let chicken rest 5 minutes before cutting for juicier meat.
Panko Chicken Tips
-
For ultra crispy panko, refrigerate breaded chicken before cooking.
-
Use oil with high smoke point like vegetable, canola or peanut oil.
-
Monitor oil temperature when pan frying.
-
Mix flavors like lemon zest or herbs into panko coating.
-
Pair with dipping sauces like honey mustard or ranch.
-
Store leftovers in airtight container for up to 4 days.
-
Reheat in oven or air fryer to maintain crispiness.
Panko Chicken FAQs
Get answers to all your pressing panko chicken questions:
Can I use regular breadcrumbs instead of panko?
You can, but the texture won’t be as crispy. Panko is best for optimal crunch.
How do I get the panko to stick to the chicken?
Ensure chicken is dried thoroughly and coated well in flour before adding egg wash and panko. Press panko into chicken firmly.
Can I bake or air fry instead of pan frying?
Yes, baking or air frying are healthier cooking methods. Spray chicken with oil before baking or air frying.
How long does cooked panko chicken last?
Refrigerate for 3-4 days. For longer storage, freeze breaded raw chicken.
Is panko chicken gluten free?
Use gluten-free panko and flour to make gluten-free panko chicken.
Can I use pork, fish or veggies instead of chicken?
Absolutely! Follow same breading technique, adjusting cook times as needed.
Take Your Panko Chicken to the Next Level
With this comprehensive panko chicken guide, you have all the know-how to make this crispy classic at home. So grab some chicken and panko, and get cooking! Impress your family and friends with your own spin on this beloved Japanese dish. Just be prepared for requests for the recipe!
ROLL CALL FOR THIS RECIPE
- Chicken Lovers: Ultra lean, boneless skinless chicken breasts are thinly sliced to cook quickly and ensure tender juicy chicken inside crunchy panko breadcrumbs. If the crunch isn’t enough to win you over, serve your favorite dipping sauce alongside the chicken.
- Weeknight Warriors: This recipe is perfect for busy nights and reheats great as leftovers. This panko chicken recipe is one the whole family will love!
- Simple Ingredients: Made of pantry staples, you likely have everything on hand to make this simple meal!
- Adaptable: You can make this recipe spicy by adding some cayenne pepper, turn leftovers into chicken parmesan with a bit of marinara sauce and mozzarella, or serve on a bun with a slice of your favorite cheese or sandwich spread.
VARIATIONS, STORAGE, and TIPS
- Cooking times will vary based on your cooking method and the thickness of the chicken. Your chicken should reach an internal temperature of 165 degrees F.
- Double, triple, or quadruple this chicken dinner!
- Be sure to line your baking sheet with parchment paper for an easy clean-up!
- If you prefer a stove top cooking method, melt butter or heat a tablespoon of olive oil in a large skillet over medium heat. Once hot, add the breaded chicken and cook for 5-7 minutes per side or until golden brown with a crispy texture and cooked through.
- I love this chicken served with honey mustard sauce while hubby prefers a few lemon wedges to squeeze over the top. The kids love BBQ sauce for dipping. This is a great recipe to make everyone happy with one main dish!
- Store leftovers in an airtight container for up to 4 days in the fridge. Store after cooling completely.
What is considered a ‘thin’ piece of chicken? What’s the best way to achieve the recommended thickness?
You want your chicken to be about 1/2-inch thick. Many grocery retailers sell thinly sliced chicken breasts, so that’s a nice option that may be available and the easiest. You can also slice a larger chicken breast in half width-wise to create two thinner breasts. A third option would be to place the chicken between two pieces of plastic wrap on a sturdy surface and to use the smooth slide of a meat mallet to pound the chicken to the desired thickness.
Can this recipe be made in the air fryer?
Absolutely! The air fryer is a magical device to achieve that extra crunch! To convert recipes from a conventional oven to preparation in the air fryer, reduce the temperature by 25 degrees and the cooking time by about 25%. Meaning, you will want to cook the chicken at 400 degrees F for about 15-17 minutes in the air fryer. If you want to re-create the air fryer results in a conventional oven, place a wire rack over your prepared baking sheet and mist with cooking spray before placing your chicken cutlets in a single layer to baking, allowing hot air to access all of the panko mixture for that added crunch!
What is the difference between regular breadcrumbs and panko breadcrumbs?
Panko breadcrumbs are made from bread that excludes the crust and is a larger crumb than traditional breadcrumbs. The two are largely interechangable, however.
- Easily made gluten-free, dairy-free, and/or egg-free (see above).
- This recipe is low in saturated fat and carbohydrate, offering delicious, lean protein.
- Crispy chicken achieved without frying of added fat.