Are you tired of dry, flavorless chicken? Want that delicious grilled flavor without firing up the outdoor grill? Look no further than your trusty air fryer! As someone who’s obsessed with finding easier ways to cook tasty meals, I’ve discovered that air fryer grilled chicken is a total game-changer. It’s quick, it’s healthy, and the results are absolutely mouthwatering.
In this comprehensive guide I’ll share everything you need to know about grilling chicken in your air fryer – from the benefits to the step-by-step process plus some killer seasoning ideas that’ll make your taste buds dance. Let’s dive in!
Why You Should Be Grilling Chicken in Your Air Fryer
Before we get into the how-to, let me convince you why this method is worth trying:
- Quick Cooking Time: Air fryers significantly reduce cooking time compared to traditional grilling – you’ll have juicy chicken in just 20-25 minutes!
- Healthier Option: Uses way less oil than traditional cooking methods (your waistline will thank you)
- Consistent Results: Even cooking temperatures mean no more half-raw, half-burned chicken disasters
- Super Easy Cleanup: Most air fryer parts are dishwasher-safe (goodbye, crusty grill grates!)
- Year-Round Grilling: No more waiting for good weather to enjoy grilled chicken
- Amazing Flavor: Crispy exterior, juicy interior – without the hassle of outdoor grilling
As someone who’s ruined plenty of chicken on a traditional grill, I can’t stress enough how much easier this method is!
What You’ll Need
Let’s gather our equipment and ingredients
Equipment:
- Air fryer (any model works)
- Meat thermometer (seriously, don’t skip this)
- Tongs
- Cutting board
- Paper towels
Ingredients:
- Boneless, skinless chicken breasts (or thighs if you prefer)
- Olive oil (or avocado oil)
- Your choice of seasonings (more on this below)
Preparing Your Chicken
The secret to perfect air fryer grilled chicken starts with proper preparation:
-
Pat dry: Use paper towels to remove excess moisture from your chicken. This helps achieve that crispy exterior we’re aiming for.
-
Even thickness: For boneless chicken breasts that are thicker than ½ inch, either:
- Butterfly them with a sharp knife
- Pound them with a meat mallet to even thickness
This step is technically optional but HIGHLY recommended – it ensures even cooking and prevents dry spots.
-
Oil it up: Drizzle about 1 tablespoon of olive oil over both sides of your chicken. The oil helps your seasonings stick and promotes browning.
-
Season generously: This is where the magic happens! More on seasoning options below.
Killer Seasoning Options
The beauty of air fryer grilled chicken is how versatile it is with seasonings. Here are some of my favorite combinations:
Basic All-Purpose Seasoning
- 1 tsp kosher salt
- ½ tsp cracked black pepper
- ½ tsp garlic powder
- ¼ tsp Italian seasoning
- ¼ tsp paprika
Spicy Southwestern Blend
- 1 tsp chili powder
- 1 tsp garlic powder
- 1 tsp onion powder
- 1 tsp Italian seasoning (or oregano)
- Salt and pepper to taste
Simple Marinade Option
If you have extra time, try this quick marinade:
- ¼ cup olive oil
- 2 tablespoons lemon juice
- 2 minced garlic cloves
- Salt and pepper to taste
Marinate the chicken for at least 30 minutes (up to 24 hours) in the refrigerator for extra flavor and tenderness.
Air Fryer Setup and Preheating
Setting up your air fryer correctly is crucial for perfect results:
-
Preheat properly: Most recipes call for preheating your air fryer to between 375°F and 400°F for about 3-5 minutes. I usually go with 390°F for the perfect balance.
-
Grease the basket: Lightly spray the air fryer basket with olive oil spray to prevent sticking.
-
Arrange for airflow: When you place your chicken in the air fryer, make sure the pieces aren’t touching and that there’s space for air circulation.
The Grilling Process
Now for the main event – actually cooking your chicken:
-
Place your seasoned chicken breasts in the preheated air fryer basket in a single layer.
-
Cook at 375°F-390°F for about 10 minutes.
-
Flip the chicken and cook for another 8-10 minutes, until the internal temperature reaches 165°F. (Seriously, use that meat thermometer!)
-
Let the chicken rest in the air fryer for 5 minutes before removing. This step is super important – it helps the juices redistribute throughout the meat.
-
Slice and enjoy your perfectly grilled chicken!
Cooking Time Chart
Different cuts of chicken require different cooking times. Here’s a handy reference:
| Chicken Cut | Temperature | Approximate Cooking Time |
|---|---|---|
| Boneless Breasts | 375°F-390°F | 18-20 minutes total |
| Bone-in Breasts | 400°F | 25-30 minutes |
| Boneless Thighs | 375°F | 20-25 minutes |
| Bone-in Thighs | 400°F | 25-30 minutes |
| Drumsticks | 400°F | 25-30 minutes |
Remember that cooking times may vary depending on your specific air fryer model and the size/thickness of your chicken pieces. Always use a meat thermometer to confirm doneness!
Tips for Achieving Perfect Grill Marks
One common question I get is: “But can I get those lovely grill marks in an air fryer?” While traditional grill marks are tough to achieve in an air fryer, you can still get a beautiful browned exterior that’s just as appealing. Here’s how:
- Baste with oil: A light coating of oil helps achieve browning.
- Use seasonings with sugar content: The sugar caramelizes under heat, enhancing visual appeal.
- Flip halfway: This promotes even browning on both sides.
- Don’t overcrowd: Arranging chicken with space between pieces allows better airflow and browning.
Storing and Reusing Leftover Chicken
One of the best things about air fryer grilled chicken is how well it works for meal prep:
- Refrigeration: Store cooled leftover chicken in an airtight container for up to 3-4 days.
- Freezing: For longer storage, freeze in freezer-safe bags for up to 3 months.
- Reheating: Reheat in the air fryer at 350°F for 3-4 minutes until warmed through.
Serving Suggestions
Your perfectly grilled air fryer chicken works beautifully in so many dishes:
- Slice it for amazing salads
- Use it in wraps and sandwiches
- Serve with your favorite sides like air-fried vegetables
- Add to pasta dishes
- Enjoy it on its own with a tasty dipping sauce
Troubleshooting Common Issues
Even with this foolproof method, things can occasionally go wrong. Here’s how to fix common problems:
Dry Chicken
- Cause: Cooking too long or using too high temperature
- Solution: Check doneness earlier and use a meat thermometer
Undercooked Chicken
- Cause: Pieces too thick or air fryer temperature too low
- Solution: Pound chicken to even thickness and verify your air fryer temperature
Chicken Sticking to Basket
- Cause: Not enough oil or preheating
- Solution: Lightly grease basket and ensure preheating
Final Thoughts
Air fryer grilled chicken has been a complete revelation for me. It’s one of those cooking methods that makes you wonder why you ever did it any other way. The combination of convenience, health benefits, and incredible results makes this a must-try technique for any chicken lover.
I used to dread making chicken because it would often turn out dry or flavorless. But with my air fryer, I’m consistently serving up juicy, delicious chicken that my whole family loves. Whether you’re a busy parent, a fitness enthusiast looking for healthy protein options, or just someone who appreciates good food with minimal effort, air fryer grilled chicken deserves a place in your cooking rotation.
So dust off that air fryer (or finally take it out of the box if you haven’t used it yet!), grab some chicken, and prepare to be amazed at how simple it is to create restaurant-quality grilled chicken right in your kitchen. Your taste buds—and your dinner guests—will thank you!
Frequently Asked Questions
Can I use frozen chicken in my air fryer?
It’s best to use thawed chicken for even cooking. If you must use frozen, add 5-10 minutes to the cooking time and check the internal temperature to ensure it reaches 165°F.
How do I know when my chicken is done?
Always use a meat thermometer! Chicken is safe to eat when it reaches an internal temperature of 165°F at the thickest part.
Can I make a large batch at once?
It depends on your air fryer size. Don’t overcrowd the basket—cook in batches if needed for best results.
Is air fryer grilled chicken healthy?
Yes! It uses minimal oil while still delivering juicy, flavorful results. It’s a great option for healthy meal prep.
What if I don’t have an air fryer?
While this article focuses on air fryer methods, you can achieve similar results with an oven and a wire rack, though cooking times will be longer.
Why You’ll Love This Recipe
- Healthier cooking: Air frying uses less oil, making this a lighter option without sacrificing taste.
- No grill? No problem: Enjoy grilled-style chicken even in a tiny apartment or during winter months.
- Perfect texture: Golden brown outside, tender and moist inside—every single time.
- Meal-prep dream: Make a batch and use throughout the week for quick lunches or dinners.
- Kid-friendly: Mild spices and no bones make it a hit with little ones.
Perfectly Juicy Air Fryer Grilled Chicken (Quick, Easy & Flavor-Packed)
- Author: Martha
The first time I tried making Air Fryer Grilled Chicken, it was purely out of necessity. The grill was buried under a foot of snow, the kids were hungry, and I had a fridge full of marinated chicken ready for what was supposed to be a summer-style dinner indoors. What I didn’t expect was how the air fryer would transform those simple chicken breasts into something so flavorful—crispy on the outside, juicy on the inside, with all the grilled essence we craved.
This dish has become a weekly staple in my kitchen. It’s fast, foolproof, and doesn’t require warm weather or a backyard. Whether it’s tucked into wraps, chopped over salads, or served with roasted veggies, this recipe brings smoky, seasoned comfort to every bite. It’s the ultimate blend of convenience and classic flavor, all made possible with modern air fryer magic.
- 3 boneless, skinless chicken breasts
- 1 tablespoon olive oil
- 1 teaspoon garlic powder
- 1 teaspoon onion powder
- ½ teaspoon paprika
- ¼–½ teaspoon cayenne pepper (optional)
- Salt and black pepper to taste
Optional Add-Ons:
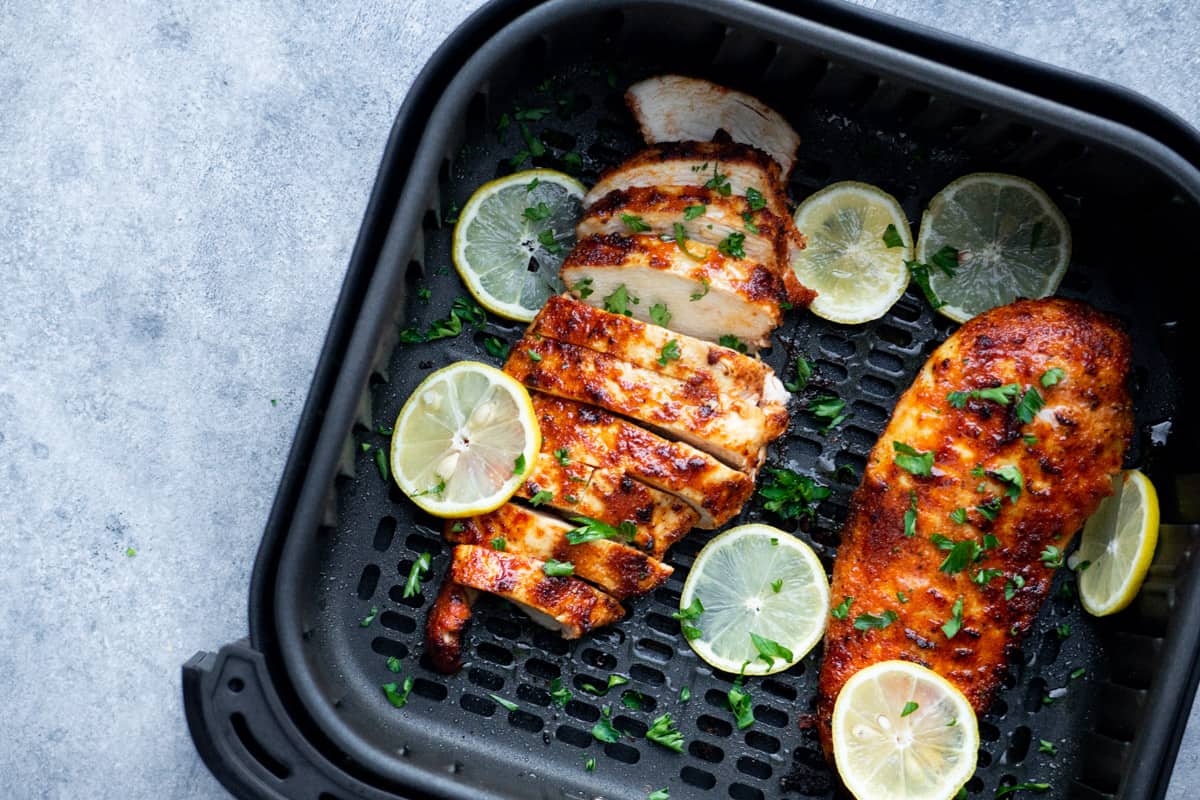
- A squeeze of fresh lemon juice after cooking
- Fresh chopped herbs like parsley or thyme for garnish
Step 1: Prepare the Chicken Start by patting your chicken breasts dry with paper towels. This helps the seasonings stick and creates a better sear in the air fryer. If your chicken is particularly thick in some parts, pound it gently with a meat mallet or rolling pin to ensure even cooking.
Step 2: Season Generously In a small bowl, combine garlic powder, onion powder, paprika, cayenne (if using), salt, and pepper. Drizzle olive oil over the chicken and rub it in. Then sprinkle the seasoning mix evenly over both sides of each breast, pressing gently to help it adhere.
Step 3: Air Fry Like a Pro Preheat your air fryer to 360°F. Lightly coat the basket with a bit of cooking spray or oil if your fryer tends to stick. Arrange the chicken in a single layer without overlapping. Cook for 10 minutes.
Step 4: Flip & Finish Turn the chicken over using tongs and continue cooking for another 5 minutes, or until the internal temperature reaches 165°F. Cooking times may vary slightly based on thickness, so always double-check.
Step 5: Let it Rest Once done, place the chicken on a cutting board and let it rest for 5 minutes. This allows the juices to redistribute, ensuring every bite is succulent.
- This recipe is easily adaptable. Try adding cumin and lime for a Tex-Mex flair, or rosemary and garlic for a Mediterranean touch.
- Works with chicken thighs too—adjust cooking time to 18–20 minutes.
- 3 boneless, skinless chicken breasts
- 1 tablespoon olive oil
- 1 teaspoon garlic powder
- 1 teaspoon onion powder
- ½ teaspoon paprika
- ¼–½ teaspoon cayenne pepper (optional)
- Salt and black pepper to taste
Share—pin this recipe for later on Pinterest!
Optional Add-Ons:
- A squeeze of fresh lemon juice after cooking
- Fresh chopped herbs like parsley or thyme for garnish