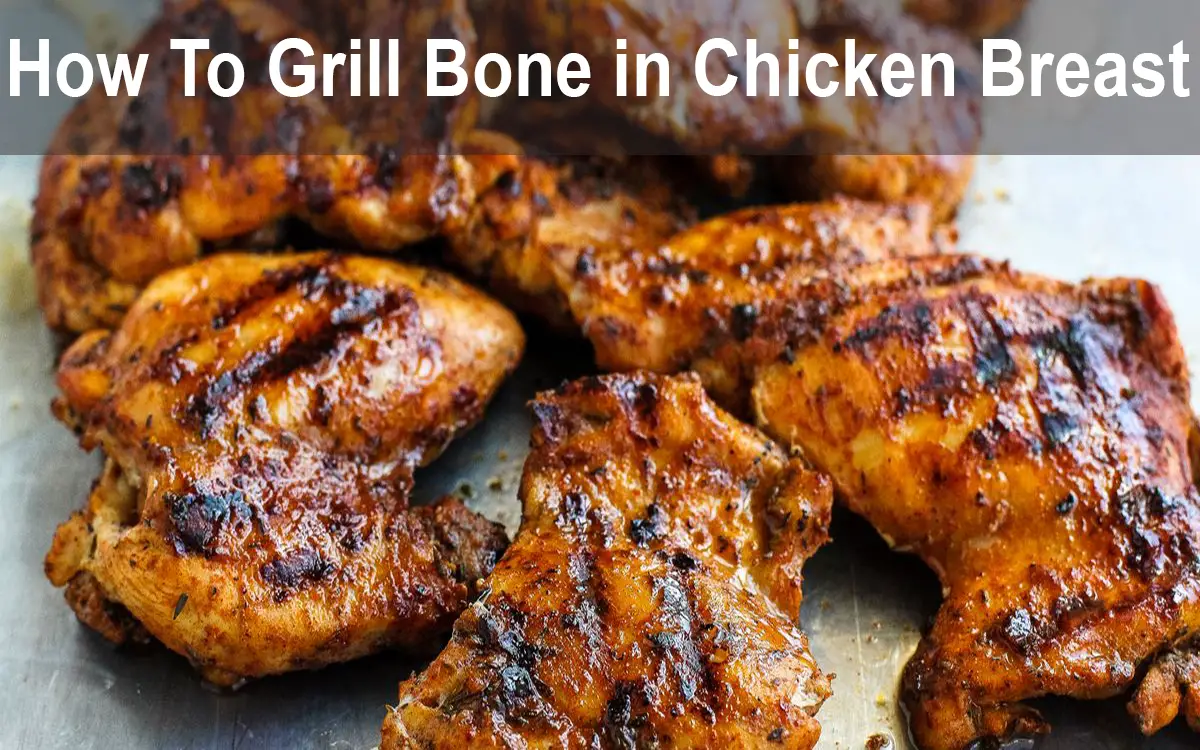
Are you tired of ending up with dry flavorless chicken from your grill? You’re not alone! Many backyard cooks struggle with getting that perfect juicy chicken breast especially the bone-in variety. But don’t worry – I’ve got all the tips and tricks you need to transform your grilling game and impress your family and friends with restaurant-quality results.
As someone who’s spent countless weekends experimenting with different grilling techniques, I can tell you that bone-in chicken breasts are actually your secret weapon for incredible grilled chicken. The bone helps retain moisture and adds flavor that boneless just can’t match
Let’s dive into everything you need to know about how to grill bone-in chicken breasts perfectly every time!
Why Choose Bone-In Chicken Breasts for Grilling?
Before we get to the how-to, let’s understand why bone-in is often better for grilling:
- Enhanced Flavor: The bone infuses the meat with deeper, richer flavor during cooking
- Moisture Retention: Bones act as natural insulators, helping keep the meat juicy
- Presentation Factor: Bone-in cuts have that impressive, restaurant-style look on the plate
- Nutrient Boost: The bone can actually contribute additional nutrients to the meat while cooking
Plus, bone-in chicken breasts typically weigh around 6-12 ounces each and include both white meat and skin, offering a more satisfying grilling experience than their boneless counterparts.
Essential Prep Work: Setting Up for Success
Selecting Quality Chicken
For the best results, start with high-quality bone-in chicken breasts:
- Look for breasts with pale pink color and minimal blemishes
- Ensure there’s a good amount of meat on the bone
- Consider organic or free-range varieties for superior taste and texture
- Allow chicken to reach room temperature for about 30 minutes before grilling (but never longer than 2 hours!)
The Secret Weapon: Brining
One of my favorite tricks for incredibly juicy chicken is brining. While you can make a traditional salt-water brine, here’s an unexpected hack that works wonders:
Pickle Juice Brine
This might sound strange, but trust me! Save your leftover pickle juice and use it to brine your chicken for at least 30 minutes before grilling. The acid tenderizes the meat and helps create extra-crispy skin. And no, your chicken won’t taste like pickles when cooked!
If you’re not into the pickle juice idea, a traditional brine works great too:
- Brine chicken for 30 minutes to 4 hours
- A simple mix of salt, sugar, and water works perfectly
- This step significantly improves moisture content and flavor
Seasoning & Marinade Options
For basic seasoning, you can’t go wrong with:
- 1 Tbsp salt
- 1/2 Tbsp black pepper
For more flavor, try:
- Basic Marinade: 1/4 cup olive oil, 1/4 cup lemon juice, 2-3 cloves minced garlic, 1 tablespoon honey, salt and pepper
- Dry Rub: Combine paprika, garlic powder, onion powder, salt, and pepper
- Alternative Seasoning Styles: Try Greek, Italian, or Cajun seasonings mixed with salt and pepper
Grilling Techniques: Getting It Right
Choosing Your Grill Type
You can use any type of grill for bone-in chicken breasts:
- Gas Grill: Offers convenience and precise temperature control
- Charcoal Grill: Provides that classic smoky flavor
- Pellet Grill: Combines convenience with wood-smoked flavor
Temperature Settings & Setup
Setting the right temperature is crucial for perfect results:
- Preheat your grill to medium heat (375°F to 400°F)
- For gas grills, this means medium setting
- For charcoal, make sure coals are evenly distributed
- Set up for both direct and indirect cooking zones if possible
The Cooking Process: Step by Step
Here’s my foolproof method for perfectly grilled bone-in chicken breasts:
-
Prep the Chicken:
- Remove chicken from brine/marinade
- Pat dry with paper towels (helps achieve better sear)
- Season generously on all sides
-
Prep the Grill:
- Ensure grill is preheated to 375-400°F
- Lightly oil the grates to prevent sticking
-
Initial Searing:
- Place chicken skin-side down on the hottest part of grill
- Sear for about 5 minutes (don’t try to flip until it releases easily!)
- Flip and sear other side for 5 minutes
-
Finish with Indirect Heat:
- Move chicken to upper rack or indirect heat zone
- Continue cooking, flipping 2-3 more times, for about 30-35 minutes
-
Check Temperature:
- Use a meat thermometer in the thickest part (avoid touching bone)
- Chicken is done at 165°F internal temperature
-
Rest Before Serving:
- Remove from grill and let rest 5-10 minutes
- This allows juices to redistribute for maximum tenderness
The Complete Timeline
For a medium-sized bone-in chicken breast (8-12 oz), expect:
- 30+ minutes for brining/marinating
- 5 minutes per side for initial sear (10 minutes total)
- 30-35 minutes additional cooking time on indirect heat
- 5-10 minutes resting time
- Total: Approximately 45-55 minutes of actual cooking time
Troubleshooting Common Issues
We’ve all had grilling mishaps, so here’s how to avoid the most common problems:
Problem: Chicken is Dry
Solution: Lower cooking temperature, use a brine, and don’t overcook! Always use a meat thermometer.
Problem: Charred Outside, Raw Inside
Solution: Your heat is too high. Start with a sear, then move to indirect heat to finish cooking.
Problem: Chicken Sticks to Grill
Solution: Make sure grates are clean and well-oiled. Don’t try to flip the chicken too early – it will release naturally when ready.
Problem: Flare-Ups
Solution: Trim excess fat and use indirect heat when necessary. Keep a spray bottle of water handy for emergencies.
Taking It to the Next Level: Pro Tips
Want to really impress? Try these advanced techniques:
- Add sauce at the end: If using BBQ sauce or glaze, add it during the last 2-3 minutes to prevent burning
- Citrus zest finish: Grate fresh lemon or lime zest over chicken after grilling for a bright flavor boost
- Basting: Consider basting with leftover marinade or a butter mixture during the last moments of grilling
- Wood chips: Add soaked wood chips to your charcoal or use a smoker box on gas grills for extra flavor
Perfect Pairings: What to Serve with Grilled Bone-In Chicken
Your perfectly grilled chicken deserves worthy companions:
- Grilled vegetables (asparagus, zucchini, bell peppers)
- Fresh summer salads
- Corn on the cob
- Rice pilaf
- Roasted potatoes
The Versatility Factor
One of the things I love most about grilled bone-in chicken breasts is their versatility. We often grill extras on the weekend for meal prep throughout the week:
- Slice for sandwiches and wraps
- Chop for salads
- Shred for tacos or quesadillas
- Serve cold for picnics
Final Thoughts
Grilling bone-in chicken breasts might seem intimidating at first, but with these techniques, you’ll be serving up juicy, flavorful chicken that’ll have everyone asking for your secrets. The key takeaways are:
- Start with quality bone-in chicken breasts
- Don’t skip the brining step (pickle juice works wonders!)
- Use proper temperature control (sear first, then indirect heat)
- Always check doneness with a meat thermometer
- Let it rest before serving
With a little practice, you’ll be grilling perfect bone-in chicken breasts like a pro! Fire up that grill and enjoy the satisfaction of serving chicken that’s juicy, flavorful, and sure to impress.
Got any questions about grilling chicken or want to share your own tips? Drop a comment below – I’d love to hear from you!
The Key To Perfectly Grilled Chicken:
The key to grilled chicken is to precook it in the oven ahead of time so you know it’s fully cooked and ready for the grill. Cooking it ahead of time also lets you cook it slowly, which yields nice, juicy, and tender meat. Plus, it gives you time to put your feet up during grilling season because most of the work is done beforehand.
Video: How To Grill Chicken Perfectly
For this recipe, we’re using bone-in chicken thighs and drumsticks. I prefer skinless but skin-on works too. I find that the skin doesn’t get really crispy on the grill no matter what I do. However, skinless can be either hard to find or more expensive.
Chicken breasts are not ideal for this method. If you really want to though, bone in and skin on chicken breasts are best. If you are planning on grilling boneless skinless chicken breasts, I have a separate post about that. They require a different method.
Want to grill a whole chicken? Get the instructions here.
Finally, if it’s wings you’re craving, you can learn how to grill chicken wings here.
How To Grill Bone-in Chicken Breast
FAQ
How long does it take to grill a bone-in chicken breast?
Is it better to grill chicken at 350 or 400 on a gas grill?
Looks like you’re seeing a trend. Chicken is best cooked at 350 or higher, definitely not low and slow like beef or pork. Sometimes I’ll throw chicken on at 225 while I wait for the family to get home, then crank it up to 400 or finish on my gas grill. The high heat tends to seal the moister inside the chicken.
How do you grill bone-in chicken breast on a Weber gas grill?
Grill the chicken, bone side down, over indirect medium heat, with lid closed, until the meat is opaque all the way to the bone, 30 to 40 minutes. If desired, to crisp the skin, grill the chicken over direct heat during the last 5 to 10 minutes of grilling time, turning once.
What is the best technique for grilling chicken breast?
Preheat grill to medium-high and lightly oil the grate. Place chicken breasts, smooth-side down on preheated grill; cook, covered, until no longer pink and juices run clear, about 5 minutes per side. An instant-read thermometer inserted into the center should read at least 165 degrees F (74 degrees C).