Are you tired of dry, flavorless chicken tenders that disappoint your taste buds? I’ve been there too! After years of trial and error, I’ve finally mastered the art of cooking perfectly juicy chicken tenders on the stove In this comprehensive guide, I’ll share all my secrets for creating tender, moist chicken tenders that will have your family begging for seconds!
Why Stovetop Chicken Tenders Are Simply the Best
Before diving into the cooking process let’s talk about why cooking chicken tenders on the stove is such a fantastic method
- Speed: Ready in under 10 minutes – perfect for busy weeknights!
- Control: You can monitor the cooking process and adjust heat as needed
- Flavor: The stovetop method creates a beautiful golden crust while keeping the inside juicy
- Versatility: Easy to season however you like, from simple salt and pepper to complex spice blends
Understanding Chicken Tenders
Chicken tenders aren’t just kid food – they’re a versatile protein that can be the star of countless meals But what exactly are they?
Chicken tenders (also called chicken strips, chicken fingers, or chicken fillets) come from the tenderloin part of the chicken breast. They’re naturally tender and juicy when cooked properly, making them perfect for quick meals.
Essential Ingredients for Perfect Stovetop Chicken Tenders
Here’s what you’ll need to make delicious chicken tenders:
- 1 pound of chicken tenders
- 2 tablespoons of olive oil or butter
- Salt and pepper to taste
- Optional seasonings or marinades
Prepping Your Chicken Tenders for Success
Proper preparation is crucial for ensuring your chicken tenders turn out perfectly juicy and flavorful. Follow these steps:
-
Clean and trim: Rinse the chicken tenders under cold water and pat them dry with paper towels. Remove any excess fat or tendons.
-
Season generously: At minimum, season with salt and pepper. For extra flavor, try a marinade or spice blend. My fave quick marinade is:
- 2 tablespoons olive oil
- 1 tablespoon lemon juice
- 1 teaspoon garlic powder
- 1/2 teaspoon dried herbs (like oregano or thyme)
-
Let them come to room temperature: Take the chicken out of the fridge about 15 minutes before cooking. This helps them cook more evenly.
The Perfect Cooking Method: Step by Step
Now for the main event – cooking those tenders to juicy perfection!
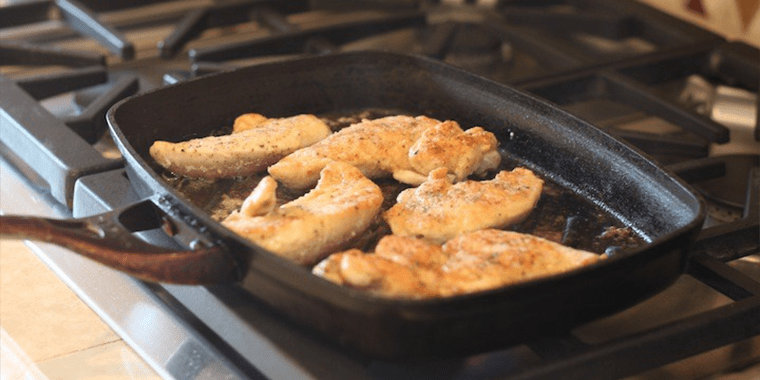
Step 1: Heat Your Pan Properly
Start by adding oil or butter to a skillet over medium heat. Let it warm until it shimmers – this is your visual cue that the pan is hot enough.
Step 2: Add Chicken Tenders Correctly
Place the chicken tenders in the skillet in a single layer. Don’t overcrowd the pan! If necessary, cook in batches to ensure even cooking.
Step 3: Get the Timing Right
This is where many people go wrong! The perfect timing for stovetop chicken tenders is:
- Cook for 3-4 minutes on the first side (no peeking!)
- Flip once and cook for another 3-4 minutes on the second side
- Total cooking time: 6-8 minutes depending on thickness
Step 4: Check for Doneness
The most reliable way to check if your chicken tenders are done is with a meat thermometer. The internal temperature should reach 165°F (75°C). No thermometer? Cut into a tender – it should be white throughout with no pink.
Step 5: Rest Before Serving
This step is SO important and often skipped! Let your cooked chicken tenders rest for 3-5 minutes before serving. This allows the juices to redistribute, resulting in much juicier meat.
My Top Tips for Ultra-Juicy Chicken Tenders
Over the years, I’ve discovered several tricks that make a huge difference in the juiciness of stovetop chicken tenders:
-
Don’t Rush the Process: Cooking on too high heat results in burned outsides and raw insides. Medium heat is your friend for even cooking.
-
Try the Lid Trick: If your tenders are cooking unevenly, cover the skillet partway through cooking. This helps trap heat and moisture.
-
Avoid Overcooking: This is the #1 cause of dry chicken! Use a timer and pay attention.
-
Consider Brining: For extra insurance against dryness, brine your chicken tenders in saltwater for 15-30 minutes before cooking.
-
Baste While Cooking: Occasionally spooning the hot oil/butter over the tenders while they cook adds moisture and flavor.
Flavor Variations to Keep Things Interesting
We eat chicken tenders pretty often in my house, so I like to mix up the flavors. Here are some of our favorite variations:
Spicy Kick
Add cayenne pepper or hot sauce to your marinade for tenders with a nice heat level.
Herbaceous Twist
Toss in Italian herbs like basil and oregano for aromatic flavor that pairs well with pasta.
Asian-Inspired
Marinate in soy sauce, ginger, and sesame oil for a delightful Asian flair. These are amazing over rice!
Lemon Pepper
Classic and simple – just lemon zest, black pepper, and a touch of garlic.
What to Serve with Your Juicy Chicken Tenders
Chicken tenders are incredibly versatile and pair well with countless sides. Here are some of our favorites:
- Fresh green salad with vinaigrette
- Crispy french fries or sweet potato fries
- Steamed or roasted vegetables
- Mashed potatoes or rice
- Macaroni and cheese (a classic combo!)
Don’t forget the dipping sauces! Honey mustard, BBQ sauce, ranch dressing, or even a homemade aioli can take your chicken tenders to the next level.
Common Problems and How to Fix Them
Even with the best instructions, things can sometimes go wrong. Here’s how to troubleshoot common chicken tender issues:
Problem: Tenders are dry and tough
Solution: You’re likely overcooking them. Reduce cooking time and make sure you’re letting them rest after cooking.
Problem: Tenders are golden outside but raw inside
Solution: Your heat is too high. Lower the temperature and give them more time to cook through.
Problem: No golden crust forming
Solution: Make sure your pan is hot enough before adding the chicken, and pat the tenders dry before cooking.
Problem: Tenders sticking to the pan
Solution: Either your pan isn’t hot enough when you add the chicken, or you need more oil.
Storing and Reheating Leftover Chicken Tenders
If you have leftovers (which rarely happens in my house!), here’s how to handle them:
- Refrigeration: Store in an airtight container for 3-4 days.
- Freezing: Wrap tightly in plastic wrap and foil, or use a freezer bag. They’ll keep for up to 3 months.
- Reheating: For best results, reheat in the oven at 350°F for about 10 minutes. Microwaving works in a pinch but may make them a bit rubbery.
Beyond Basic: Creative Ways to Serve Chicken Tenders
Don’t limit yourself to just serving plain chicken tenders! Here are some creative ideas:
- Slice and add to salads for extra protein
- Make chicken tender sandwiches or wraps
- Create a chicken tender bowl with rice, veggies, and sauce
- Chop and use in pasta dishes
- Add to stir-fries at the last minute
Final Thoughts: Practice Makes Perfect
Mastering juicy chicken tenders on the stove might take a few attempts, but don’t get discouraged! Each time you make them, you’ll get a better feel for the perfect timing and temperature for your specific stove and pan.
Remember the key points:
- Medium heat
- 3-4 minutes per side
- Internal temperature of 165°F
- Rest before serving
With these techniques in your cooking arsenal, you’ll never suffer through dry chicken tenders again! Your family will think you’ve been taking secret cooking classes.
Happy cooking!
FAQ: Your Chicken Tender Questions Answered
Q: Can I use frozen chicken tenders?
A: While fresh is best, you can use frozen tenders. Just make sure they’re fully thawed before cooking for the juiciest results.
Q: Do I need to use a non-stick pan?
A: Not necessarily, but it helps prevent sticking. A well-seasoned cast iron pan works beautifully too.
Q: Can I make chicken tenders without breading?
A: Absolutely! Many of the methods described in this article work for unbreaded chicken tenders, which are healthier and still delicious.
Q: How do I know when chicken tenders are done without a meat thermometer?
A: Cut into the thickest part – the meat should be white throughout with no pink, and the juices should run clear.
Q: Can I make these ahead of time for meal prep?
A: Yes! Cook a batch, let them cool completely, and store in the refrigerator. They’re perfect for quick lunches and dinners throughout the week.
Why you’ll love these easy chicken tenders
- Flavorful and Juicy Chicken Tenders: This recipe results in tender and juicy chicken tenders with a delightful combination of herbs and seasoning. The absence of breading allows the natural flavor of the chicken to shine through.
- Quick and Easy Recipe: The recipe is straightforward and can be prepared in a relatively short amount of time, making it a great option for a quick weeknight dinner.
- Versatile Seasoning: You can easily customize the seasoning to suit your taste. Whether you prefer different herbs or spices, this recipe is adaptable to your flavor preferences.
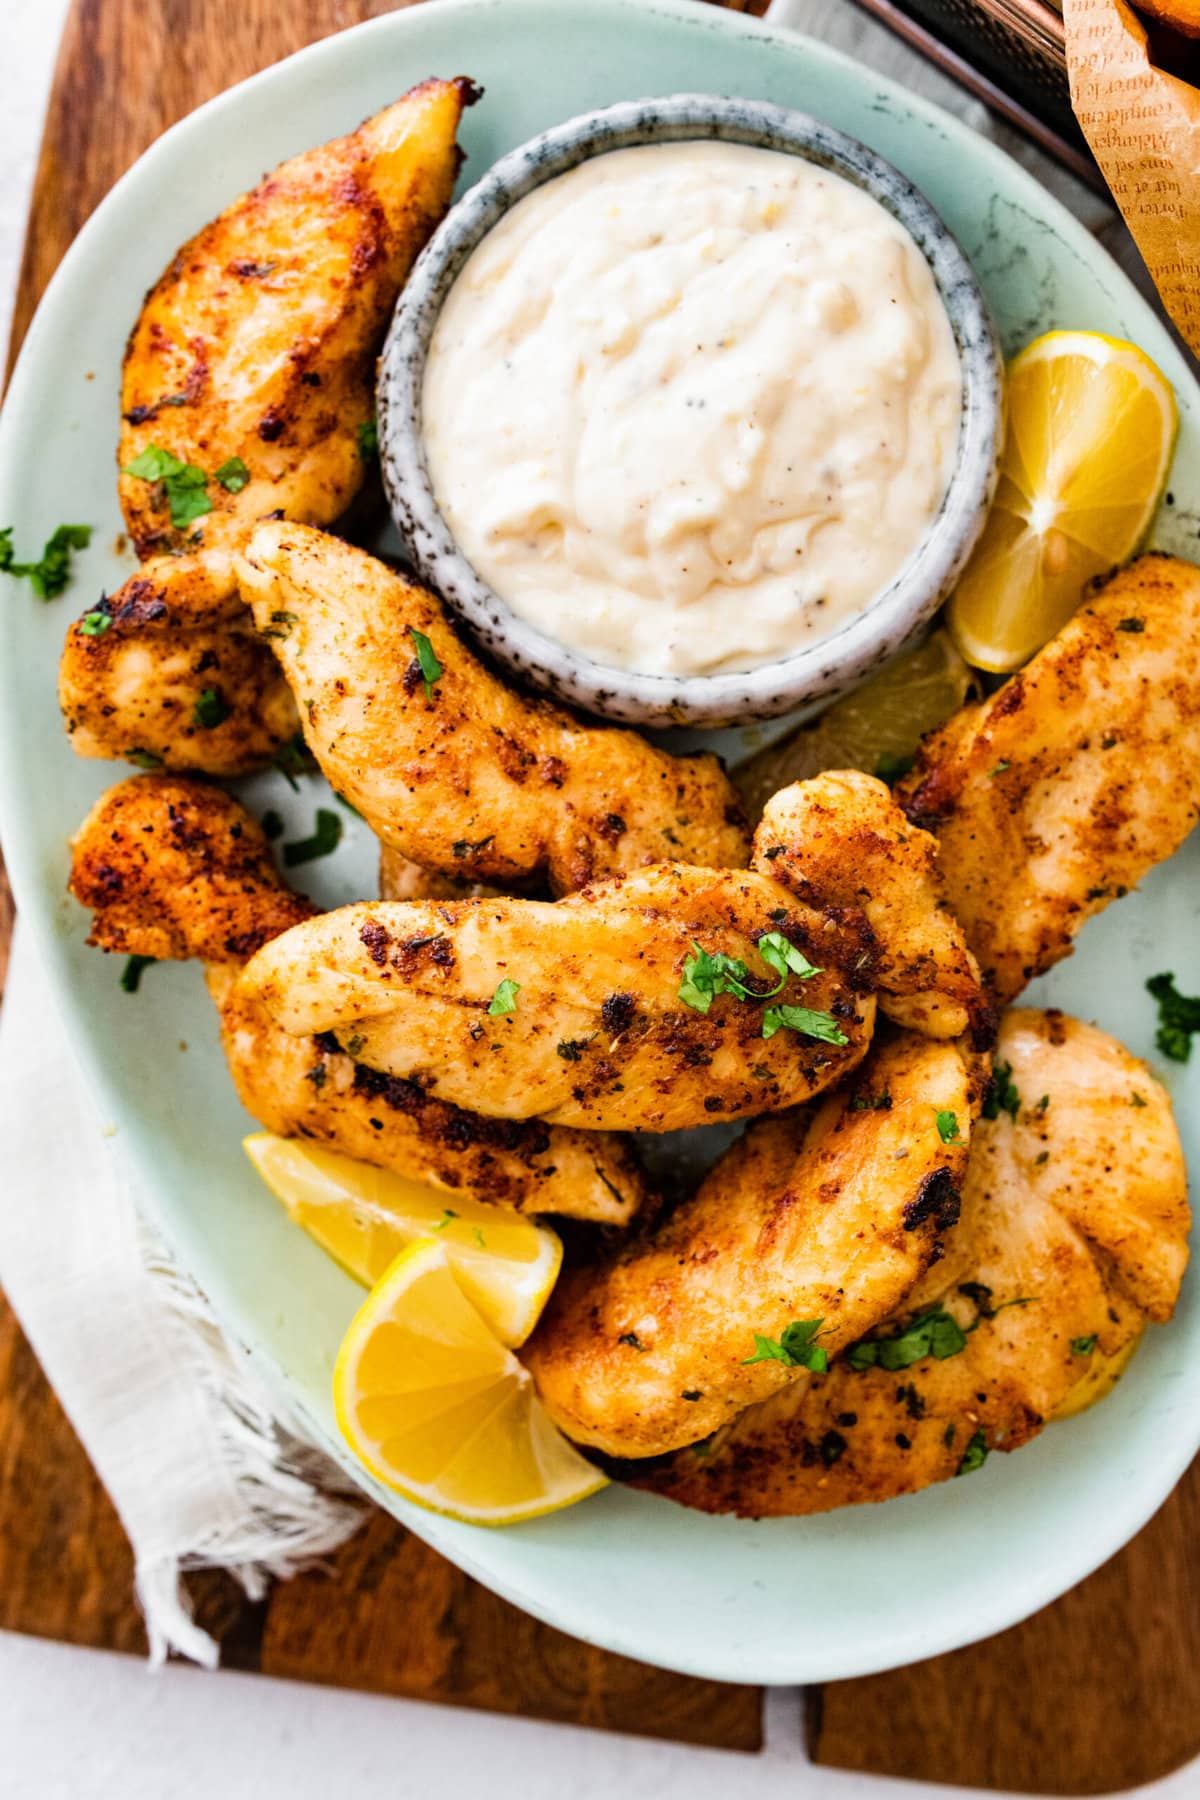
- Lemon and Garlic Aioli: The lemon and garlic aioli add a zesty and creamy element that pairs perfectly with the chicken. It’s a homemade sauce that’s simple to make but adds a burst of flavor to your meal.
- No Need for Deep Frying: This recipe doesn’t require deep frying, which makes it a healthier option compared to breaded and fried chicken tenders. Great for meal prep as well.

Chicken Tenders:
- Chicken tenders or chicken strips (about 10-12)
- Salt
- Onion powder
- Garlic powder
- Smoked paprika
- Dried parsley
- Dried oregano
- Black pepper
- Olive oil
- Butter
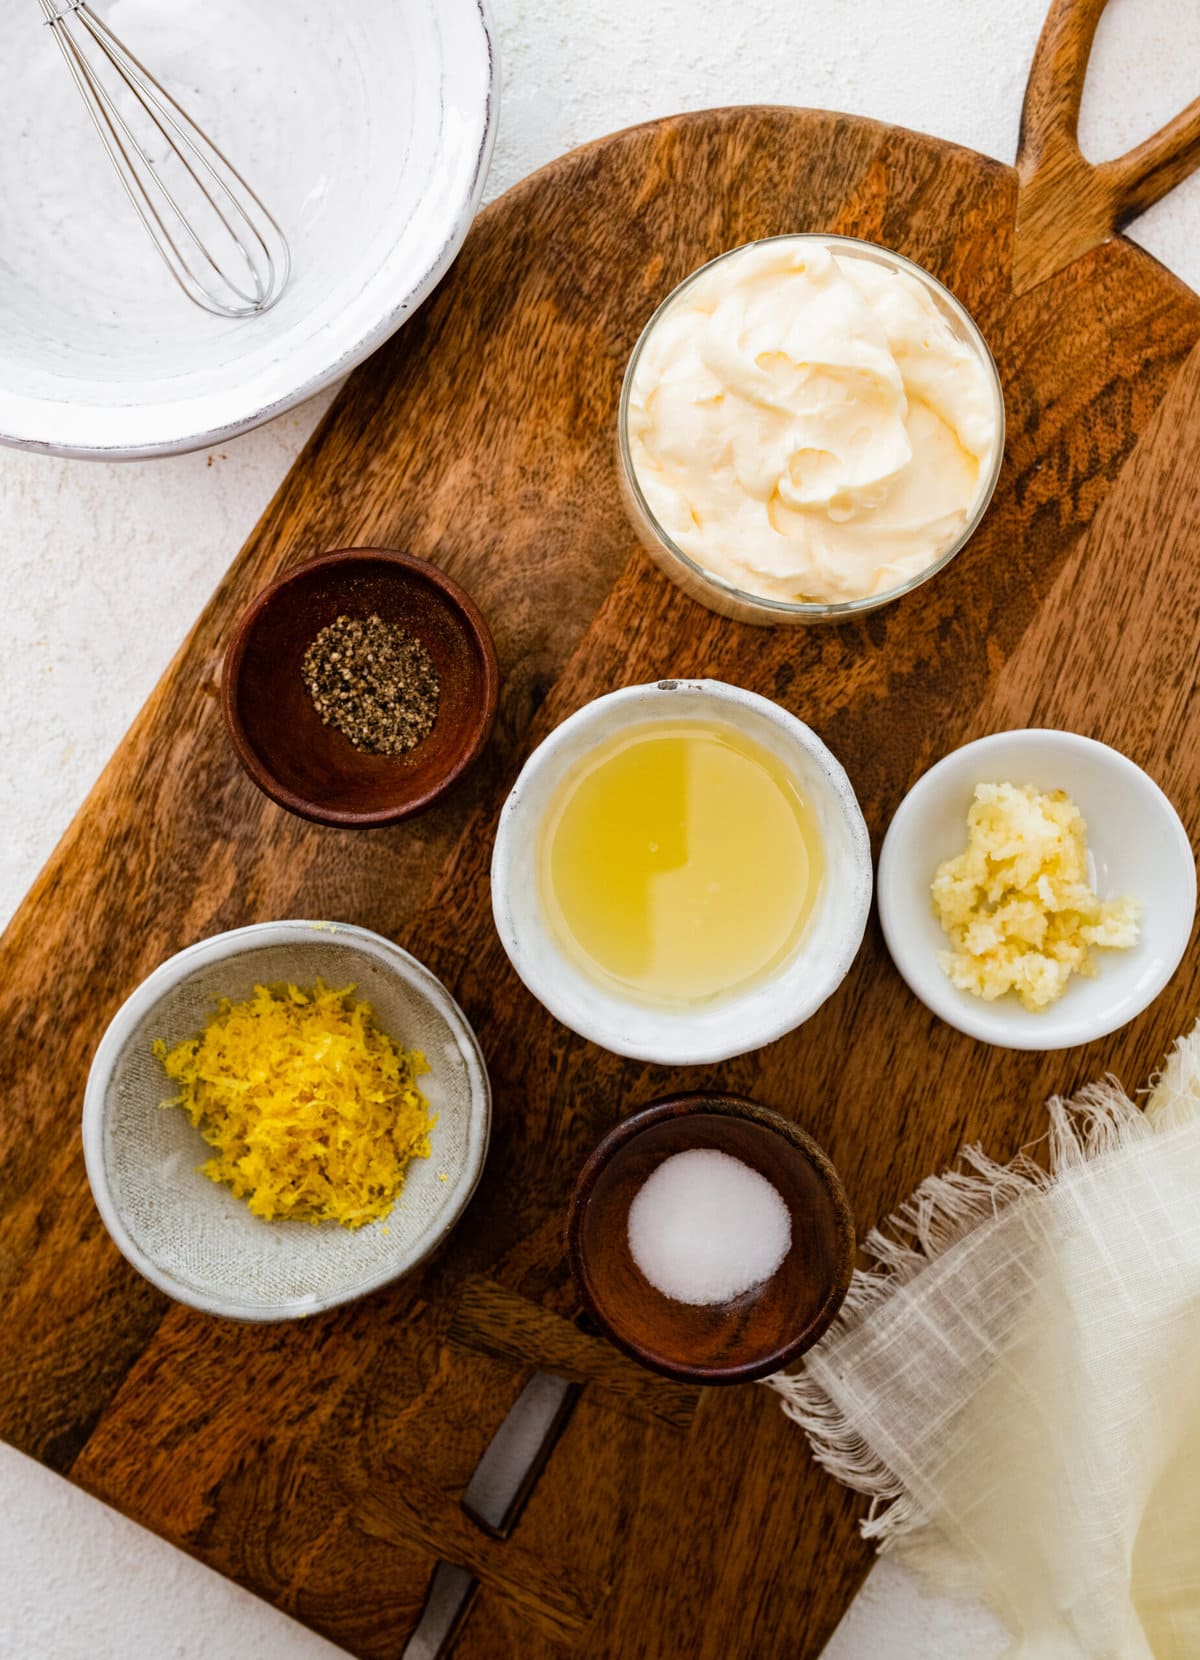
For the Lemon and Garlic Aioli:
- Mayonnaise
- Garlic, minced
- Lemon juice and lemon zest
- Salt and black pepper to taste
See the recipe card for quantities.
How to fry chicken tenders

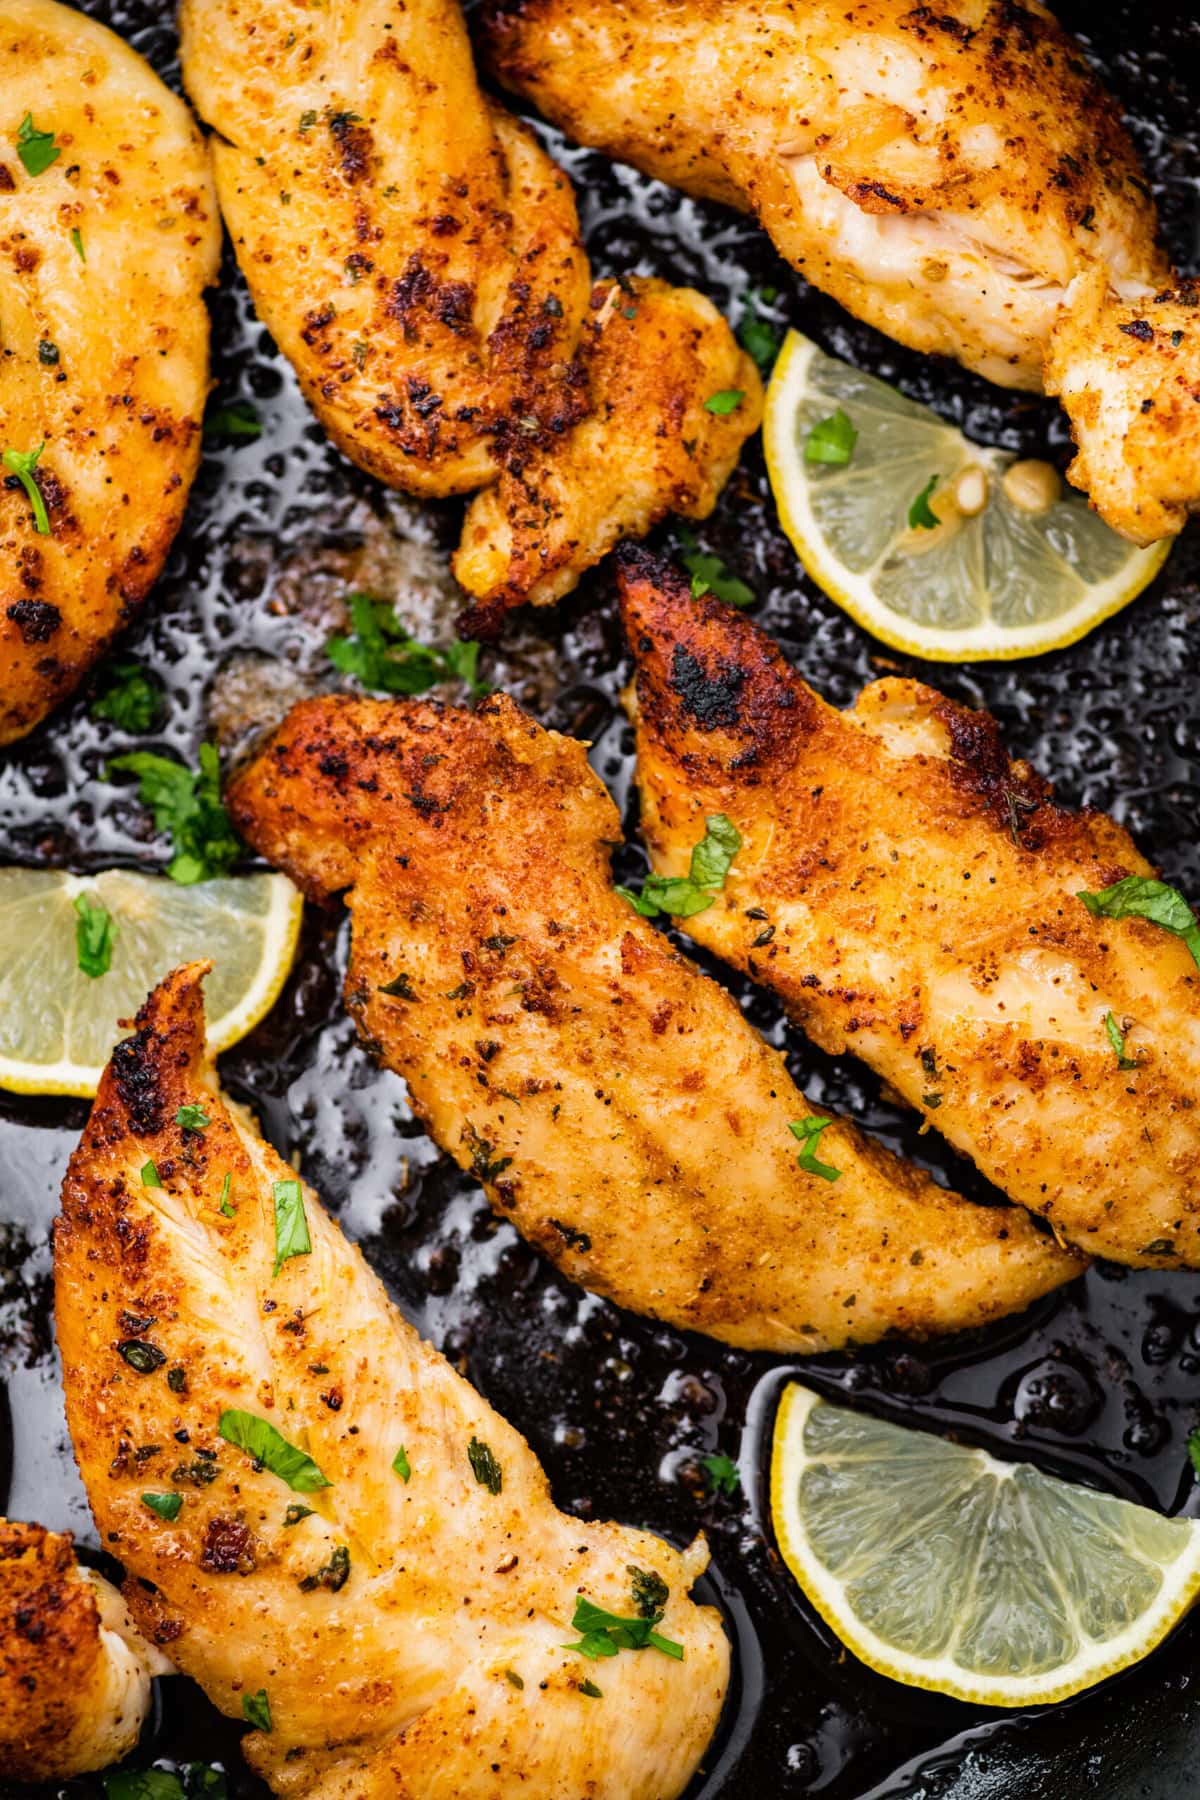
Cook the Chicken Tenders: Pat the chicken dry with paper towels. Season the chicken tenders with salt, black pepper, and dried seasonings. You can use other preferred herbs or seasonings as well. In a large skillet, heat olive oil and butter over medium-high heat.

Once the pan is hot, add the seasoned chicken tenders to the skillet.

Cook for about 4-5 minutes on each side or until they are no longer pink in the center and have a golden brown color. The cooking time may vary depending on the thickness of the tenders. Make sure to cook the chicken to an internal temperature of 165°F (74°C).
Serve: Once the chicken tenders are cooked, remove them from the skillet and let them rest for a few minutes. Serve the pan-fried chicken tenders with the lemon and garlic aioli as a dipping sauce on the side.
You’ll love this recipe for its simplicity, delicious flavors, and the flexibility it offers for personalizing the seasonings and sides to match your preferences. It’s a tasty and satisfying dish that’s easy to prepare.
Here are some common recipe substitutions for pan-fried chicken tenders without breading:
- Protein Substitutions:
- Instead of chicken tenders, you can use turkey tenders, pork tenderloin, or boneless skinless chicken breasts cut into strips.
- Seasoning Substitutions:
- You can use various herbs and seasonings based on your preference, such as paprika, cumin, chili powder, or Italian seasoning.
- Cooking Oil Substitutions:
- If you prefer a different oil, you can use vegetable oil, canola oil, avocado oil, or even coconut oil for pan-frying.
- Dipping Sauce Substitutions:
- Swap out the lemon and garlic aioli for other dipping sauces like ketchup, ranch dressing, honey mustard, or teriyaki sauce.
- Gluten-Free Substitutions:
- If you need a gluten-free option, ensure that the seasonings and sauces you use are gluten-free. Also, consider using almond flour or gluten-free breadcrumbs for a breading alternative.

1. Smoky BBQ Chicken Tenders:
- Season the chicken tenders with a smoky bbq or seasoning blend before pan-frying. Serve with your favorite bbq sauce for dipping.
2. Mediterranean-Inspired Chicken Tenders:
- Season the chicken tenders with Mediterranean herbs like Italian seasoning, oregano, thyme, and rosemary, or lemon pepper. Serve with a side of tzatziki sauce and pita bread, or your favorite sides.
3. Honey Mustard Glazed Chicken Tenders:
- Drizzle honey mustard sauce over the cooked chicken tenders or use it as a dipping sauce.
- Cast iron skillet is one of my favorite saute pans.
Store leftover pan-fried chicken tenders in an airtight container in the refrigerator for up to 3-4 days. This healthy meal makes great leftovers to toss in a salad the next day.