Have you ever craved that perfectly juicy, golden-brown rotisserie chicken but didn’t want to make a trip to the store? I totally get it! As a backyard grilling enthusiast I’ve spent years perfecting the art of rotisserie chicken on my grill and I’m excited to share all my tips and tricks with you.
Rotisserie chicken is one of those meals that looks impressive but is actually pretty simple once you get the hang of it. Whether you’re cooking on a gas grill, pellet grill, or charcoal setup, I’ll walk you through everything you need to know to create restaurant-quality rotisserie chicken right in your backyard.
Key Takeaways
Before we dive into the details, here’s what you’ll learn:
- Why rotisserie cooking creates such juicy, flavorful chicken
- Essential equipment you’ll need for success
- How to choose the perfect chicken
- Step-by-step instructions for preparation and cooking
- Temperature monitoring and cooking times
- Delicious serving suggestions and ideas for leftovers
Understanding Rotisserie Cooking
What Is Rotisserie Cooking?
Rotisserie cooking is a method where meat (in this case, chicken) is skewered on a spit that rotates slowly over heat. As the chicken spins, it bastes itself in its own juices, creating that moist, tender meat with a beautifully crisp exterior we all love.
Benefits of Rotisserie Chicken
There are so many reasons to try making rotisserie chicken at home:
- Enhanced Flavor: The slow rotation helps lock in flavors and creates a deliciously seasoned exterior with a juicy interior.
- Even Cooking: The constant rotation distributes heat evenly, preventing any one side from overcooking.
- Self-Basting Action: As the chicken turns, it continually bastes itself in its own juices and fat.
- Healthier Option: Excess fat drips away during cooking, making this a healthier option than some other cooking methods.
- Minimal Supervision: Once set up, rotisserie cooking requires very little attention, freeing you up to prepare sides or relax.
While store-bought rotisserie chickens are convenient, making your own gives you complete control over the ingredients. You can start with a high-quality bird (like organic or air-chilled) and skip the preservatives additives and chlorine rinses often used in commercial preparations.
Essential Equipment Needed
To make rotisserie chicken on your grill, you’ll need:
- Rotisserie Kit: This includes the spit rod, forks, and motor. Most grills can be fitted with an aftermarket rotisserie attachment if they don’t come with one.
- Drip Pan: Essential for catching drippings to prevent flare-ups and make cleanup easier.
- Heat-Resistant Gloves: For safely handling hot equipment.
- Digital Meat Thermometer: The most reliable way to check for doneness.
- Basting Brush: For applying marinades or oils during cooking (optional).
- Kitchen Twine: For trussing the chicken, which helps it cook more evenly.
Preparing Your Grill for Rotisserie Cooking
Setting Up Your Grill
The setup varies slightly depending on your grill type, but here’s the general process:
-
Clean the Grill Remove any debris from previous cooking sessions
-
Preheat the Grill:
- For a gas grill: Aim for 350°F-375°F
- For a pellet grill: Set to 350°F-375°F
- For a charcoal grill: Set up for indirect heat
-
Install the Rotisserie Kit: Follow the manufacturer’s instructions for your specific grill model.
-
Position the Drip Pan: Place it beneath where the chicken will rotate to catch drippings.
Two-Burner Gas Grill Setup
If you’re using a smaller two-burner Weber gas grill, try this setup:
- Turn on only one burner (the one opposite from where the motor is attached)
- Place the drip pan over the unlit burner
- This creates indirect heat that will cook your chicken evenly without burning it
Choosing the Right Chicken
Selecting the Best Bird
- Size Matters: Choose a whole chicken weighing between 3.5 to 5.5 pounds. This range works best for even cooking and fits well on most home rotisserie setups.
- Quality Counts: When possible, opt for organic or free-range chickens for better flavor and texture.
- Freshness Check: Look for smooth, unblemished skin and a sell-by date that’s at least a week away.
- Air-Chilled Option: If available, air-chilled chickens often have better skin and texture than water-chilled ones.
Preparing the Chicken
Basic Preparation Steps
- Remove from Refrigerator: Take your chicken out about an hour before cooking to remove the chill.
- Remove Giblets: Check the cavity and remove any giblets or neck pieces.
- Rinse and Dry: Some chefs prefer to rinse the chicken (inside and out) with cold water, then pat it completely dry with paper towels. Others skip the rinsing step to avoid spreading bacteria.
- Trim Excess Fat: Remove any excess fat around the neck cavity and tail end.
- Bend Wings Back: Tuck the wing tips behind the chicken to prevent burning.
Marinades and Seasoning Options
You have tons of options for flavoring your rotisserie chicken:
Basic Approach:
- Binder: Use either olive oil (for gas grills) or mayonnaise (works great on pellet grills) as a base to help seasonings stick.
- Simple Seasoning: A mix of salt, pepper, and granulated garlic never fails.
Flavor Boosters:
- Dry Rubs: Try BBQ rubs, lemon pepper, or smoky paprika blends.
- Herb Mixtures: Fresh or dried herbs like thyme, rosemary, and sage work beautifully.
- Citrus Zest: Adds brightness without excessive moisture.
Stuffing the Cavity:
Adding aromatics to the cavity enhances flavor throughout the meat. Try combinations of:
- Half an onion, quartered
- Several garlic cloves, crushed
- Fresh herb sprigs (thyme, rosemary)
- Bay leaves
- Lemon or orange wedges
Trussing the Chicken
Trussing helps the chicken cook evenly and keeps the cavity stuffing in place:
- Tie the legs together with kitchen twine.
- If you have poultry lacers, use them to close the cavity.
- This helps the bird hold its shape while rotating on the spit.
Mounting the Chicken on the Rotisserie
This step is crucial for even cooking:
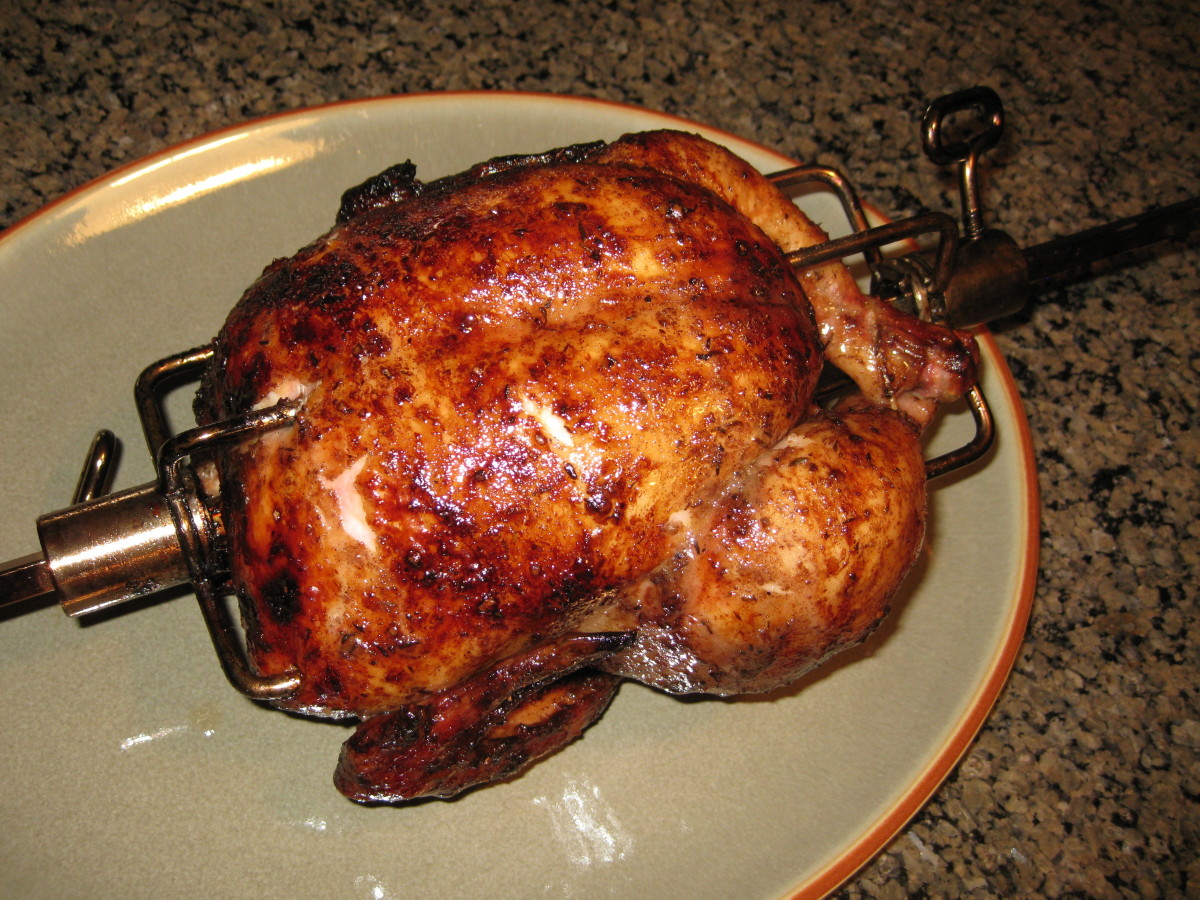
- Place the rotisserie rod through the center of the chicken, entering through the neck cavity and exiting through the tail end.
- Position the forks on either side, pushing them firmly into the chicken to secure it.
- Tighten the screws very firmly – if they come loose during cooking, the chicken won’t rotate properly.
- Check that the chicken is centered on the rod for balanced rotation.
Pro tip: Do this prep on a rimmed baking sheet to catch any raw juices and make transport to the grill easier.
Cooking the Chicken on the Grill
Step-by-Step Rotisserie Method
- Install the Spit: Place the rod with the secured chicken onto your grill’s rotisserie attachment.
- Test Rotation: Turn on the motor to ensure the chicken rotates freely without hitting any grill surfaces.
- Final Seasoning: If needed, add any final touches of seasoning while the chicken is rotating.
- Close the Lid: Keep the grill lid closed during cooking to maintain even temperature.
- Occasional Checking: It’s okay to peek occasionally to ensure everything is running smoothly.
Monitoring Temperature and Cooking Time
- Cooking Time: Plan for approximately 15-20 minutes per pound of chicken.
- Target Temperature: Cook until the internal temperature reaches 165°F in the thickest part of the breast and thigh (without touching bone).
- Visual Cues: Look for deeply golden brown skin and clear juices.
- Rest Before Carving: Allow the chicken to rest for 10-15 minutes after cooking. This lets the juices redistribute throughout the meat for maximum juiciness.
Remember, it’s done when it reaches the proper temperature, not after a specific amount of time. Weather conditions, grill variations, and chicken size can all affect cooking duration.
Troubleshooting Common Issues
Uneven Browning
If your chicken is browning unevenly, it may not be properly balanced on the spit. Stop the rotisserie, reposition, and ensure the screws are tight.
Flare-Ups
Occasional flare-ups happen as fat drips. Make sure your drip pan is properly positioned, and if necessary, reduce the direct heat slightly.
Motor Struggling
If your rotisserie motor seems to struggle, your chicken might be too large or unbalanced. Try a smaller bird next time or reposition for better balance.
Serving Suggestions
Rotisserie chicken pairs beautifully with so many sides! Here are some of my favorites:
Classic Sides:
- Creamy mashed potatoes
- Roasted seasonal vegetables
- Fresh coleslaw
- Garlic bread or dinner rolls
Lighter Options:
- Quinoa salad with fresh herbs
- Steamed green beans with almonds
- Broccoli slaw with apple cider dressing
- Simple garden salad
Making the Most of Leftovers
Leftover rotisserie chicken is like gold in the kitchen! Here’s what I like to do with mine:
- Chicken Salad: Dice and mix with mayo, celery, and grapes for a quick lunch
- Tacos or Quesadillas: Shred and season for an easy Mexican-inspired meal
- Soups and Stews: Add to broth with vegetables for a cozy dinner
- Pasta Dishes: Toss with your favorite pasta, sauce, and veggies
- Grain Bowls: Combine with quinoa or rice, veggies, and a tasty dressing
My Final Tips
After years of making rotisserie chicken, here are my most important tips:
- Don’t Rush: Give yourself plenty of time – the slower cooking produces the best results.
- Check Security: Make absolutely sure the chicken is secured tightly on the rotisserie rod.
- Trust Your Thermometer: Appearance can be deceiving – always verify doneness with a good digital thermometer.
- Let It Rest: Those 10-15 minutes of resting time make a huge difference in juiciness.
Step 4: Caramelize the Glaze
- During the final 10 minutes of cooking, baste the chicken generously with the BBQ glaze one last time.
- Allow the glaze to caramelize as the chicken finishes cooking, creating a glossy, smoky crust.
Step 3: Cook the Chicken
- Place the rotisserie rod on the Arteflame grill, ensuring it rotates evenly over medium heat.
- Cook the chicken for 1.5 to 2 hours, depending on its size. Baste with the BBQ glaze every 20-30 minutes to build layers of flavor.
- Use a meat thermometer to check the internal temperature; it should reach 165°F (74°C) at the thickest part of the breast.
Simple Steps to the Perfect Rotisserie Chicken | Weber Grills
FAQ
How long does it take to rotisserie a chicken on the grill?
How long does a barbecue rotisserie cooking take?
The cooking time of BBQ on a rotisserie depends on the size and type of food you are cooking, as well as the cooking temperature, and even the weather. For larger roasts between 10 and 20 minutes per pound of meat is average.
What temperature should the grill be for rotisserie?
No matter what you are to cooking, use with indirect medium-low heat and the temperature should stay right around 350F. Slide the rotisserie motor onto the mounting bracket, plug it in, and turn the motor on and off to make sure it is working. 5. Open the lid on the grill.
Can you cook rotisserie chicken on a grill?
Mastering the art of rotisserie chicken on a grill is a game-changer for any backyard BBQ master. Whether you’re using a gas or charcoal grill, the key to achieving that tender, flavorful chicken lies in the slow, succulent, self-basting process that is unique to rotisserie cooking.
How do you rotisserie chicken on a gas grill?
Preheat the Grill: Light your grill and let it reach a steady temperature of 350°F to 400°F. This range works well for rotisserie chicken. Install the Rotisserie Kit: Secure the rotisserie kit according to the manufacturer’s instructions, making sure it aligns with your grill’s motor.
Can you cook rotisserie chicken at home?
Juicy and golden, rotisserie chicken is mostly hands-off cooking and you get a better, tastier chicken by doing it at home. If you don’t have an attachment for your grill, look into options for adding one. Timing tip: start about 2 ½ hours (or a little more) ahead of when you plan to serve.
Does rotisserie chicken come with a grill attachment?
Many grills come with a rotisserie attachment, making it accessible to home cooks. Rotisserie chicken offers several advantages: Flavor: Rotisserie cooking locks in flavors, creating a deliciously seasoned exterior and juicy interior.
How do you put a chicken on a rotisserie?
Let’s start at the beginning—how to put a chicken on a rotisserie. Follow these steps: Truss the chicken using butcher’s twine. Cut a piece at least four times longer than the length of the bird. Follow the step-by-step tutorial by Weber for detailed instructions on how to truss a chicken for rotisserie grilling.
How do you spit chicken on a rotisserie grill?
Preheat your grill. If you have a rotisserie burner, turn it on. If not, set your grill for indirect heat (burners on at the sides, off in the middle). Slide one fork onto the spit rod, then carefully slide the rod through the chicken (from rear to neck). Secure it with the second fork. Mount the spit on your grill.