Ever stared at a package of chicken breast wondering how long it’ll take to cook it in the oven? I’ve been there too many times! That’s why I wanted to share everything I’ve learned about cooking cut up chicken breast in the oven. It’s one of those basic kitchen skills that can make weeknight dinners so much easier.
Cut-up chicken breast cooks faster and more evenly than whole pieces, making it perfect for quick meals. But getting the timing right is crucial – nobody wants dried-out chicken or (even worse) undercooked pieces!
In this guide, I’ll walk you through exactly how long to cook your cut-up chicken breast plus all the factors that might affect cooking time. Let’s make sure your chicken turns out juicy and delicious every single time!
The Basic Cooking Time for Cut-Up Chicken Breast
For most cut-up chicken breast pieces (around 1-2 inches thick) you’ll need approximately 15-20 minutes in a preheated oven at 375°F (190°C). The chicken is done when it reaches an internal temperature of 165°F (74°C).
But there’s more to it than just setting a timer! The exact cooking time depends on several factors:
- The size and thickness of your chicken pieces
- Whether you’re using bone-in or boneless chicken
- Your specific oven type
- How you’ve prepared the chicken
Important Factors That Affect Cooking Time
Size and Thickness Matters Most
The thickness of your chicken pieces is probably the biggest factor that affects cooking time. Here’s a handy reference:
| Thickness of Chicken Breast | Cooking Time at 400°F (200°C) |
|---|---|
| 1-1.5 inches (2.5-3.8 cm) | 15-20 minutes |
| 1.5-2 inches (3.8-5 cm) | 20-25 minutes |
| 2-2.5 inches (5-6.4 cm) | 25-30 minutes |
Pro tip: Try to cut your chicken into uniform pieces so they’ll all be done at the same time!
Bone-In vs. Boneless
While most recipes call for boneless, skinless chicken breast, bone-in chicken will take longer to cook. Bone-in chicken pieces typically need about 5-10 minutes more in the oven than boneless pieces of the same size.
| Type of Chicken | Additional Cooking Time |
|---|---|
| Boneless, skinless | Base cooking time |
| Bone-in | Add 5-10 minutes |
Oven Temperature Makes a Difference
Most recipes recommend cooking cut-up chicken breast at 375°F (190°C), but you can adjust based on your needs:
- 350°F (175°C): Slower cooking, more tender results but takes longer
- 375°F (190°C): Good balance between cooking time and moisture retention
- 400°F (200°C): Faster cooking, but requires more careful monitoring
- 425°F (220°C): Quick cooking, best for thin pieces only
I personally find that 375°F gives me the best results for most chicken dishes, but 400°F works great when I’m in a hurry!
Oven Type Matters Too
If you’re using a convection oven (with a fan), your cooking time will be shorter. Convection ovens cook more quickly and evenly due to the circulating air.
For convection ovens:
- Reduce cooking time by about 2-3 minutes, OR
- Lower the temperature by 25°F (15°C) and keep the same cooking time
The Importance of Internal Temperature
The most reliable way to know when your chicken is done is to use a meat thermometer. Chicken is safe to eat when it reaches an internal temperature of 165°F (74°C).
Without a thermometer, you can check for:
- Clear (not pink) juices when you pierce the chicken
- Firm (not rubbery) texture when pressed
- White (not pink) meat all the way through
But honestly, a good meat thermometer is worth the investment. It’s the only way to be 100% sure your chicken is safe to eat without overcooking it.
Step-by-Step Guide to Perfectly Cooked Chicken Breast
- Preheat your oven to 375°F (190°C)
- Cut your chicken breast into uniformly sized pieces (1-2 inches)
- Season or marinate your chicken as desired
- Arrange pieces on a baking sheet, giving them space (don’t overcrowd!)
- Cook for 15-20 minutes, depending on thickness
- Check internal temperature – should reach 165°F (74°C)
- Let the chicken rest for 5-10 minutes before serving
Tips for Juicy, Perfectly Cooked Chicken Every Time
Prevent Drying Out
Chicken breast is notorious for drying out in the oven. Here are some ways to keep it juicy:
- Marinate before cooking – even 15 minutes helps!
- Cook at a moderate temperature rather than high heat
- Use foil to cover for part of the cooking time
- Don’t overcook – remove as soon as it hits 165°F
- Let it rest after cooking to redistribute juices
Use a Baking Rack
Placing your chicken on a rack over a baking sheet allows air to circulate underneath, resulting in more even cooking and a better texture. The chicken won’t sit in its own juices, which can make the bottom soggy.
Season Well
Chicken breast can be bland without proper seasoning. Some good options include:
- Garlic powder, onion powder, paprika, and salt and pepper
- Italian seasoning, oregano, and basil
- Chili powder, cumin, and smoked paprika
- Lemon pepper and herbs de Provence
I like to season my chicken before cooking so the flavors really get a chance to penetrate the meat.
FAQ: Your Chicken Cooking Questions Answered
Can I cook cut-up chicken breast from frozen?
While not ideal for texture, you can cook chicken from frozen. It will take about twice as long, and the results won’t be as good as thawed chicken. For food safety, make sure it reaches 165°F throughout. Whenever possible, thaw your chicken in the refrigerator overnight.
Can I cook vegetables with my chicken on the same pan?
Yes! This is one of my favorite time-saving tricks. Choose veggies that cook in a similar timeframe to chicken, like bell peppers, broccoli, or zucchini. Toss them in olive oil and seasonings, then arrange around your chicken pieces. Just make sure not to overcrowd the pan, which can lead to steaming instead of roasting.
How long should I let my chicken rest after cooking?
Let your chicken rest for 5-10 minutes after taking it out of the oven. This allows the juices to redistribute throughout the meat instead of running out when you cut into it. Cover loosely with foil to keep it warm.
What can I do with leftover cooked chicken breast?
Cooked chicken breast is super versatile! You can:
- Add it to salads
- Use in pasta dishes
- Make chicken tacos or quesadillas
- Add to soups and stews
- Make chicken salad sandwiches
Store leftovers in an airtight container in the refrigerator for 3-4 days.
Common Mistakes to Avoid
- Overcrowding the pan – This causes the chicken to steam rather than bake
- Skipping the preheating step – Always preheat your oven for even cooking
- Not using a meat thermometer – Visual cues aren’t reliable enough
- Cutting into the chicken immediately – Let it rest first!
- Cooking all pieces the same amount of time despite different sizes
My Favorite Easy Chicken Breast Recipe
Here’s a simple recipe I use all the time for quick weeknight dinners:
Simple Roasted Cut-Up Chicken Breast
Ingredients:
- 2 boneless, skinless chicken breasts, cut into 1-inch pieces
- 2 tablespoons olive oil
- 1 teaspoon garlic powder
- 1 teaspoon paprika
- 1/2 teaspoon dried oregano
- Salt and pepper to taste
Instructions:
- Preheat oven to 375°F (190°C)
- In a bowl, toss chicken pieces with olive oil and seasonings
- Arrange on a baking sheet lined with parchment paper
- Bake for 15-20 minutes or until internal temperature reaches 165°F
- Let rest for 5 minutes before serving
Conclusion
Cooking cut-up chicken breast in the oven doesn’t have to be complicated! The key points to remember are:
- Cut-up chicken pieces (1-2 inches) typically need 15-20 minutes at 375°F
- Always check for an internal temperature of 165°F
- Factor in size, oven type, and bone-in vs. boneless when determining cooking time
- Let the chicken rest after cooking
- Use seasonings and proper techniques to prevent drying out
With these tips in mind, you’ll be making perfectly cooked chicken breast every time. No more dry, overcooked chicken or unsafe undercooked pieces!
What’s your favorite way to season chicken breast? I’m always looking for new ideas to try in my kitchen!

What To Serve With Baked Chicken Bites
Serve as appetizers with dips or serve as a main dish with side dishes like potatoes, rice, pasta, and vegetables. Here are some recommendations:
Let the chicken bites cool completely, then pack it in an airtight container or a Ziploc and store it in fridge or freezer. It will keep well in the fridge for up to 3 days and in the freezer for up to 3 months. Reheat baked chicken bites in the oven, air fryer, or microwave.To reheat in the oven– Transfer the chicken to a baking dish and bake in the oven at 180C for 8 minutes or until heated through.In the air fryer– Air fry at 180C/380F for 4 minutes or until warmed to how you like it.
- When cutting the chicken into cubes, try to cut them as uniformly as possible so they cook evenly.
- For variation in taste, try different seasonings occasionally. Some good ones I recommend are jerk seasoning, lemon pepper, Peri peri, and blackening seasoning.
- Line the baking tray or dish with parchment paper for easy clean up.
- Add garlic butter, or lemon butter to the chicken bites after taking them out of the oven for even more flavor.

How To Bake Chicken Bites
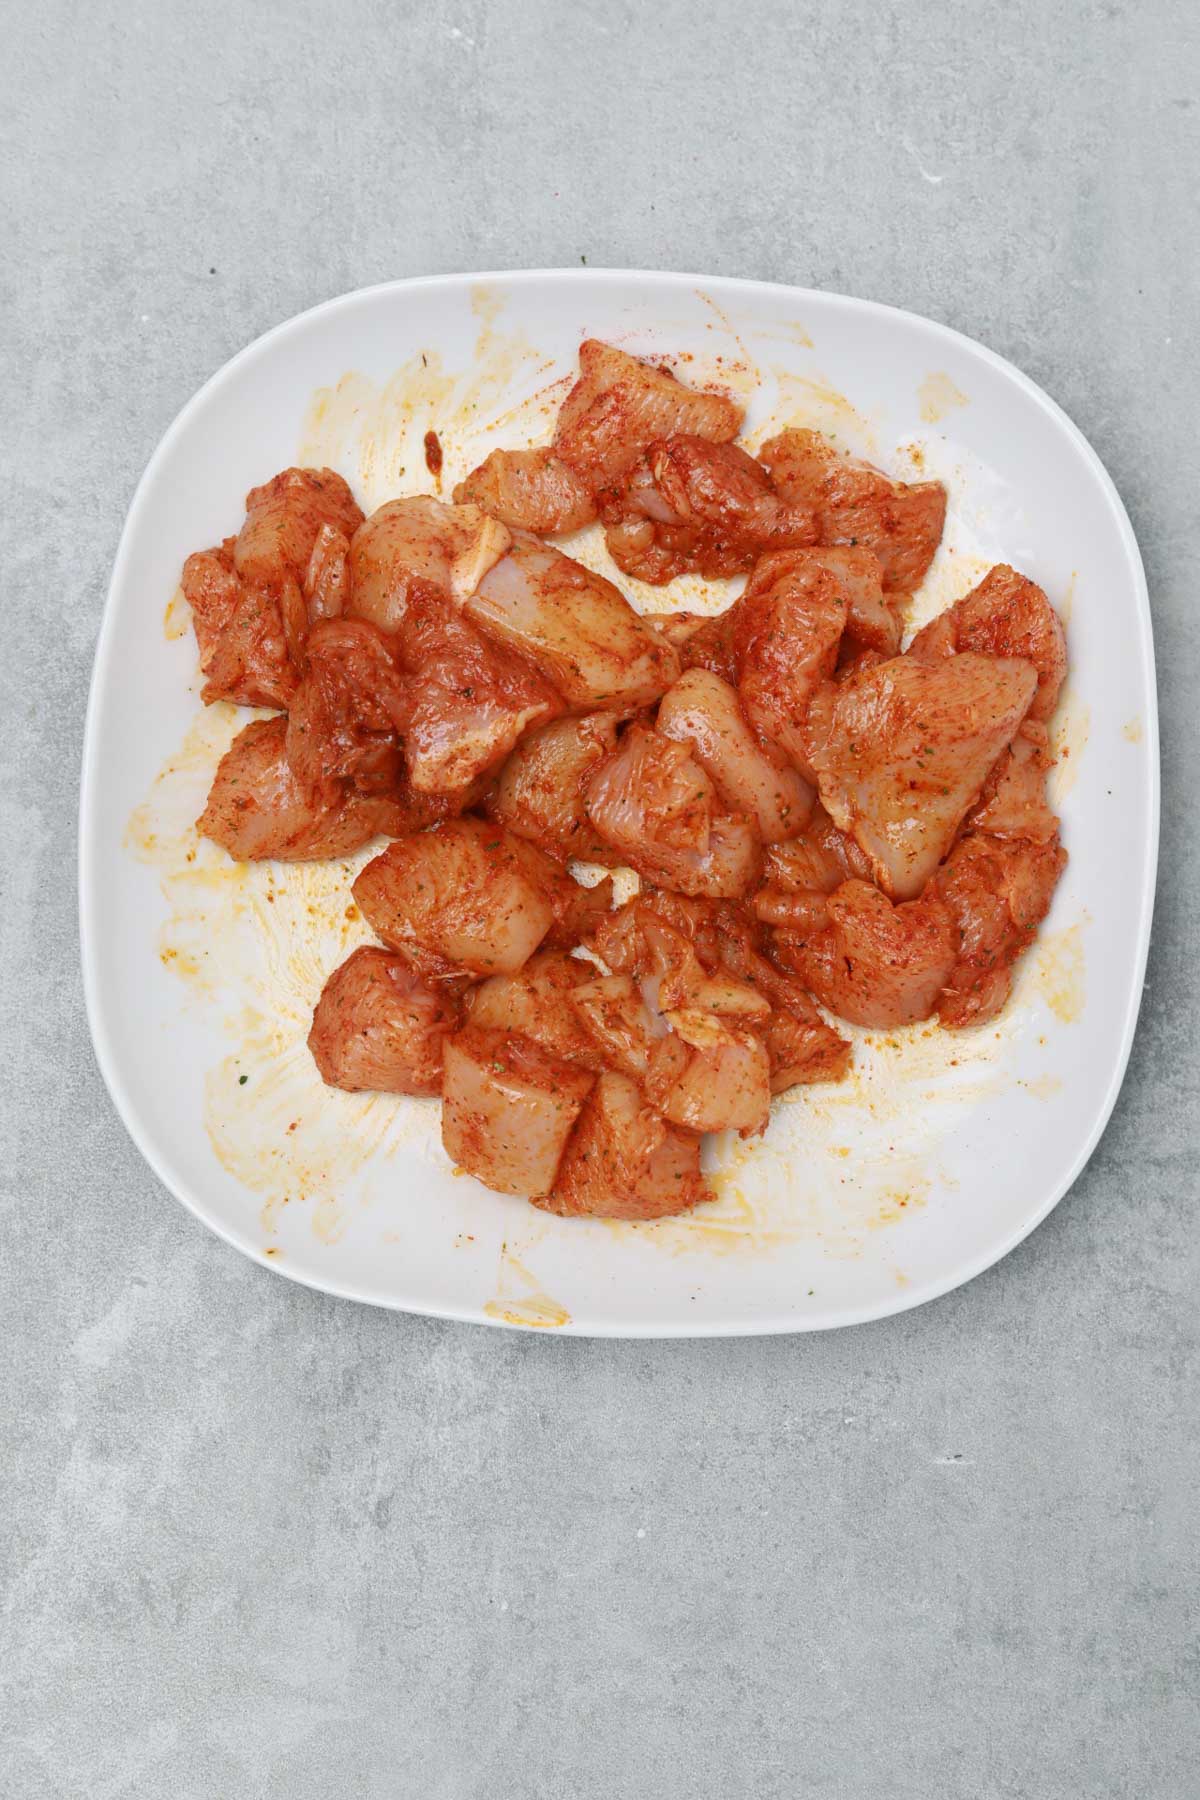
Step 1– Dice chicken breast or thighs into bite size cubes of about 1 inch and pat them dry. If you bought the ready-diced chicken, then skip this step and move on to the next step.
Step 2– Combine the paprika, garlic powder, onion granules, black pepper, crushed stock cube, salt and parsley.
Step 3– Add the cubed chicken into a bowl then add the seasoning and olive oil. Mix to combine.
Step 4– Transfer the seasoned diced chicken to a baking dish or tray.
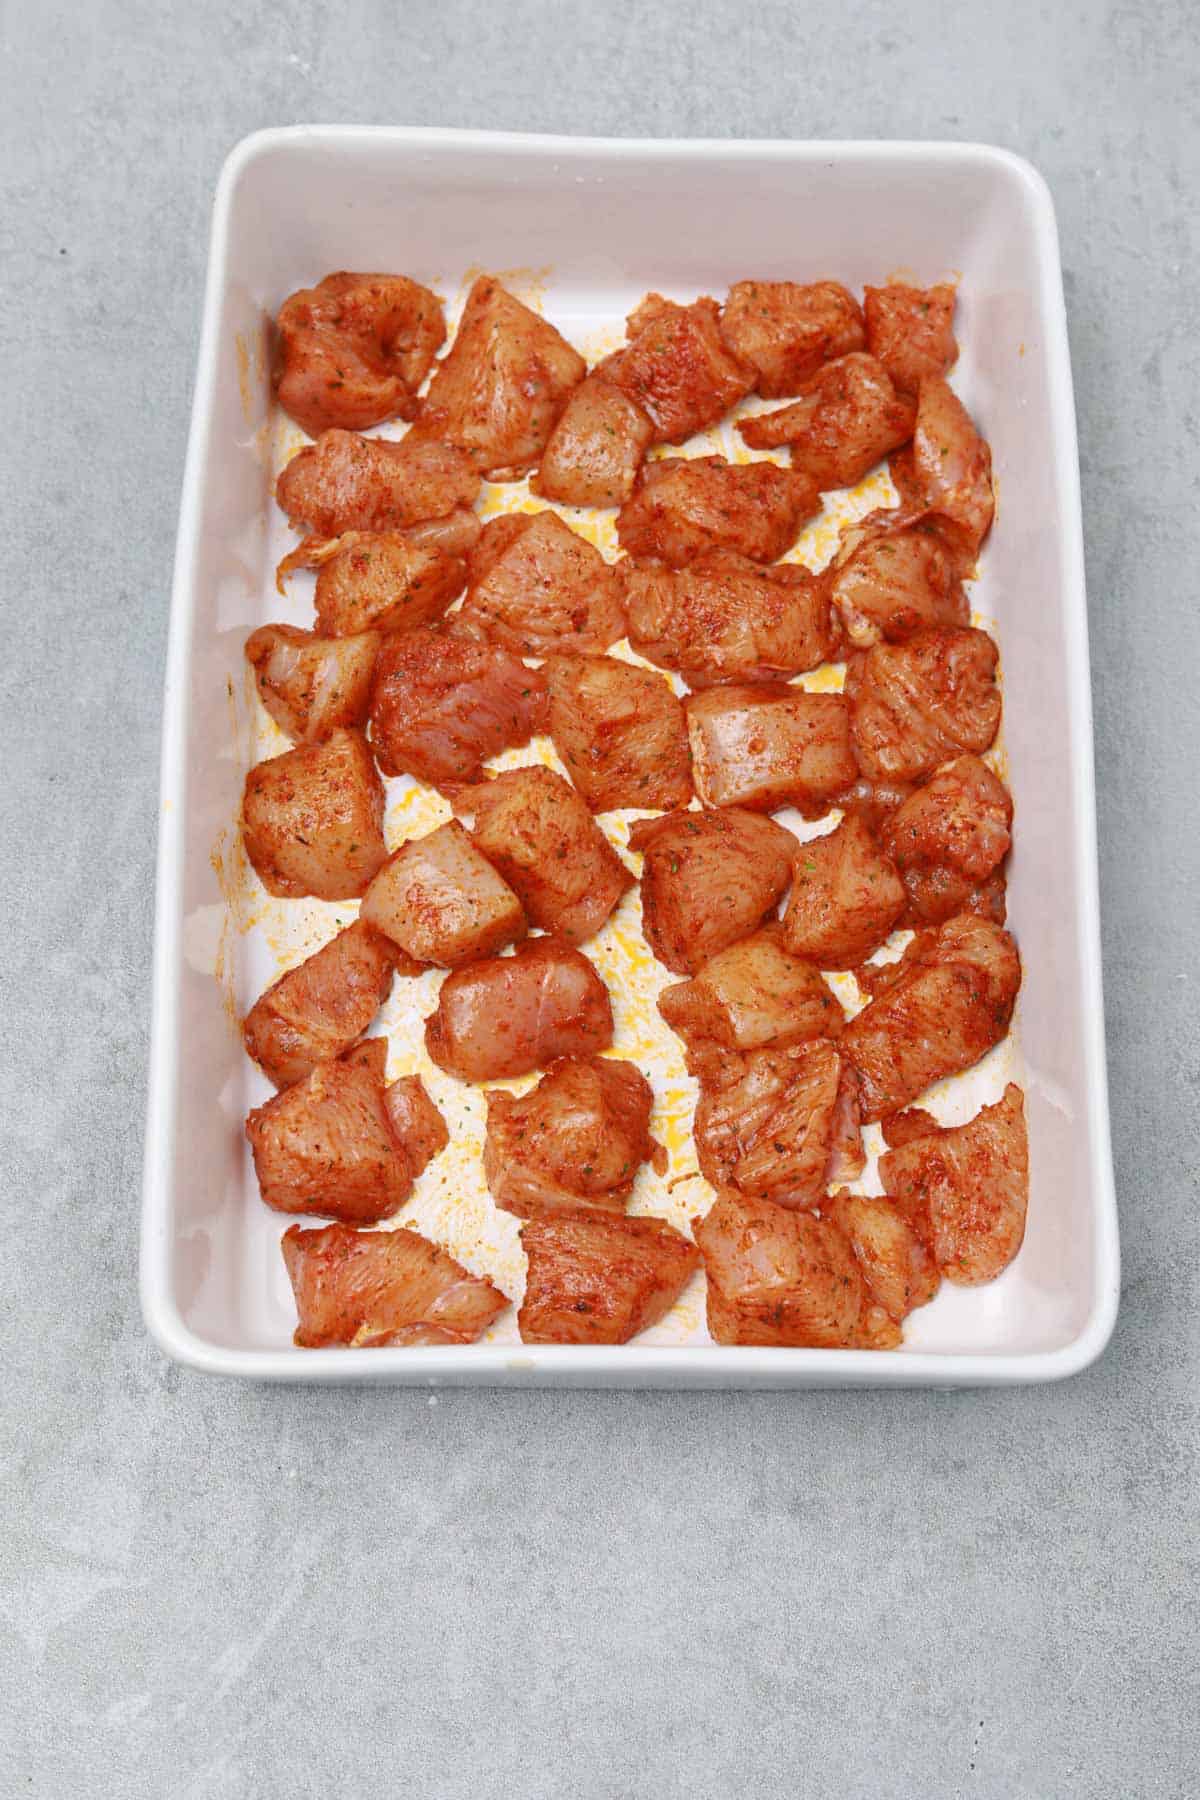
Tip- Arrange the chicken chunks so they are not overlapping and theres a bit of space between them.
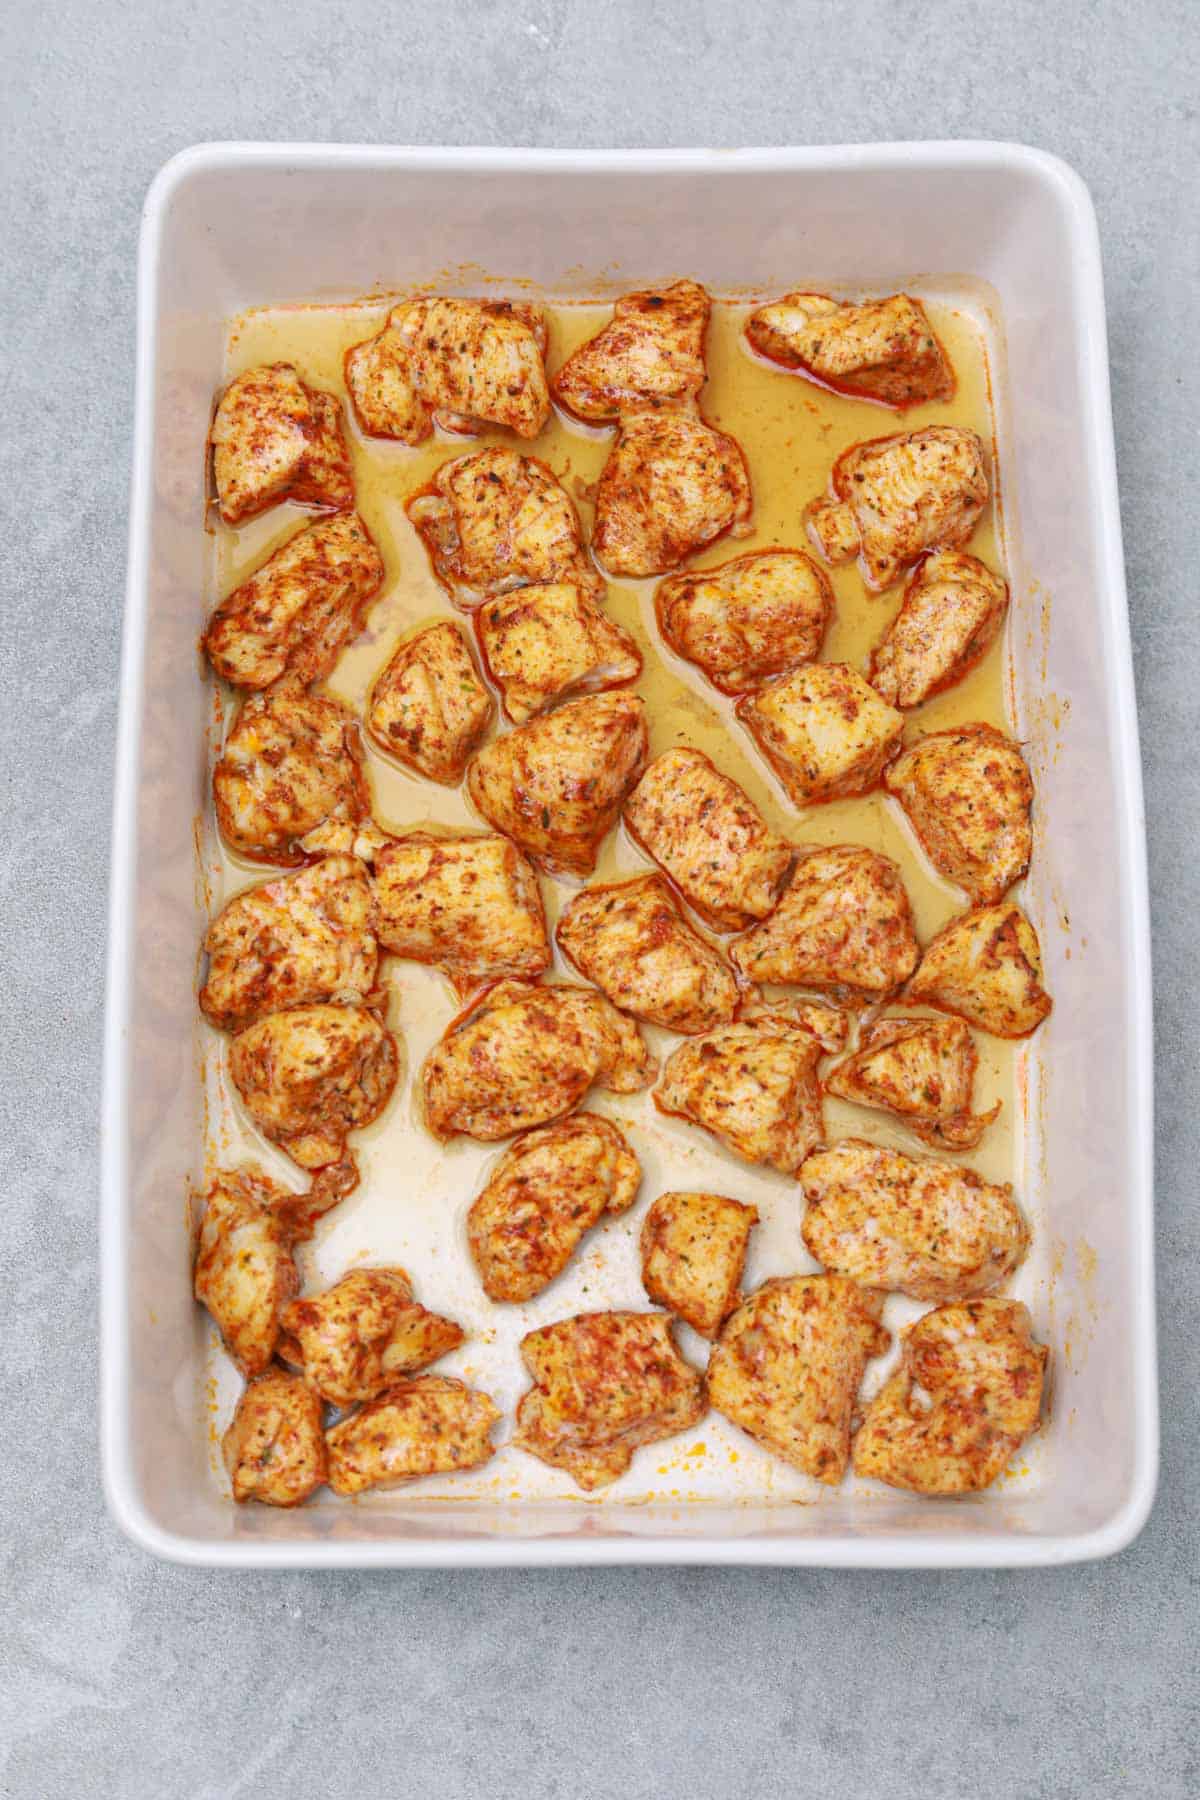
Step 5– Place the baking tray in the oven and bake chicken bites for 20 minutes at 200C/400F.
Tip- How long to cook diced chicken in the oven at 400 is 20-25 minutes. Chicken is cooked when the inside temperature reads at least 160F/70C. Dont overcook the chicken so it doesnt dry out.
Step 6– Bring the tray out of the oven. If adding garlic butter, or lemon butter sauce, add to the chicken now and stir to combine.
Step 7– Let the chicken rest for 5 minutes then serve.