Are you dreaming of fall-off-the-bone, incredibly juicy chicken legs that melt in your mouth? Look no further! I’ve spent years perfecting the art of slow-roasted chicken legs, and I’m excited to share all my secrets with you today. When it comes to cooking chicken legs at 275°F, patience isn’t just a virtue—it’s the secret ingredient!
The Magic of Low and Slow Cooking at 275°F
Cooking chicken legs at 275°F (135°C) requires about 2.5 to 3 hours for bone-in chicken legs. This might seem like a long time compared to higher-temperature methods but trust me, the results are worth every minute of waiting!
Why 275°F Works So Well
Low-temperature cooking (275°F) creates magic in your oven At this temperature
- The collagen in the chicken breaks down slowly
- Flavors develop more deeply
- Heat distributes evenly throughout the meat
- The chicken retains more moisture
- The meat becomes incredibly tender
Think of it like this high-heat cooking is like a sprint—quick but sometimes leaves you breathless. Low-heat cooking is a leisurely walk that gets you to a much more delicious destination!
Step-by-Step Guide to Perfect Oven-Baked Chicken Legs at 275°F
What You’ll Need
- 8 chicken legs (bone-in, skin-on work best)
- 1 teaspoon garlic salt
- 1 tablespoon black pepper
- 2 tablespoons melted butter
- 1 cup BBQ sauce (optional, but highly recommended)
- Meat thermometer
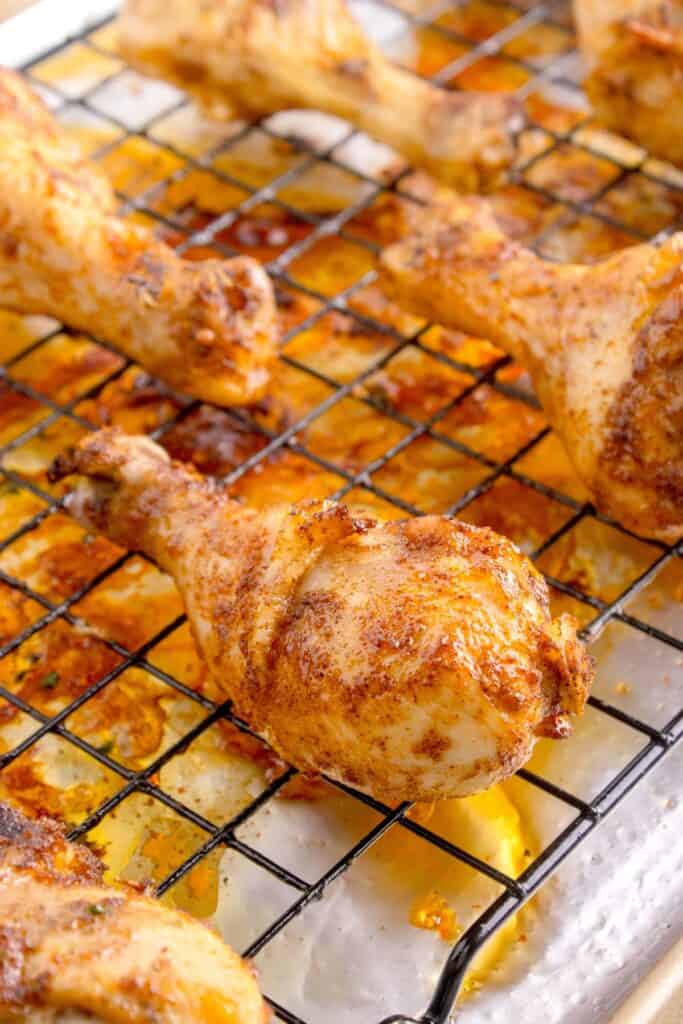
- Baking sheet with rack or foil-lined baking sheet
Preparation Steps
-
Preheat your oven to 275°F (135°C). Proper preheating is crucial for even cooking.
-
Prepare your chicken legs by patting them dry with paper towels. This step is super important! Removing excess moisture helps the skin crisp up better (even at low temps).
-
Season generously. Mix the garlic salt and black pepper in a small bowl, then brush the chicken legs with melted butter and sprinkle with the seasoning mix.
-
Arrange properly on your baking sheet. Make sure the legs aren’t touching each other—they need space for proper air circulation!
The Cooking Process
-
Bake for 2 hours at 275°F. During this time, the magic starts happening as the collagen breaks down.
-
Apply BBQ sauce (if using) after the initial 2 hours. This creates that beautiful, sticky glaze we all love.
-
Return to the oven for another hour, or until the internal temperature reaches 175°F-180°F (79°C-82°C).
-
Let them rest for about 10 minutes before serving. This allows the juices to redistribute throughout the meat.
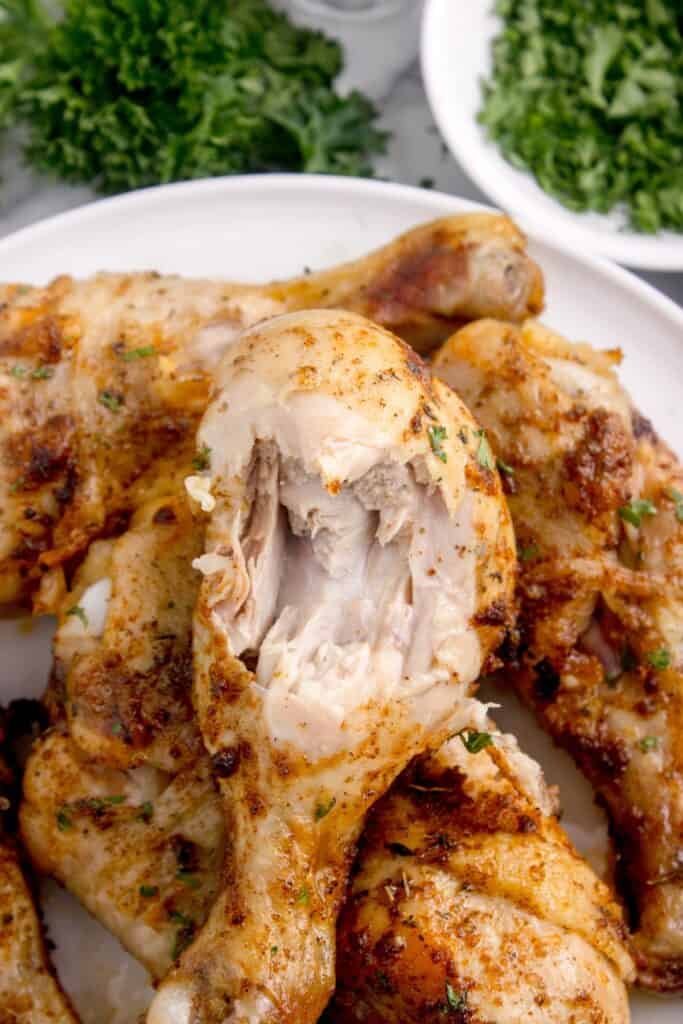
Pro Tip: While the USDA recommends 165°F (74°C) as a safe temperature for chicken, going to 175°F-180°F for chicken legs specifically results in that perfect fall-off-the-bone texture we’re aiming for.
How to Check for Doneness
The most reliable way to know your chicken legs are done is to use a meat thermometer. Insert it into the thickest part of the leg, avoiding the bone. You’re looking for:
- 165°F (74°C): Technically safe to eat
- 175°F-180°F (79°C-82°C): Perfect for fall-off-the-bone texture
No thermometer? Try the “fork test.” If the meat easily pulls away from the bone when you twist a fork in it, they’re done!
Getting Crispy Skin at 275°F
Let’s be honest—achieving super crispy skin at 275°F is challenging. But we’ve got options:
-
Broiling method: After the legs reach the desired internal temperature, switch your oven to broil for 3-5 minutes. Watch carefully to prevent burning!
-
Temperature bump: Increase the oven temperature to 400°F for the final 15-20 minutes of cooking.
-
Pat dry thoroughly: Before cooking, make sure the skin is extremely dry by patting with paper towels multiple times.
Common Questions About Cooking Chicken Legs at 275°F
Can I use frozen chicken legs?
No, I don’t recommend it. Always thaw your chicken legs completely before cooking at this temperature. Frozen legs will cook unevenly and might dry out on the outside before the inside is done.
How do I prevent the chicken from drying out?
Even though 275°F is great for moisture retention, there are extra steps you can take:
- Baste the legs with their own juices every 30-45 minutes
- Place a small pan of water in the oven to create humidity
- Use bone-in, skin-on chicken legs which naturally retain more moisture
- Apply a sauce or glaze during the last hour of cooking
What seasonings work best with this cooking method?
The beauty of slow-roasting is that the flavors have time to develop and penetrate the meat. Some great options include:
- Classic BBQ rub: brown sugar, paprika, garlic powder, onion powder
- Herbs de Provence with lemon zest
- Cajun seasoning for a spicy kick
- Simple salt, pepper, and garlic powder
- Italian herbs with olive oil instead of butter
Perfect Side Dishes for Slow-Roasted Chicken Legs
These juicy, tender chicken legs pair beautifully with:
- Creamy mashed potatoes
- Roasted vegetables (you can even add them to the same pan for the last hour)
- Coleslaw for a refreshing contrast
- Cornbread to soak up the delicious juices
- Simple green salad with vinaigrette
Troubleshooting Your Slow-Roasted Chicken Legs
My chicken legs are still tough after 2.5 hours!
No problem! Some chicken legs, especially from larger birds, need more time. Continue cooking for another 30-60 minutes, checking the internal temperature regularly. The meat should eventually become tender.
The skin isn’t crispy enough for my liking
If you’re a crispy skin fanatic, try this: cook the legs as directed, then remove them once they reach 175°F. Let them rest for 5 minutes, then return them to a 425°F oven for 10 minutes or broil for 3-5 minutes.
Can I make this recipe in advance?
Absolutely! These chicken legs reheat beautifully. Store them in an airtight container in the refrigerator for 3-4 days. To reheat, place them in a 350°F oven for 15-20 minutes with a splash of water or broth in the pan to maintain moisture.
Why I Love This Method (Personal Experience)
I’ve been cooking chicken legs for my family for years, and let me tell you, discovering the 275°F method was a game-changer! My kids used to leave bits of chicken on their plates, but now? Clean plates every time!
I remember the first time I tried this method—I was skeptical about the long cooking time. But when I took that first bite and the meat literally fell off the bone, I was converted! The texture was incredible, and the flavor had developed in ways I hadn’t experienced with higher-temperature cooking.
Nutritional Information
For those keeping track, here’s the approximate nutritional info per serving (2 chicken legs with BBQ sauce):
- Calories: 400
- Total Fat: 24g
- Saturated Fat: 7g
- Cholesterol: 120mg
- Sodium: 1280mg
- Total Carbohydrate: 18g
- Dietary Fiber: 1g
- Sugars: 14g
- Protein: 30g
Keep in mind these values can vary depending on the specific ingredients you use.
Final Thoughts
Cooking chicken legs at 275°F might test your patience, but I promise the results are worth the wait. There’s something truly special about meat that’s been given the time to develop flavor and tenderness naturally.
So next weekend, when you’re not in a rush, give this method a try. Set your oven to 275°F, prepare your chicken legs, and let the low, gentle heat work its magic for about 3 hours. Your family will think you’ve suddenly become a professional chef!
What’s your favorite way to season chicken legs? I’d love to hear your variations in the comments below!

Tips for the Best Baked Chicken Legs
- Pat the chicken dry with a paper towel to remove any moisture. I find this helps the oil stick to the chicken, making it extra crispy. I really notice the difference if I skip this step.
- Leave plenty of room on the baking sheet. If it’s too crowded, the chicken will steam instead of roast! I like to leave a few inches in between each leg.
- Store any leftover chicken legs in an airtight bag or container in the refrigerator for up to 3-4 days. They can also be frozen for up to 3 months!
- Reheat leftovers in the oven at 350 degrees F for about 15 minutes. I also reheat them in the air fryer for 5-7 minutes at 375 degrees.
Variations and Substitutions for Oven Baked Chicken Legs
- Add baking powder to the seasoning mix. This helps them crisp up even more when baked.
- Marinate the chicken in buttermilk for a few hours (4 hours tops) before seasoning for the most tender results. This step is totally optional, but I love doing it when I have time.
- Brush BBQ sauce over the drumsticks in the last 5 minutes or so of cooking for a sweet and flavor tangy.
- Brush the drumsticks with honey or maple syrup in the last 5 minutes of cooking for a sweeter glaze.
- Add a squeeze of lemon juice to the seasoning mix for a bright, citrus flavor. I love lemon, so I make this variation a lot!
- Add a pinch of cayenne pepper or red pepper flakes to add a little heat. I’ve even added a dash or two of buffalo sauce!