Cooking chicken breast on a Cuisinart Griddler is a quick and easy way to make delicious grill-marked chicken at home. With the right timing, you can achieve moist tender chicken breast with nice char lines every time. In this comprehensive guide, we’ll cover everything you need to know about cooking chicken breast on a Cuisinart Griddler, from prep to doneness.
The Cuisinart Griddler is a versatile countertop appliance that can be used as a grill, griddle, or panini press It has interchangeable plates that allow you to switch easily between grilling, cooking, and pressing.
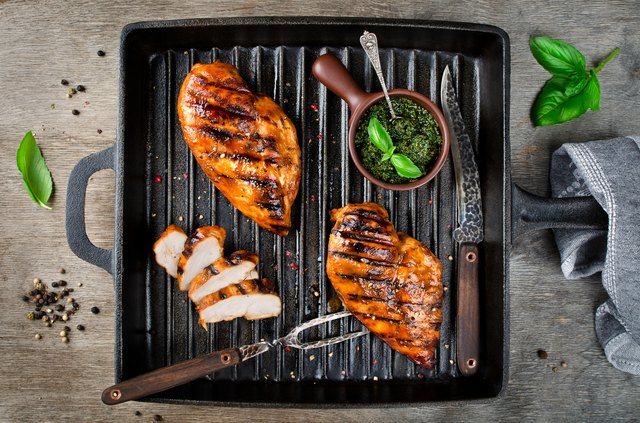
When set to grill mode and preheated properly the Cuisinart Griddler can mimic the results of an outdoor grill, providing attractive sear marks on chicken breast along with a smoky charbroiled flavor. Its clamshell design allows the chicken to cook from both the top and bottom at once, reducing overall cook time.
Compared to oven baking or pan frying, the Cuisinart Griddler can cook chicken breast faster. And unlike a broiler, it offers more control over the level of charring. This makes it an ideal quick-cooking method for weeknight dinners.
Preparing Chicken Breasts for the Cuisinart Griddler
To ensure your chicken breasts cook up tender and juicy on the Griddler, it’s important to prep them properly before cooking:
-
Pound to an Even Thickness: Chicken breasts often come in uneven thicknesses, which can lead to uneven cooking. Place each breast between sheets of plastic wrap and use a meat mallet or rolling pin to gently pound them to an even 1/2″ thickness.
-
Marinate for Flavor: Marinating is key for adding moisture and flavor to chicken breast. Marinate for 1-2 hours in the fridge in a zip-top bag with your choice of oil, acid, and spices.
-
Pat Dry: Make sure chicken is patted very dry before cooking. Excess moisture on the surface can prevent browning and cause steaming instead of searing.
Proper preparation ensures your chicken cooks evenly and develops a nice char on the Cuisinart Griddler. Now let’s get to the important part – timing!
How Long to Cook Chicken Breast on a Cuisinart Griddler
Cooking times can vary slightly based on the size, thickness, and bone-in vs boneless chicken breasts. Here are general guidelines for how long to cook chicken breast on a Cuisinart Griddler:
-
Boneless, Skinless Chicken Breast: Grill for 5-7 minutes per side, depending on thickness. Chicken should register 165°F internally.
-
Bone-In Chicken Breasts: Grill bone-side down first for 8-10 minutes, then flip and cook 5-7 minutes more until chicken is 165°F.
-
Flattened, Stuffed Chicken Breasts: Grill stuffed side down first for 7-8 minutes, then flip and grill 5-6 minutes more until chicken reaches a safe 165°F.
-
Chicken Breast Cutlets/Tenders: Grill for 3-4 minutes per side. Check temperature with an instant read thermometer before removing.
These times are for grilling on a preheated Cuisinart Griddler set to a medium-high temperature of around 400°F. Always check chicken with a food thermometer to confirm it has reached a safe minimum internal temperature of 165°F before serving.
If your chicken is thicker than 1/2-inch, you may need to grill a minute or two longer. Let chicken rest 5 minutes before slicing into it.
Handy Tips for Cooking Chicken Breast on the Cuisinart Griddler
Follow these tips and tricks for perfect grilled chicken breast on your Cuisinart Griddler every time:
-
Preheat the Griddler fully before adding food. This helps ensure proper searing.
-
Use a digital food thermometer to check for doneness, especially for thicker cuts. Don’t rely on cook times alone.
-
Allow chicken to rest 5 minutes before cutting into it so juices can redistribute. This keeps it extra moist.
-
Avoid overcrowding chicken on the Griddler. Leave space between pieces so steam can escape.
-
Use a grill press on thicker breasts to ensure even contact with the grill plates.
-
Clean grill plates well after each use to prevent flavor transfer. Use a nylon brush for stuck-on bits.
-
If chicken browns too quickly, lower heat. If not browning enough, increase heat.
With the proper prep, cook times, and temperature, you can achieve restaurant-quality grilled chicken breast in the convenience of your own kitchen using the versatile Cuisinart Griddler. Crisp, grill-marked chicken is just a few minutes away with this handy countertop appliance.
Common Questions About Cooking Chicken on a Cuisinart Griddler
Can you cook frozen chicken breast on a Cuisinart Griddler?
It’s best not to cook frozen chicken breast directly on the Griddler. Thaw breasts in the refrigerator completely before grilling for food safety and to prevent overly long cook times.
What temperature should I cook chicken at on my Cuisinart Griddler?
Preheat to 400°F and maintain a medium-high heat while grilling. Check chicken with a thermometer for doneness instead of relying on time alone.
Do I need to use oil or grease on the Cuisinart Griddler for chicken?
You don’t need extra grease if chicken has been marinated or seasoned. But you can lightly brush or spray oil on the hot grill plates first for easier release if chicken is sticking.
How do I get good grill marks on chicken breast using the Cuisinart Griddler?
Use a grill press to ensure chicken maintains close contact with the hot grill plates. Don’t overcrowd chicken and let some steam escape so it sears rather than steams.
Can I use metal utensils to turn chicken on the non-stick Cuisinart Griddler plates?
Avoid metal spatulas or tongs on the non-stick Griddler plates so you don’t damage the coating. Use wood, plastic or silicone instead.
Whether you’re a novice or a pro home cook, the Cuisinart Griddler makes it easy to achieve delicious, quick-cooked chicken breast with attractive char marks. Follow this guide for how long to cook chicken breast on a Cuisinart Griddler and you’ll have perfectly grilled results in minutes.
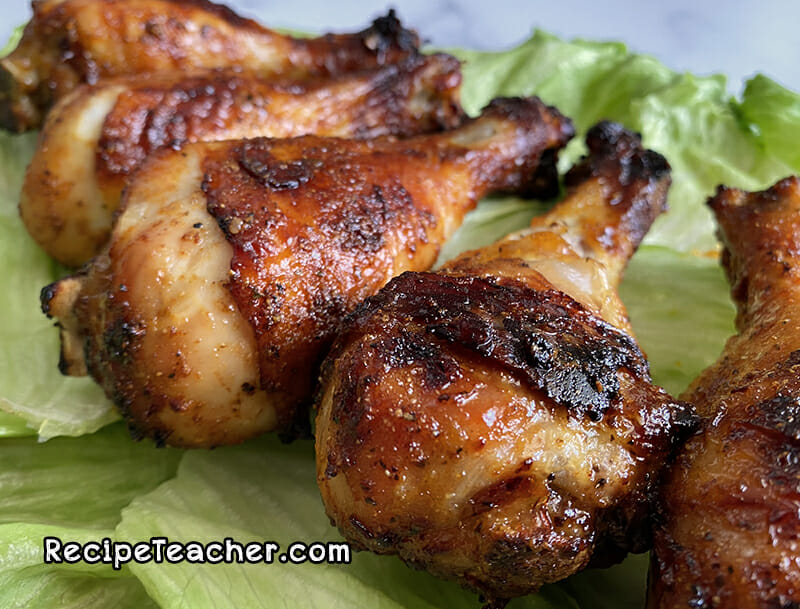
Don’t Need to Use Sauce
For this recipe, we do not use sauce during the cooking. The ingredients are going to give you a nice barbecue flavor, while still letting the flavors of the chicken shine through. If you want to add sauce, you certainly can. Just add your favorite BBQ sauce in the last 5 minutes of the cooking time. But trust me, I don’t think you’ll need it.
Other Recipes You Might Like
If you like this recipe, you’re really gonna love a few more of our air fryer chicken recipes!
- Best Damn Air Fryer Chicken Wings. Oh my goodness! Take homemade wings to a new level with this wings recipe. We expertly season the wings and then air fry them to crispy, juicy perfection. No messy sauces either. These wings are sure to be a big hit for any occasion.
- Best Damn Air Fryer Chicken Thighs. We use boneless, skinless chicken thighs and a few simple ingredients to make the most mouthwatering chicken thighs that can be made in an air fryer.
- Best Damn Air Fryer Chicken Tenders. Making chicken tenders in an air fryer is absolutely the best way to enjoy these crispy treats. We make a simple breading and use boneless, skinless chicken breast to make tenders that will rival any restaurant-made chicken tenders.
For this recipe the chicken must be defrosted or fresh.
The cayenne adds a little kick and helps boost the other flavors. You can omit the cayenne entirely if you want to heat at all.
Make sure that you pat the chicken legs dry with a paper towel first. Out of the package, there will be lots of water moisture. Too much moisture can cause the skin to steam, and we won’t get the Maillard reaction that gives us that beautiful look and taste. Also, temps can vary from appliance to appliance. If your chicken legs aren’t showing much color after 15 minutes, turn the temp up to 400° for the final minutes of cooking time.
We have a great recipe for Best Damn Oven Baked Chicken Legs!