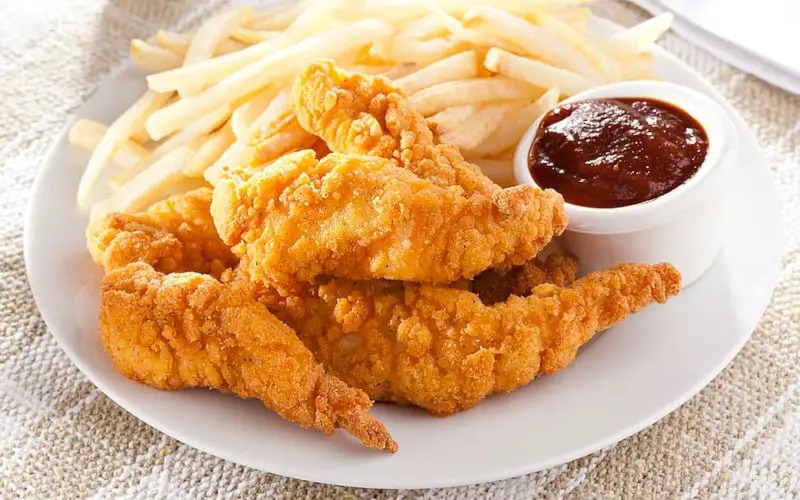
Chicken strips, also known as chicken tenders or chicken fillets, are a versatile and delicious ingredient When boiled properly, they can be juicy, flavorful and perfect for using in salads, sandwiches, soups and more But how long should you boil chicken strips for optimal texture and taste? This comprehensive guide will walk you through everything you need to know for boiling foolproof chicken strips every time.
What are Chicken Strips?
Chicken strips are thin, long cuts of chicken breast meat that have been sliced lengthwise from the breast. They are sometimes called chicken tenders or chicken fillets.
Chicken strips usually come from the tenderloin part of the breast, which is attached to the underside. This area doesn’t get much exercise, so the meat is very tender. The strips are all white meat and contain no bones.
When sold raw in stores, chicken strips are often coated in breadcrumbs or batter and marketed as ready for cooking methods like frying or baking. Plain, uncooked chicken strips are also available and perfect for boiling.
Benefits of Boiling Chicken Strips
There are a few advantages to boiling chicken strips rather than using other cooking methods:
-
It’s fast: Boiling takes only 10-15 minutes, making it one of the quickest cooking methods. This is perfect for weeknight meals or when you’re short on time.
-
Lean and healthy: Boiled chicken has a light flavor and comes out moist, juicy and tender. It retains nutrients better than high-heat methods like frying.
-
Shreds easily: The boiled chicken fibers relax and separate, making the meat easy to shred or chop. This is ideal for meal prepping or using in recipes.
-
Versatile: Shredded boiled chicken works well in salads, sandwiches, pasta dishes, soups and more. It’s a handy pre-cooked ingredient to have on hand.
-
Simple method: Boiling chicken requires minimal prep or cleanup. Just add your strips to a pot of water and boil.
How Long to Boil Chicken Strips
The exact boiling time can vary based on the thickness and size of your chicken strips. Here are general guidelines:
-
Small strips, 1/2 inch thick: Boil for 8-10 minutes.
-
Medium strips, 3/4 inch thick: Boil for 10-12 minutes.
-
Large strips, 1 inch thick: Boil for 12-15 minutes.
-
Frozen strips: Add 2-3 minutes to the time above.
To ensure food safety, use a meat thermometer to double check doneness. Chicken is fully cooked when the internal temperature reaches 165°F. If needed, simmer a minute or two longer.
Watch the pot during boiling. If the water is at a rapid boil the whole time, the chicken may end up overcooked. Keep the heat at a gentle simmer and the strips will cook evenly.
Step-by-Step Guide
Follow these simple steps for perfect boiled chicken strips every time:
1. Prepare the Chicken Strips
-
Buy prepackaged plain chicken strips or slice your own from chicken breasts.
-
Cut the strips into the desired size, anywhere from 1/2 inch to 1 inch thick. Uniform sizing will help them cook evenly.
-
Pat the chicken dry with paper towels. This helps it brown slightly as it boils.
2. Fill a Pot With Water
-
Choose a pot with a lid that’s large enough to hold the chicken strips in a single layer. This allows them to cook through evenly.
-
Fill the pot about 2/3 full with water. The water level should cover the chicken by about 1 inch.
-
Bring the water to a gentle boil over high heat.
3. Add Chicken Strips to the Pot
-
Once the water is boiling, add the chicken strips.
-
For even cooking, add them in a single layer if possible, not piled on top of each other.
4. Boil the Chicken
-
Allow the water to return to a gentle simmer.
-
Let the strips simmer for the estimated time based on thickness. Start checking for doneness a few minutes early.
-
Use tongs to occasionally turn and separate the pieces so they cook evenly.
-
If needed, adjust the heat to maintain a gentle simmer. Boiling too vigorously can make the chicken tough.
5. Check for Doneness
-
After the estimated cook time, use a meat thermometer to test the chicken.
-
Insert into the thickest part without touching bone. It should read 165°F when done.
-
If underdone, simmer for another 2-3 minutes and recheck.
6. Remove From Heat
-
Immediately drain the chicken strips in a colander and rinse with cool water to stop the cooking.
-
Use the boiled chicken right away or let it cool completely before refrigerating.
Tips for the Best Results
Follow these extra tips for perfectly cooked, flavorful boiled chicken strips:
-
Pat the raw chicken dry before boiling for better browning.
-
Use low or medium-low heat to prevent overcooking. Simmer, don’t boil vigorously.
-
Add aromatics to the pot like garlic, onion, carrots, celery, peppercorns or herbs for extra flavor.
-
Cool in an ice water bath if you want to stop cooking quickly.
-
Use poultry shears or a sharp knife to cut cooked chicken for salads or sandwiches.
-
Store boiled chicken strips in the fridge for up to 3-4 days. Freeze for longer storage.
-
Season the boiled chicken as desired when using in recipes. It absorbs sauces and spices well.
Common FAQs
Here are answers to some frequently asked questions about boiling chicken strips:
How do I know when they’re done boiling? Check the internal temperature in the thickest part with a meat thermometer. 165°F means it’s fully cooked.
Can I boil frozen chicken strips? Yes, just add a couple extra minutes to the cook time and watch closely.
Should I simmer them with a lid on or off? A partially covered pot is best to prevent boiling over but still allow steam to escape.
Is the broth safe to consume? Yes, you can strain and use the broth. It has a light chicken flavor.
Can I shred the chicken and freeze it? Absolutely. Shredded boiled chicken freezes well for meal prepping.
Time to Get Boiling!
Now you’re ready to perfectly boil juicy, tender chicken strips! This simple cooking method takes just 10-15 minutes for a healthy, versatile addition to recipes.
Refer to this guide for tips on prep, cook time, doneness and storage. Soon you’ll be shredding, slicing and enjoying delicious boiled chicken strips in your favorite dishes. Grab those strips and get boiling!
Boiled Chicken vs. Poached Chicken
In this case, “boiled” is a little bit of a misnomer. Youre not boiling the chicken for the whole time (this would result in tough, dry chicken!). Youre only boiling it initially to bring the liquid up to temp, but then you finish it in the simmering liquid.
Technically, this method is called “poaching,” which just means simmering ingredients in a small amount of liquid.
This is all to say that for this recipe, there is no real difference between boiled chicken or poached chicken.
:max_bytes(150000):strip_icc()/__opt__aboutcom__coeus__resources__content_migration__simply_recipes__uploads__2017__03__2017-03-06-Poached-Chicken-15-01d4692223c8485b8fd666410f3b9440-2-2-2e3b0e82a6964e4aa35425451c71a643.jpg)
Add Flavor to Your Boiled Chicken
For seasoning the poaching liquid during cooking, I most frequently use peppercorns, bay leaves, lemon slices, and garlic. You could also think about using sliced ginger, sliced scallions, fresh rosemary or thyme, or orange slices.
:max_bytes(150000):strip_icc()/__opt__aboutcom__coeus__resources__content_migration__simply_recipes__uploads__2017__03__2017-03-06-Poached-Chicken-13-fffe70eeb220465c827bc37dd4c2eeef.jpg)