Raising backyard chickens can be an incredibly rewarding experience From fresh eggs to fun, feathery companions, chickens make great additions to any homestead However, there may come a time when you need to humanely end a chicken’s life. This could be due to old age, illness, injury, or even for meat.
Killing an animal is never easy But when done properly and humanely, euthanasia can minimize pain and suffering Here are some of the most humane methods for humanely killing a chicken
Cervical Dislocation
Cervical dislocation involves quickly dislocating the chicken’s neck to sever the spinal cord. When done correctly, unconsciousness occurs within 2-5 seconds. It causes rapid death by cutting off blood flow to the brain.
To perform cervical dislocation:
-
Grasp the chicken’s legs with one hand and hold it firmly against your body to restrict movement.
-
With your other hand, grasp the base of the head where it meets the neck.
-
Pull the head down to extend the neck fully.
-
Then pull the head up and back in a firm, quick motion to separate the spinal cord from the brain.
-
Check for limpness and lack of reflexes to ensure death.
Cervical dislocation requires some physical strength and confidence. But when done swiftly, it is extremely humane. Be sure to pull the head backward, not just downward to break the neck.
Decapitation
Decapitation severs the head from the body with a sharp blade. Unconsciousness normally occurs within 10-15 seconds. It causes death by removing the brain and cutting off oxygenated blood flow.
To humanely decapitate a chicken:
-
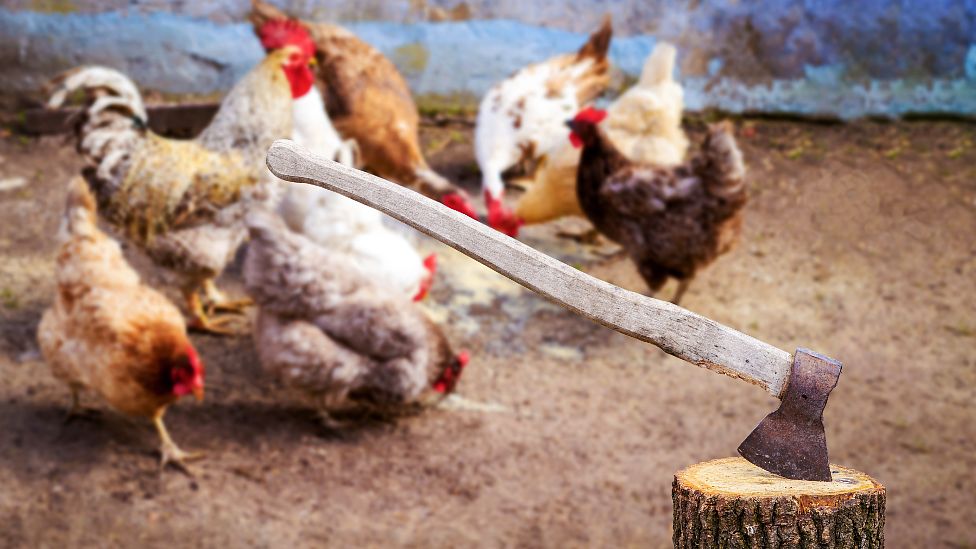
Use a sharp hatchet, axe, or butcher knife to ensure a clean cut.
-
Restrain the bird firmly in a cone or your hands.
-
Identify the soft joint between the skull and spine.
-
Position the blade above this joint and cut down in one swift, forceful motion to remove the head.
-
Avoid simply cutting the throat without removing the head.
For safety, you can use a stump with nails to hold the chicken’s head in place while you swing the blade. Just be sure your tool is razor sharp for a quick, humane death.
Exsanguination
Exsanguination involves cutting the jugular veins and carotid arteries to bleed the bird out. This method is common for butchering chickens to preserve meat quality.
To bleed a chicken:
-
Restrain the bird upside down in a cone to restrict movement.
-
Feel for the large arteries on either side of the neck.
-
Make a deep cut across the arteries to sever them completely.
-
Cut the blood vessels on one side only.
-
Death normally occurs within 90 seconds from blood loss.
However, cutting the throat alone is not acceptable. The bird remains conscious for up to 4 minutes until the brain is depleted of oxygen. So bleed out must be immediately followed by:
- Pithing – Inserting a knife into the brain via the roof of the mouth.
OR
- Decapitation – Removing the head after bleeding.
This ensures the chicken loses consciousness quickly for a humane death.
Other Acceptable Methods
There are a few other methods considered humane when performed correctly:
-
Blunt force trauma – Striking the back of the head with sufficient force to destroy brain tissue. However, this requires precision and can be emotionally difficult.
-
Captive bolt stunning – Using a captive bolt gun to fire a rod into the chicken’s brain to cause immediate unconsciousness before killing. But this requires specialized equipment.
-
Electrocution – Using specialized pliers to pass an electric current through the brain. This causes immediate unconsciousness when done properly.
-
Gas methods like carbon dioxide and nitrogen displacement can humanely render a chicken unconscious before death. But these also require extensive specialized equipment.
Unacceptable Methods
Some conventional killing methods are very inhumane. Avoid these techniques:
-
Cutting the throat without decapitation or pithing afterwards.
-
Suffocation.
-
Freezing.
-
Poisoning.
-
Drowning.
-
Twisting or breaking the neck without decapitation.
-
Hitting the head without sufficient force.
-
Spinning or throwing the chicken.
Any method that does not immediately destroy brain function will likely cause unnecessary suffering.
Things to Consider
Here are some other tips for humanely killing chickens:
-
When in doubt, consult your veterinarian to euthanize the bird for you.
-
Handling the bird gently and calmly reduces stress.
-
Act decisively once you’ve decided euthanasia is needed.
-
Dispose of remains properly by burning or burying.
-
Be prepared for involuntary muscle twitches after death. The chicken is not suffering at this point.
-
Have a sharp backup method like pithing ready in case your technique doesn’t succeed.
-
Euthanize a sick or injured chicken sooner rather than later to prevent further suffering.
Killing an animal is intensely emotional. But humane euthanasia minimizes pain and distress when a chicken’s quality of life declines. Perform cervical dislocation, decapitation, captive bolt stunning, or exsanguination swiftly, decisively, and with respect to reduce suffering. Avoid unnecessarily drawn-out methods at all costs. With the proper technique and mindset, you can give your beloved chickens a peaceful passing.
Killing and dressing birds
- Carefully remove birds from coops and crates to reduce bruising.
- Place a bird in a killing cone or hang it from a shackle.
- If you don’t have one of these, you can suspend poultry from a clothesline or other support by the feet. Use a short piece of rope with a small square of plywood held fast to the end by a knot.
- Hold the head in one hand and pull down for slight tension to steady the bird.
- Use a sharp knife to cut the birds throat from the outside just behind the lower jaw.
- Hold the front part of the head securely to avoid cutting your hand.
- This should cut the large and cross vein and allow them to bleed freely.
- To reduce carcass contamination, don’t cut the esophagus or windpipe.
- Hold the bird’s head for a while until the bleeding and flopping stops.
- This prevents excess blood splatter.
- Catch the blood in a container.
Other farm slaughter methods include wringing the birds neck or chopping off the head with an axe. Not as much blood may be pumped out of the carcass by those methods as with a good throat cut.
Dry picking usually only occurs for some waterfowl processing. Pick these birds right after they have been bled.
Keep boiling water nearby to keep the scald water hot enough during the entire processing period. Always monitor the water temperature with a thermometer.
- Scald young birds at 125 to 130 F for 30 to 75 seconds. The time needed for good feather removal leaves the outer layer of skin intact.
- Scald older birds near 140 F for 30 to 75 seconds for easier feather removal. The cuticle layer of the skin will normally come off at this temperature.
- Scald duck and geese at 160 to 170 F for 1 to 2 minutes. Waterfowl are harder to remove feathers from.
Adding detergent to the scald water helps water go through the feathers, especially on waterfowl.
The time and temperature of the scalding method affects the appearance of the dressed carcass and how easy the feathers come out.
Lower temperatures require a longer scald time. Higher temperatures require a shorter scald time but increase the risk of over scalding. Higher temperatures also result in the loss of the yellow cuticle skin layer, which makes the skin easier to tear when removing feathers.
- Immerse the bird, head first in the scald water while holding the bird by the shanks.
- Move the bird up and down and side to side in the scalding container for more even and thorough scalding. When you achieve a proper scald, you can easily remove the tail and wing feathers.
- Re-dip the birds for a short time if there are hard to remove feathers.
- After scalding, hang the bird back on the rope or shackle.
- Using slight pressure, gently rub the carcass to quickly and easily remove the feathers.
- Don’t delay picking after the scalding.
- Develop a picking procedure. Pull the large tail and wing feathers first and then set a routine for removing the rest of the body feathers.
- Rinse the bird with water after removing most of the feathers.
- Using slight pressure, rub the carcass to remove any remaining small feathers and pinfeathers.
- A pinning knife or a dull knife helps remove the small pinfeathers.
Dipping waterfowl in paraffin wax removes small feathers and down after you’ve removed most feathers.
Follow the wax manufacturer’s directions. Usually, dipping a fairly dry carcass, at least twice in a 135 to 160 F wax bath and then in cold water will build up a wax coat to remove feathers. Some directions instruct a higher temperature for the wax dip, with a dip in water or short air cooling period between wax dips.
Remove the wax when it’s at the flexible stage and isn’t cold enough to be brittle. You can reuse the wax by heating it and straining out the feathers. Dirt, blood and water will separate from the melted wax.
Singeing usually isn’t needed for young birds. More mature chickens and turkeys may have a few hairs remaining after you remove the feathers. Use a bottle gas torch or an open flame on a gas range to singe these hairs. Be careful you don’t burn yourself or the bird’s skin.
Cut off the head between the head and first neck vertebra. Use a twisting motion to cut through the joint. Don’t try to cut through the bone.
Remove the neck and skin with a shears or knife if you plan to cut up or split the bird for frying or barbecuing. Make sure you cut close to the carcass.
- Split the neck skin, inserting the knife through the skin at the point of the shoulders. Cut forward, guiding the knife up the back of the neck.
- Pull the skin loose from the neck.
- Pull the crop, trachea (windpipe), gullet (esophagus) loose from the neck skin and cut off where they enter the body cavity.
- Cut off the neck. You may prefer to do this after chilling the carcass. Cut the neck muscle into the bone around the neck at the shoulder and then twist off.
- Wash the neck and then place it in the giblet chilling container.
With the bird breast-up on a table, hold the shanks with one hand. Apply upward pressure on the hock joint. With a sharp knife, cut through the hock joint starting on the inside of the joint. Pull the joint into the knife while slightly moving the birds feet to help you cut through the joint.
With the bird breast-down on the table, start the cut 1 inch forward from the oil gland nipple. Cut deep to the tail vertebra. Then follow the vertebra to the end of the tail in a scooping motion to remove the oil gland.
The “J” cut and the bar cut are two cuts for opening the body cavity. Producers often use the “J” cut for broilers and other small poultry not trussed when cooked. Producers desire trussing for roasting turkeys, capons or other large fowl. Thus they use the bar cut for these birds.
- Pull the abdominal skin forward and up away from the tail of the bird.
- Cut through the skin and body wall. Start the knife point just to the right of the keel point and extend the cut to the tail next to the vent.
- Make the cut slowly and don’t cut into the intestine.
- Use a shallow cut with just the point of the knife penetrating the skin and body wall.
- Complete the cut around the vent, keeping the knife next to the back and tail far from the vent.
- Cut entirely around the vent and pull the vent and end of the large intestine out away from the opening of the body cavity.
- This will prevent contaminating the inside of the carcass.
- Make a half-circle cut around the vent next to the tail.
- Use short, slow strokes and avoid cutting the intestine.
- Insert your index finger up over the intestine through the opening you cut.
- Use your finger as a guide and extend the cut with a knife or shears to complete the circle and free the vent.
- Pull the vent and short section of the intestine out to prevent contaminating the inside of the carcass.
- At 1.5 to 2 inches below the keel point, make a cut from side to side of the bird about 3 inches long.
- This will leave a bar of skin about 1.5 to 2 inches wide between this cut and the opening where you cut the vent free.
- Thread the end of the intestine up over the skin bar and leave it extended from the body cavity.
- Stretch the abdominal opening, and insert your hand as far forward as you can in the body cavity. Detach the organs from the wall as you go.
- Pick up the heart between your index and second finger.
- Cup your hand and gently pull out all the organs. Use a slight twisting motion as you bring the organs out of the body.
You should remove the gizzard, liver and heart from the other organs.
- Cut the gizzard from the stomach and intestine and peel excess fat from the outside.
- Remove the heart. Trim off the heart sac and the heavy vessels around the top part.
- Trim off the liver but be careful to not cut the gallbladder.
- You can cut or pinch off the gallbladder from the liver.
- Split the gizzard and open it under a stream of water to remove its contents.
- Peel the lining from the gizzard by putting your thumbnail under the lining at the edge of the cut surface and pulling away from the muscle
- The lining is easier to remove after the gizzard has cooled slightly.
- You may want to split the gizzard lengthwise to its lining and try to remove the unbroken lining and its contents. This will avoid contaminating the muscle with the gizzard contents.
- Rinse the giblets well and place them in a pan of cool water.
- Put your hand in the body cavity to reach the lungs.
- Starting next to the ribs, roll your index finger towards the backbone on each side of the bird to pick out the lungs.
- Pull the gonads (ovaries or testes), if present, from the body cavity.
- Check the body cavity to be sure that you’ve removed all the desired parts. Thoroughly wash the inside of the carcass with a hose or under a faucet.
- Wash the outside of the bird and rub off all any dirt, pinfeathers, loose cuticle and blood.
- Place the carcass in the chill water container.
You can pre-chill carcasses by placing them in a container of cold tap water continuously overflowing at a slow rate. This will cool the carcass to water temperature and further clean the carcass.
Chill poultry carcasses in ice and water to lower carcass temperature to 40 F before packing. You can chill smaller birds in a couple of hours. Turkeys and large capons or roasters will need to chill a few hours before reaching this temperature.
Remove the chilled carcasses from the ice water. Hang them by a wing and let them drain for about 10 minutes before placing them in bags for transport or storage. Make sure that you drain all the water from the bird before packing them.
After chilling the giblets, wrap the heart, liver and gizzard in a small square of plastic food wrap or in a small plastic bag. Place the giblet pack and neck in the body cavity of the cooled carcass before packing.
On carcasses with a bar cut, cut the tail from the top of the bird down through the vertebrae. Don’t to cut the tail all the way off. Turn the tail down and tuck it under the bar strap. Flex the legs tightly against the carcass and work the legs under the skin bar to truss the bird.
- Place the carcasses on a table.
- Smooth the neck skin down over the back of the bird
- Put the bird, head first, into a plastic bag of proper size.
- For a better package, put the end of a flexible plastic or rubber hose in the bag. Keep the bag snug around the hose and suck air from the bag. Remove the hose, twist the bag several times and secure it with a wire tie.
Birds can also be frozen in locker wrap paper or aluminum foil. Refrigerate birds or freeze promptly after packaging them.
Don’t freeze birds until you have chilled them to 40 F or below. Only place a small number of unfrozen birds in home-type freezers at any one time. Placing a large number of unfrozen food in the freezer puts too much load on it and causes slow freezing of the unfrozen birds and partial thawing of already frozen products.
Chill birds thoroughly or freeze them before transporting them. Make sure you wrap packaged birds in several layers of newspaper or other insulating material. This will keep them cold during transport until they can be refrigerated or frozen again.
Selecting birds for slaughter
High quality poultry carcasses come from live birds with the following traits at slaughter time.
Thus, good care during the growing phase is key to producing poultry meat. Different strains and breeds of poultry vary in growing time to reach the best size and health for slaughter.
You will normally process all the healthy birds from a flock. Don’t use birds that have any of the following when processed:
- Lumps or spots of any size on the surface of the liver.
- Any measurable amount of fluid in the body cavity.
- Orange fat in a poorly fleshed birds rather than yellow or white fat.
- Any single internal organ that’s two or more times the normal size (compare with similar sized bird). Ignore gallbladder size.
- Breast meat the same color as the thigh and leg meat.
- Meat with white streaks or an area that is larger compared to the same area on the other side of the bird.
Select your best birds for marketing. When showing, youth will want to pick healthy, well-fleshed, well-finished birds that are free from defects such as:
- Breast blisters
- Bruises
- Skin tears
- Other similar defects
You can process birds with defects by trimming damaged tissue and still have a good carcass for meat. Don’t attempt to dress pin-feathery birds. Wait a week or two until these feathers grow out and are easier to see and remove during processing.
Don’t feed poultry 6 to 8 hours before slaughter but allow access to water. Fasting reduces the feed content in the digestive tract. This helps prevent contamination during processing.
Have a wire-bottom holding cage or crate to help keep birds clean during fasting. Dirty birds contaminate the scald water, and thus contaminate poultry meat during processing.
How to humanely euthanized a chicken (no tools)
0