Skinning a chicken can be an intimidating task for beginners, but with the right tools and techniques, it’s easier than you think. In this step-by-step guide, I’ll walk you through how to humanely skin a chicken from start to finish.
Why Skin a Chicken?
There are a few reasons you may want to skin a chicken rather than pluck it
-
It’s faster – skinning can cut your processing time in half compared to plucking. Great if you’re butchering a large batch.
-
Less mess – skinning eliminates the feathers flying everywhere that comes with plucking
-
No special equipment needed – skinning just requires a sharp knife versus scalding tanks and pluckers for plucking.
-
Tougher birds – older laying hens with coarse feathers can be easier to skin than pluck.
The main downside is you lose the skin, which provides flavor and moisture when the chicken is cooked. But for stews and casseroles, skinless chicken works great.
Step 1: Prepare Your Tools & Area
You don’t need a lot of fancy equipment to skin a chicken, but having these items close at hand will make the job easier:
-
Sharp knife – a sturdy 5-6 inch boning knife works perfectly.
-
Cutting board – avoid wood boards as they can harbor bacteria. Plastic is best.
-
Plastic bags – one for the skin/feathers, one for the meat.
-
Rope – to secure the chicken’s legs before dispatching.
-
Large bowl of water – for rinsing your knife and hands.
You’ll also want to prep your working area. Put down plastic sheeting or butcher paper over your work surface to catch any mess. And set up near a water source like a hose or sink.
Step 2: Dispatch the Chicken Humanely
There are a few methods to quickly and humanely dispatch a chicken. I prefer using a killing cone:
-
Place the chicken upside down in a killing cone. This calms the bird and holds it securely.
-
Pull the head down to expose the neck.
-
Make a deep cut across the side of the neck near the head to sever the carotid artery.
-
Let the bird bleed out before proceeding.
Once the bird is still and bleeding has stopped, it’s ready to be skinned.
Step 3: Start Skinning at the Breast
With the chicken still secured in the cone, make an incision in the skin at the tip of the breastbone.
-
Grab hold of the skin on either side of the incision.
-
Firmly pull the skin away from the breast meat, tearing the connective tissue.
-
Continue tearing the skin downwards toward the abdomen on both sides.
-
Pull the skin outward to remove it from the thighs.
-
Cut carefully around the tail and vent area with the knife.
The goal is to end up with the entire breast and leg meat exposed and skinless.
Step 4: Remove the Entrails
Before removing the meat from the bones, we need to remove the entrails:
-
Make a shallow incision up the belly of the chicken starting from the vent.
-
Reach inside and cut around the anus, being careful not to cut any intestines.
-
Pull the anus and attached entrails out slowly.
-
Cut the ribs away from the backbone on both sides to fully expose the cavity.
-
Scoop out any remaining organs and membrane.
-
Cut away the neck, leaving the crop and windpipe attached.
-
Pull out the windpipe, esophagus and crop in one piece.
Rinse the carcass thoroughly with water after removing all the entrails.
Step 5: Remove the Meat from the Bones
Now we can carve the skinned chicken away from the bone frame:
-
Cut through the wing joints and separate the wings from the breasts.
-
Run the knife down either side of the breastbone to remove the breast meat.
-
Find the hip joint and pop each thigh out of the socket.
-
Cut through the skin to remove the thigh and drumstick together.
-
Repeat on the other side to remove the remaining leg.
Place the skinned boneless chicken pieces into a clean bag, and put the carcass and skin into a waste bag for disposal.
Step 6: Clean Up & Store the Meat
One final step remains – thoroughly cleaning up and storing the meat properly:
-
Hose down your working area and tools with hot soapy water.
-
Give the skinned chicken pieces a good rinse under cold water.
-
Pat dry with paper towels.
-
Place in sealed zip-top bags or vacuum pack if possible.
-
Store in the refrigerator for 1-2 days before freezing.
-
Use within 6 months for best quality.
And that’s it – with these steps you can quickly and cleanly skin a chicken! It just takes a bit of practice to get the technique down. Before you know it, you’ll be skinning chickens like a pro.

Skinning a Chicken vs. Plucking a Chicken…
I first learned how to skin a bird from my friend when we were butchering ducks. Besides chickens, I also raise Muscovy ducks for their eggs and meat. I found that it’s not an easy task to pluck a duck.
After we skinned the ducks I was wondering if it would be worth it for me to try it when I butchered my chickens.
The decision whether to skin a chicken or to pluck a chicken comes down to two things…
First, do you want the skin? It’s full of flavor and fat and can keep the meat moist if you roast your chicken. Some people like to make crispy chicken skins as a snack, some just like the taste of it…
Obviously, if you want the skin you’ll have to pluck your chicken. If you skin it, the skin is gone with the feathers.
The second consideration is how much time does it save you. If you raise chickens for meat regularly and butcher many of them at the same time, you might want to invest in a plucking machine to make the plucking job oh so much easier (you can see how Melissa from Melissa K. Norris uses a plucking machine here).
However, if you don’t want to invest in such a machine you can pluck your chickens by hand, which is really not that hard at all, or, you can skin them.
I hate titles such as “how to skin a chicken in 30 seconds” or “how to make a million dollars in an hour” or “how to break apart a pallet in 2 minutes” (I came across many of those when I was building my chicken coop from pallet wood!), I don’t know if they apply to anyone but they sure don’t apply to me.
Truth is, it might be a little bit faster to skin a chicken than to pluck a chicken but for me, it’s not by much.
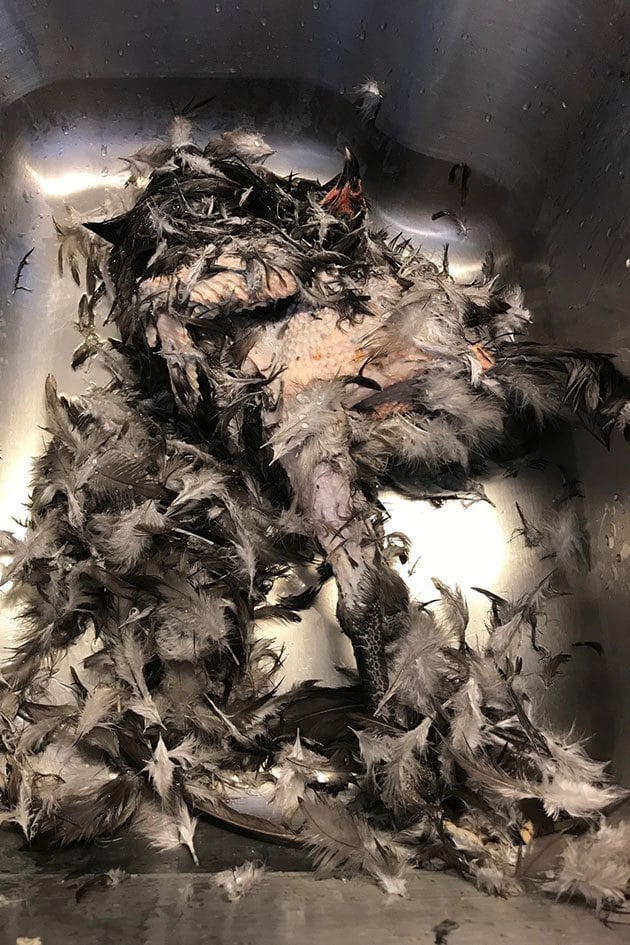
Honestly, what I like the most about skinning a chicken is that I don’t need to bring a huge pot of water to a boil (to scald the chicken. This makes plucking easier) and that I can work outside and eliminate the feather mess.
I suggest that you try to skin a chicken a couple of times and choose for yourself whether you like it better than plucking and if it really saves you time.
Separate the Throat from the Skin
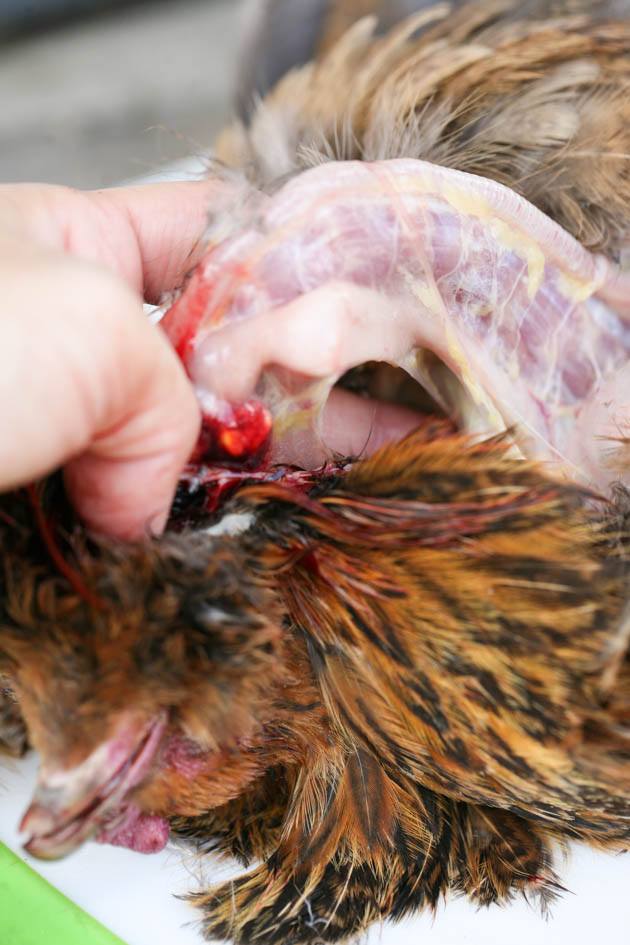
The next thing that I do is separate the throat from the skin.
I just grab the throat and pull the skin around it. The head is still connected, I don’t remove it in the process (you can if you’d like to).
Sometimes I need help from the knife to cut the skin around the head but most of the time I can just tear it.
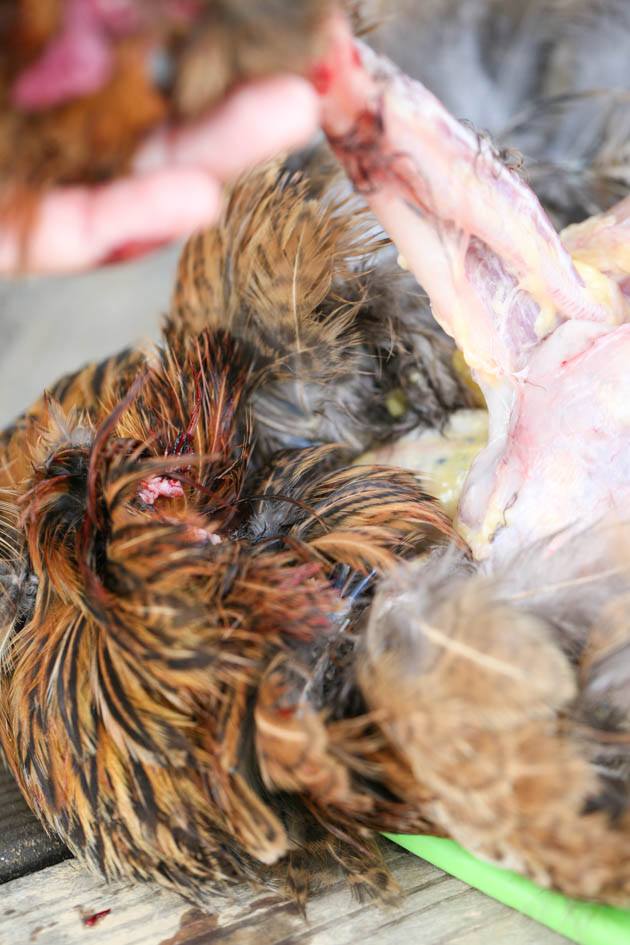
I leave the head and the throat as they are and go to work on the legs.
How to Skin a Chicken the FAST way// Homesteading HACK!
FAQ
How to remove the feathers of a chicken?

To remove feathers from a chicken, the most common method involves scalding the chicken in hot water, then plucking the feathers. Scalding helps loosen the feathers, making them easier to remove.
How do I remove chicken skin?
After washing or bathing, gently pat or blot the skin with a towel so that some moisture remains. Try medicated creams. Apply a nonprescription cream that contains urea, lactic acid, alpha hydroxy acid or salicylic acid. These creams help loosen and remove dead skin cells.
What are the dangers of eating chicken skin?
Eating two chicken drumsticks with skin, or even just one chicken thigh, can get you upward of 10% of your daily vitamin D values, which is a lot. Eating two chicken drumsticks or a chicken thigh with skin can get you upward of 10% of your daily vitamin D values.
How do you make chicken skins?
Preheat the oven to 450F and line a baking sheet with aluminum foil (for easy clean up). Pat dry the chicken and lay flat on the foil. Lightly salt and pepper the chicken skins. Bake chicken skins for ~ 13-16 minutes or until crispy. 10 minutes may work for thighs, drums may be 12 minutes, breasts may be 16 minutes.
How can you get rid of chicken skin?
Take the skin off the meat by pulling with a thick paper towel. Pat the skin dry or put in refrigerator for an hour if you have time. Refrigerating the chicken skin will help dry it out. Thigh and breast skin are the largest pieces and lay the flattest. Drumstick chicken skin is smaller so there’s not a lot of yield compared to the breast or thigh.
What are the benefits of chicken skin?
Chicken skin even has Omega-3 fatty acids, known for their anti-inflammatory and antioxidant benefits, and overall beneficial effect for health in general. Chicken skin is a natural source of vitamin E, albeit the content is minimal considering how much chicken skin you can and should eat.