Fried chicken drumsticks are a classic comfort food that pretty much everyone loves. Whether you’re cooking for a family dinner weekend gathering or just craving some crispy goodness, homemade fried chicken drumsticks are always a hit. I’ve been perfecting my recipe for years, and today I’m sharing my step-by-step guide to help you achieve that perfect balance of crispy exterior and juicy interior.
What You’ll Need
Before we dive into the cooking process, let’s gather our ingredients:
For the chicken
- 2 pounds chicken drumsticks
- 1 cup all-purpose flour
- 2 teaspoons onion powder
- 2 teaspoons garlic powder
- 1 tablespoon paprika
- ½ teaspoon chili powder (adjust to taste)
- 1½ to 2 teaspoons salt
- 1 teaspoon black pepper
- 1 egg
- ¾ cup milk (or buttermilk)
- Oil for frying (peanut, vegetable, or canola work best)
The Perfect Frying Method
Step 1: Prepare Your Coating
First, we need to prepare our coating mixtures:
- In a large bowl, combine the flour, onion powder, garlic powder, paprika, chili powder, salt, and black pepper. Mix well.
- In a separate bowl, whisk together the milk, egg, and a pinch of salt and pepper.
This double-dipping process is what gives us that amazing crispy crust!
Step 2: Coat the Chicken
Now it’s time to coat your drumsticks:
- Dip each chicken piece first in the seasoned flour mixture
- Transfer it to the milk and egg mixture
- Finally, coat it again in the flour mixture
The key here is to make sure each piece is thoroughly coated. I like to press the flour mixture into the chicken to ensure it sticks well.
Step 3: Heat the Oil
Temperature control is critical for perfect fried chicken:
- Heat your oil to 350°F (175°C) in a deep fryer or heavy-bottomed pot
- Use a kitchen thermometer to maintain this temperature throughout cooking
If you don’t have a thermometer, you can test if the oil is ready by dropping a small piece of flour in – if it sizzles immediately, your oil is ready.
Step 4: Fry the Drumsticks
Now for the main event – frying those drumsticks!
- Carefully place the coated chicken drumsticks in the hot oil
- Don’t overcrowd the pan – fry in batches if necessary
- Cook for approximately 12-15 minutes, turning occasionally
- The chicken is done when it reaches an internal temperature of 165°F and has a golden brown, crispy exterior
Step 5: Drain and Rest
Once cooked:
- Remove the drumsticks and place them on a plate lined with paper towels
- Let them rest for 1-2 minutes before serving
- This rest period allows excess oil to drain and the juices to redistribute
Pro Tips for Perfect Drumsticks
After years of making fried chicken, I’ve gathered some helpful tips:
-
Use the right oil: Peanut oil is my favorite because it has a high smoke point and adds great flavor. Vegetable or canola oil are good alternatives.
-
Maintain oil temperature: This is super important! If the oil is too hot, the outside will burn before the inside cooks. If it’s too cold, your chicken will absorb too much oil and become greasy.
-
Don’t crowd the pan: Overcrowding lowers oil temperature and results in soggy chicken. It’s better to fry in batches.
-
Season generously Don’t be shy with your seasonings, especially salt and pepper in the milk mixture. This ensures flavor throughout the chicken, not just on the coating
-
Double-dipping option: For extra crispy chicken, you can re-dip in the egg-milk mixture and then back in the flour mixture before frying.
Common Questions About Fried Chicken Drumsticks
How long does it take to fry chicken drumsticks?
An average chicken drumstick takes approximately 12-15 minutes when deep frying at 350°F. However, cooking time can vary depending on the size of your drumsticks and the exact temperature of your oil. Always check that the internal temperature has reached 165°F to ensure they’re fully cooked.
Why isn’t my fried chicken crispy?
If your fried chicken isn’t crispy, the most likely culprit is oil temperature. When the oil is too cold (below 350°F), the chicken takes longer to cook and absorbs more oil, resulting in greasy, soggy chicken. Always use a thermometer to maintain proper temperature.
Do I need to marinate the chicken first?
Unlike some recipes that require marinating, this method doesn’t need it as long as you season your milk and egg mixture well with salt and pepper. However, if you prefer, you can marinate the chicken in buttermilk for 2-4 hours or overnight for extra tenderness and flavor.
Can I use an air fryer instead?
Yes! If you prefer a healthier option, you can adapt this recipe for an air fryer. The coating process remains the same, but you’ll need to spray the coated chicken with a little oil before air frying at 390°F for about 20-25 minutes, flipping halfway through.
Variations to Try
Once you’ve mastered the basic recipe, here are some delicious variations to try:
Spicy Fried Chicken
- Add 1 teaspoon of cayenne pepper to your flour mixture
- Include a tablespoon of hot sauce in your milk mixture
Herb-Infused Fried Chicken
- Add 1 tablespoon of dried herbs like thyme, rosemary, or Italian seasoning to your flour mixture
- Infuse your milk with fresh herbs for several hours before using
Double-Fried Method
For extra crispy chicken:
- Fry the drumsticks for 5 minutes
- Remove and let rest for 10 minutes
- Increase oil temperature to 375°F
- Fry again for 3-5 minutes until extra crispy
Perfect Pairings
Fried chicken drumsticks pair wonderfully with:
- Mashed potatoes
- Coleslaw
- Potato salad
- Cornbread
- Mac and cheese
- Biscuits
- Fresh green salad
Storing Leftover Fried Chicken
If you somehow have leftovers (which rarely happens in my house!):
- Let the chicken cool completely
- Store in an airtight container in the refrigerator for up to 3 days
- To reheat, place in a 350°F oven for 10-15 minutes to restore crispiness
Final Thoughts
Making perfect fried chicken drumsticks at home isn’t complicated, but it does require attention to detail. The crispy exterior and juicy interior make all the effort worthwhile! Once you master this basic technique, you can experiment with different seasonings and variations to create your own signature fried chicken.
Remember, practice makes perfect, so don’t worry if your first batch isn’t exactly as you imagined. Each time you make it, you’ll get better at controlling the temperature and perfecting the coating. Before long, you’ll be known for having the best fried chicken around!
Happy cooking!

Recipe: Fried Chicken Drumsticks Yield: 4 servings
8 chicken drumsticks (about 2 pounds) Kosher salt and freshly ground black pepper 1½ cups buttermilk ½ cup pickle brine (optional) 1½ cups all-purpose flour 1 teaspoon onion powder 1 teaspoon garlic powder 1 teaspoon kosher salt 1 teaspoon freshly ground black pepper ½ teaspoon cayenne pepper 2 quarts vegetable, peanut, or grapeseed oil, for frying
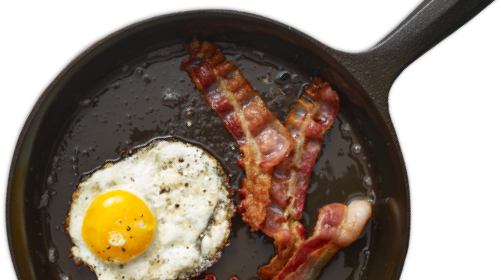
The Field Method for Cast Iron Care
Season the chicken all over with salt and pepper and place inside a large, resealable plastic bag. Add the buttermilk and pickle brine (if using), seal, and refrigerate for at least 4 and up to 12 hours.
In a mixing bowl, whisk together the flour, onion powder, garlic powder, salt, pepper, and cayenne (feel free to add more spices or adjust the seasoned flour to your liking). Working with 1 drumstick at a time, remove the chicken from the marinade (no need to let the excess liquid drip off) and dredge in the flour, making sure to coat the entire drumstick. Transfer to a plate and let sit at room temperature for 10 to 30 minutes.
Place a wire rack inside a rimmed baking sheet and preheat the oven to 200°F. In a No.10 Dutch Oven, heat the oil to 350°F. Add half of the chicken and fry, turning the drumsticks over every few minutes and adjusting the heat as needed to keep the oil temperature around 325°F. Continue frying the chicken until golden brown and an instant-read thermometer inserted into the center registers 165°F, 10 to 15 minutes total. Transfer the chicken to the wire rack and keep warm in the oven while you fry the second batch. If not serving right away, refrigerate the fried chicken and reheat in a 400°F oven until crispy, 10 to 15 minutes.
Frying is just about the best way to build seasoning in a cast iron Dutch oven.
Best—These dishes are the best options for building resilient seasoning, and surefire choices for getting tricky pans back on track.
Better—The best way to keep your skillet in great shape is to cook frequently, and cast iron-friendly dishes like these are your bread and butter.
Safe—These recipes wont strip seasoning away from your pan, but wont really add any, either.
OK—Be sure to clean up promptly. Recipes with this rating might feature acidic ingredients which can affect seasoning if not washed soon after cooking.
Sign up for updates on all things cast iron and Field Company.