Raising backyard chickens is becoming increasingly popular among urban and rural homesteaders. Having a steady supply of fresh eggs is just one of the many benefits of keeping chickens. However ensuring your flock has constant access to clean drinking water is essential for their health and egg production. Building your own DIY chicken water bucket is an easy, cost-effective way to keep your chickens hydrated.
In this comprehensive guide, we will walk through everything you need to know to create a functional water bucket chicken owners can rely on.
Why Make a DIY Chicken Water Bucket?
Constructing your own water bucket has many advantages over purchasing a commercial option
-
Cost Savings: DIY water buckets can be made for under $10 using materials you likely already have at home. Pre-made waterers can cost over $50.
-
Customization: With a homemade bucket, you can modify the size, shape, and features to perfectly fit your flock’s needs.
-
Durability: Food-grade plastic buckets last for years, much longer than some commercial waterers.
-
Easy to Clean: DIY buckets have fewer nooks and crannies where grime can build up.
-
Prevent Waste: Custom buckets reduce water wastage from tipping, leaks, and chicken mess.
Materials Needed
Making a five gallon chicken water bucket requires just a few simple materials:
- 5 gallon food-grade plastic bucket with lid
- Drill with various drill bits
- Utility knife
- Poultry nipple waterer kit
- Small stainless steel washers and screws
- Silicone sealant (100% waterproof)
Optional:
- Brick or concrete paver (to weigh down bucket)
- PVC pipe, chain, or rope (for hanging bucket)
Step-by-Step Instructions
Follow these straightforward steps to assemble your own gravity-fed chicken water bucket:
1. Mark the Nipple Placement
Select a spot for the nipple toward the bottom of the bucket, at least 2 inches up from the base. Mark the center point with a pencil.
2. Drill the Hole for the Nipple
Using a hole saw drill bit the same diameter as the poultry nipple, drill a hole at the marked location. Clean up any rough edges with a utility knife.
3. Insert Nipple and Washer
Place a washer over the threaded end of the nipple. Apply silicone sealant on the threads and washer. Insert the nipple into the hole and tighten until snug and no leaks occur.
4. Attach the Lock Nut
Slide the remaining washer over the protruding nipple end. Thread on the lock nut and tighten securely to affix the nipple in place.
5. Seal Exposed Threads
To prevent leaks, apply silicone sealant on any exposed nipple threads inside the bucket. Allow to fully cure.
6. Drill Ventilation Holes
On the bucket lid, drill 5-10 small holes for air circulation. This prevents algae growth and allows fresh oxygen in.
7. Hang and Fill Bucket
Use rope, chain, or PVC pipe to hang the bucket at a height your chickens can reach the nipple. Fill bucket with cool, fresh water. Attach the lid tightly.
Maintaining Your DIY Water Bucket
With proper care, your homemade chicken waterer can last for many years:
-
Check water levels daily, refilling as needed.
-
Scrub the bucket weekly using a bleach solution to kill bacteria.
-
Monthly, disassemble nipple and washers to clear any mineral buildup.
-
Monitor for leaks and reapply sealant if needed.
-
In winter, consider installing a bucket heater to prevent freezing.
Helpful Tips and Modifications
- Use food coloring in the water to encourage chickens to drink
- Add apple cider vinegar or electrolytes for health benefits
- Install a float valve to automate water refilling
- Insulate the bucket by wrapping in bubble wrap to prevent freezing
- Create a PVC stand to elevate bucket off the ground
- Funnel rainwater runoff into the bucket to conserve water
Constructing your own gravity-fed DIY chicken water bucket is an easy and economical way to ensure your flock stays hydrated. Customize the size and features to suit your specific needs. With regular cleaning and maintenance, a homemade waterer will provide years of reliable service. Let us know how your chicken water bucket project goes!
Introduction: DIY 5-Gallon Chicken Waterer
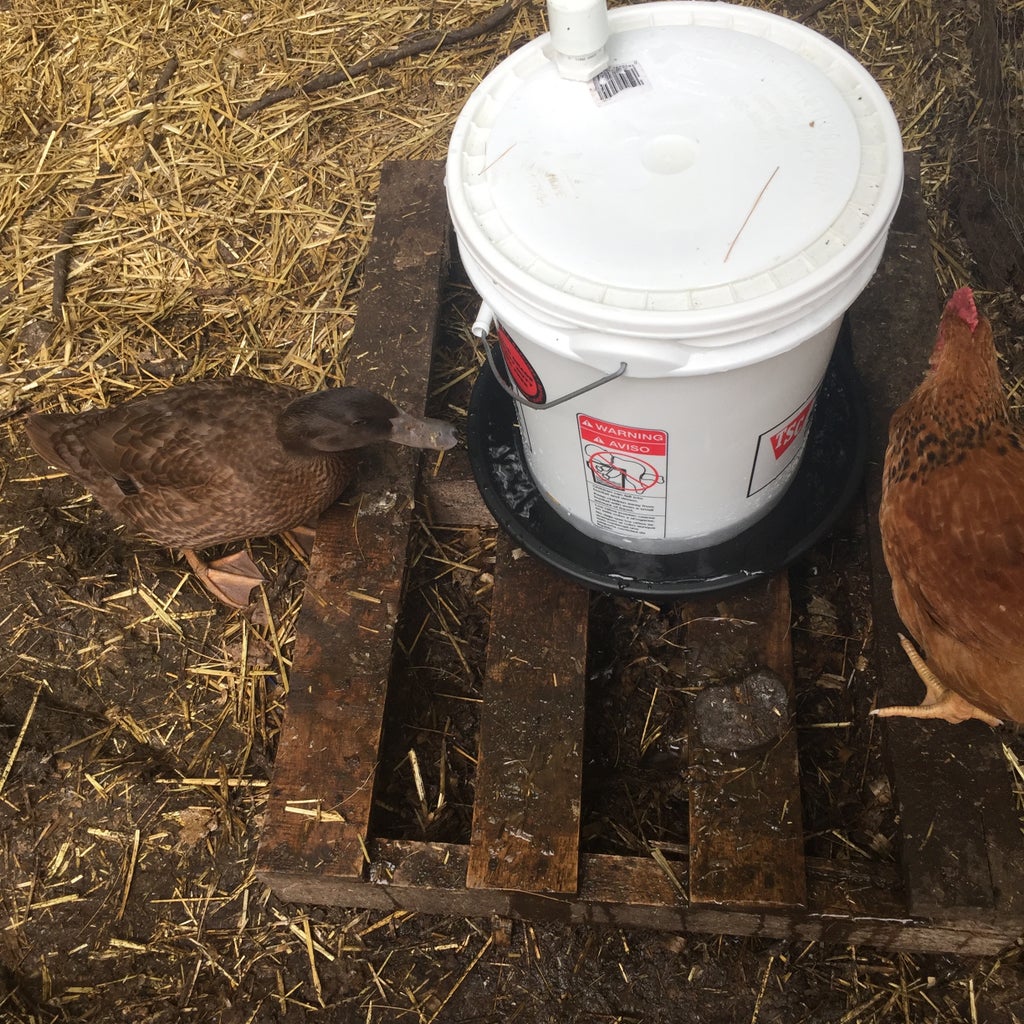
Simple 5-Gallon Chicken Waterer, my local big box store did not carry paint lids with pour spout so I had to improvise with a few PVC Couplings
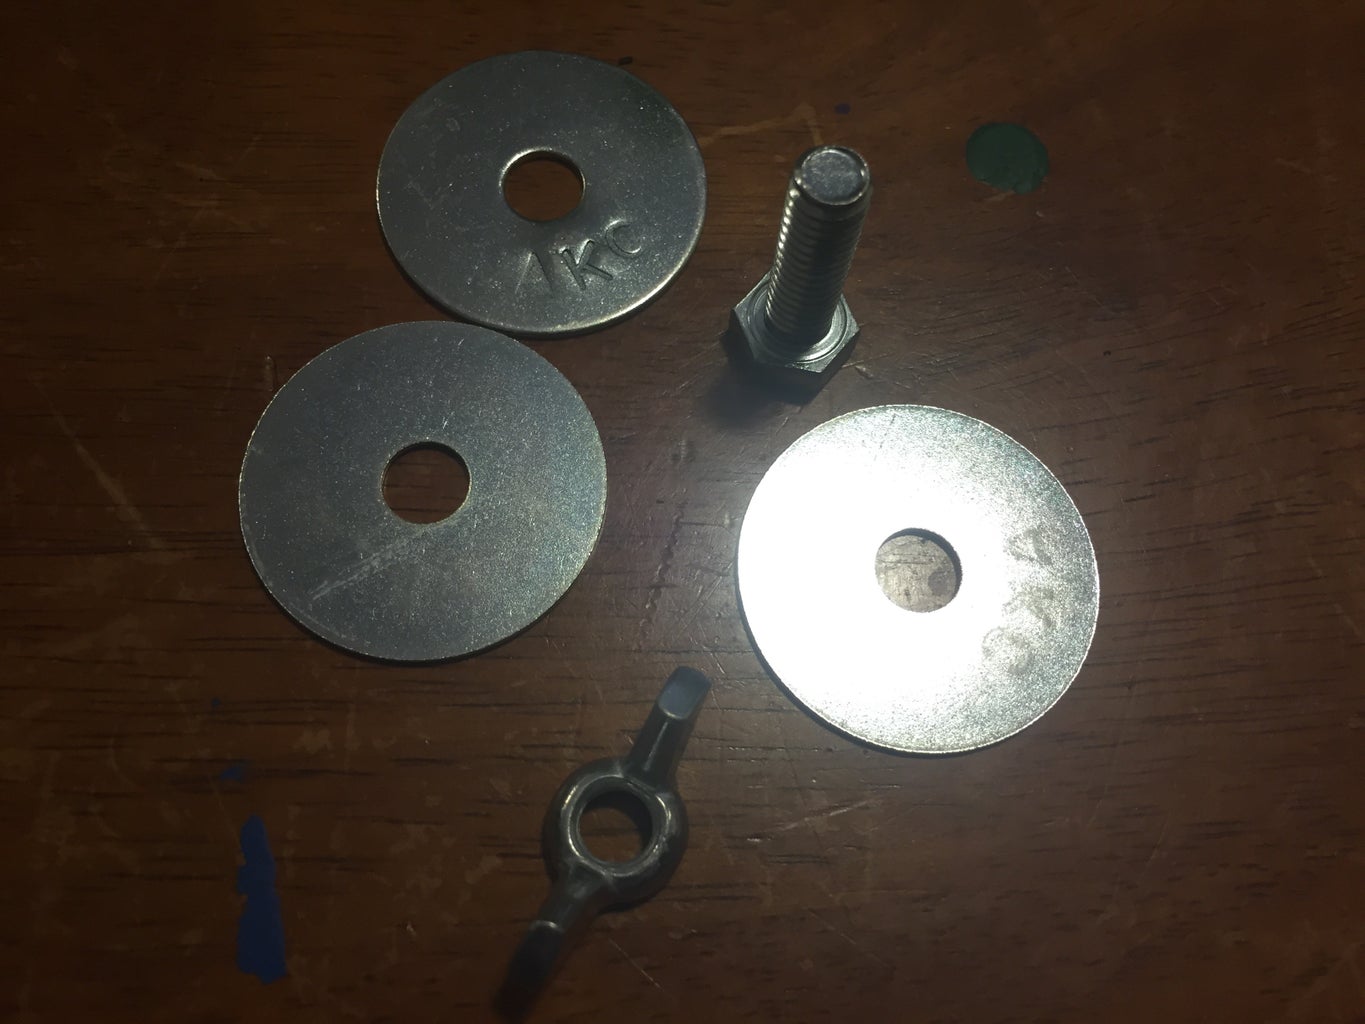
- 5/8 x 1-1/4″ Washers (3)
- 5/8 x 1″ Bolt
- 5/8 Nut – I used a WingNut for ease
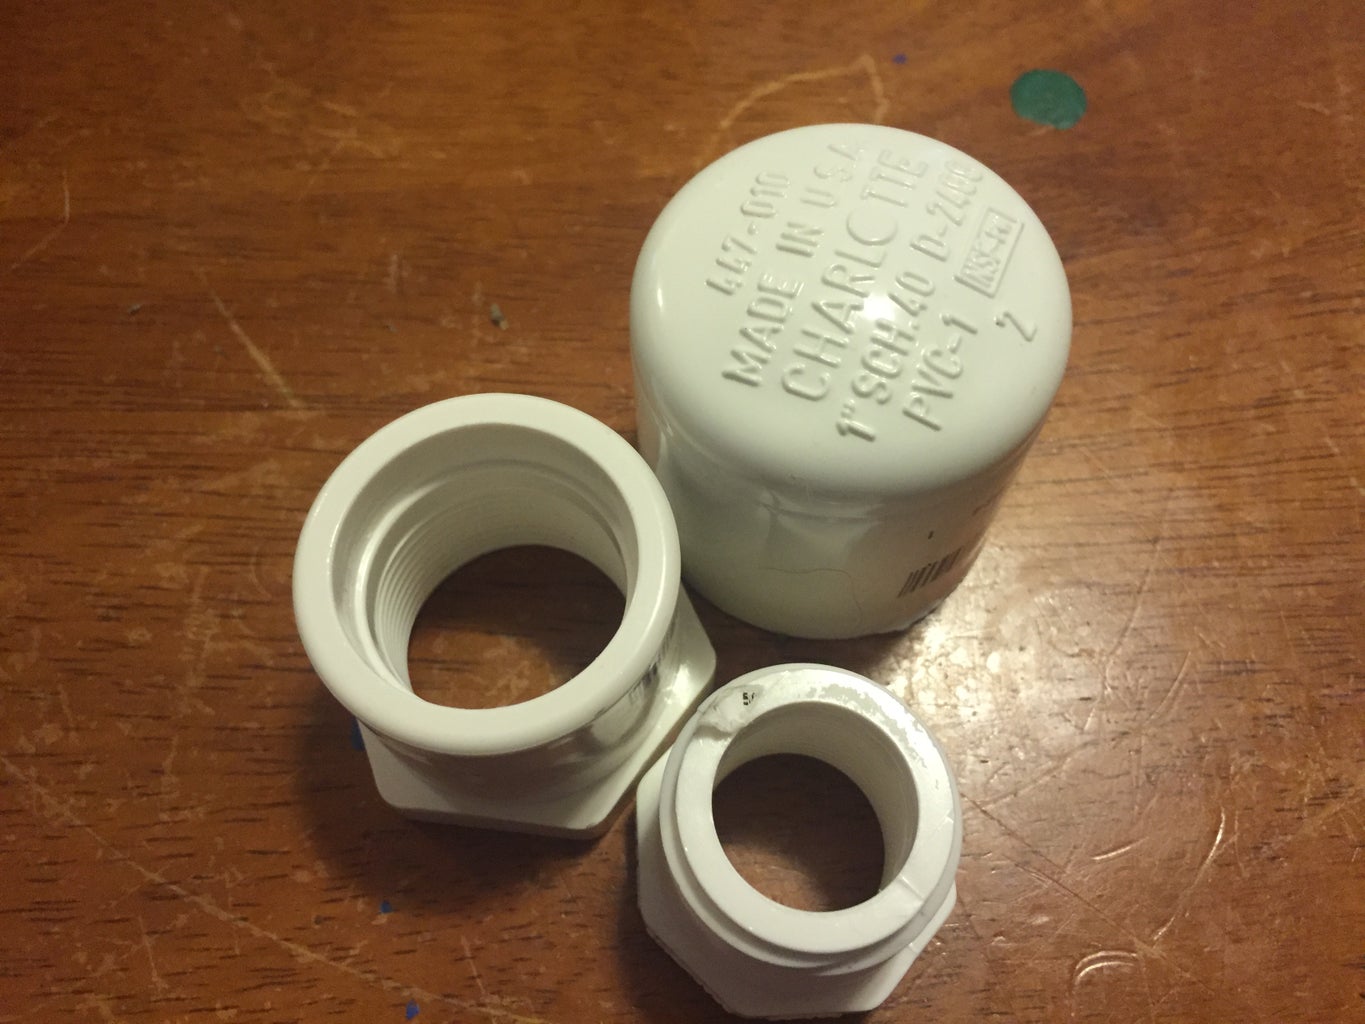
- 3/4-1″ Threaded PVC Adapter
- 1/2″-3/4″ Threaded PVC Adapter
- 3/4″ PVC Cap
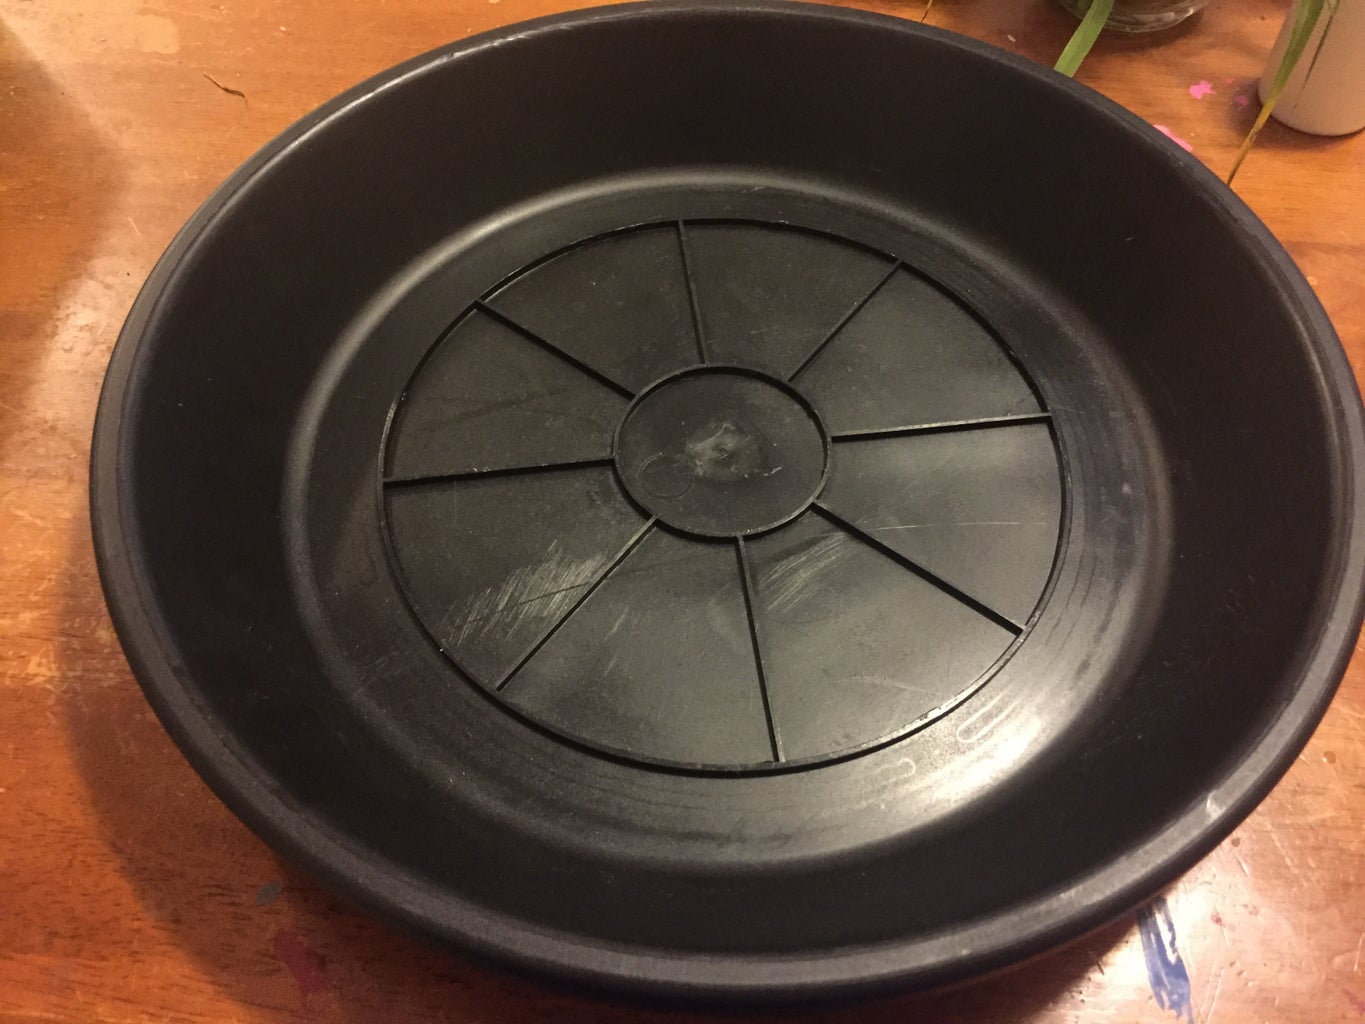
- 14″ Planter Saucer
- 5-Gallon Bucket & Lid
- 5/8″ Drillbit
- 1″ Drillbit
- Set of Channel Locks
Step 1: Step 1: Drill the Saucer and Bucket
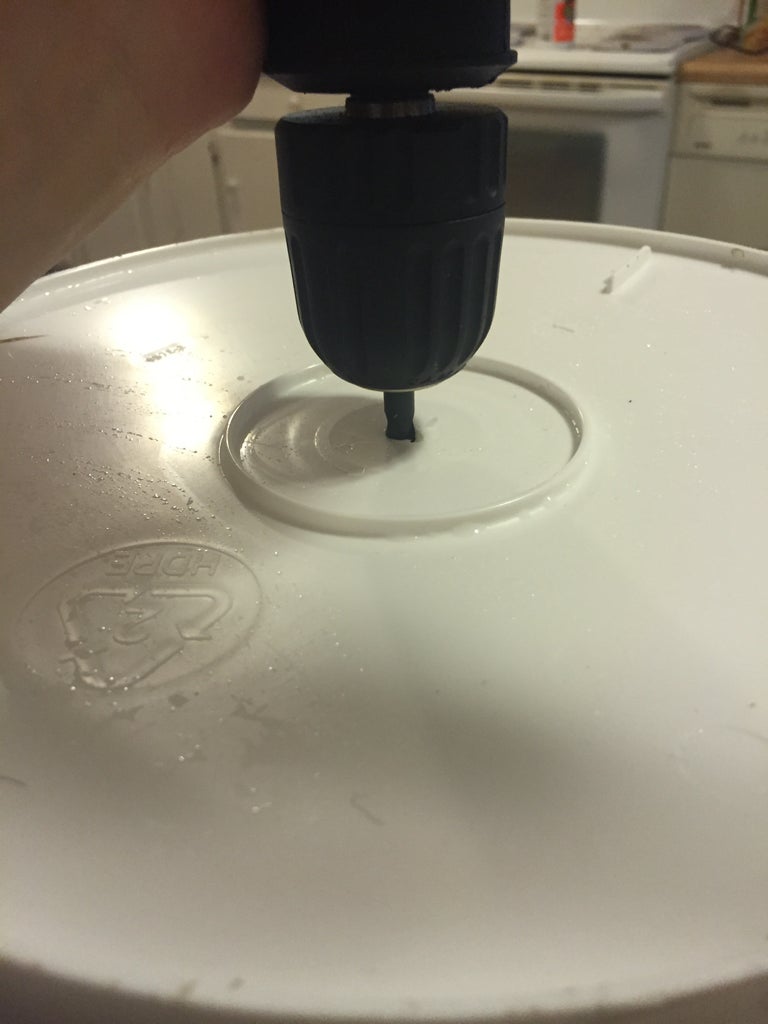
Using the 5/8″ Drillbit drill a hole in center of the Saucer and Bucket. *Hint Drilling in Reverse will yield a cleaner hole
Make a Chicken Water Bucket with Me || Poultry Water Cups
FAQ
How to make a DIY chicken water?
- DIY Chicken Waterer Supply List. …
- Step 1: Gather your drill, drill bits, poultry nipples, bucket, and lid. …
- Step 2: Drill holes for the poultry nipples 1-1.5 inches from the bottom of the bucket. …
- Step 3: Take a break and pet a chicken, as all this drilling is very hard work.
How do you make a 5 gallon self-watering bucket?

To create a self-watering 5-gallon bucket, you’ll need two 5-gallon buckets, a drill, a wick (like a piece of rope), and some spacers. The bottom bucket acts as a reservoir, while the top bucket holds the soil and plant.
How long does a 5 gallon bucket of water last for chickens?
A 5-gallon bucket of water can last a flock of chickens anywhere from a few days to a couple of weeks, depending on the number of chickens and the environmental conditions. A single chicken might drink about a pint of water per day, according to Carolina Farm Stewardship Association, so a 5-gallon bucket (40 pints) could last one chicken for up to 40 days. However, factors like temperature, activity levels, and the presence of other water sources can affect consumption.
How to make magic water for chickens?
Magic water for chickens is a simple, natural mixture made with warm water, garlic, apple cider vinegar, and honey, designed to boost their immune systems and overall health.
Can you make a DIY chicken waterer from a 5-gallon bucket?
Making a DIY chicken waterer from a 5-gallon bucket is a cost-effective and efficient way to ensure your chickens have constant access to clean water. This guide is designed to be easy to follow, reliable, and focused on what’s best for you and your chickens. Start with a clean, food-grade 5-gallon bucket.
Can You DIY a chicken waterer?
Longbourn Farm offers a DIY chicken waterer tutorial that’s both cost-effective and easy to create. This guide walks you through the simple steps of making a long-lasting chicken waterer using a few supplies like a 5-gallon bucket, lid, and feed pan.
Can you use a 5 gallon bucket to water chickens?
By using a 5-gallon bucket and a few chicken nipples, you can construct a durable waterer that prevents contamination from dirt and droppings. DIY Danielle ® provides a step-by-step guide to help you assemble this efficient watering solution for your chicks or adult chickens.
How do you put a Waterer in a 5 gallon bucket?
We were able to source a bucket top for our DIY waterer at our local big box store. Once you’ve drilled holes in the 5 gallon bucket, drill a 1″ hole in the top. Secure the top to the bucket by snapping it into place. This forms an air-tight seal when under water so the pan refills only when the water level has sunk low enough.
How do you put a chicken nipple Waterer in a coop?
1. Drill a hole in the bottom of the bucket using the 11/32″ drill bit. 2. Apply a small amount of silicone sealant around the hole. 3. Screw the poultry nipple waterer into the hole. 4. Fill the bucket with water and secure the lid. 5. Hang the bucket in your chicken coop at a height that is comfortable for your chickens to reach the water.
How do you heat a chicken waterer?
Use a small aquarium heater inside the water container. Place the waterer on a heated base specifically designed for poultry waterers. Wrap the waterer in insulating material and use a heat lamp (safely distanced) to warm the area. How often should I clean my DIY chicken waterer?