Canning chicken at home is a great way to preserve meat for future use. Having shelves stocked with canned chicken means quick, easy meals are always within reach. Whether you raised chickens yourself or bought chicken on sale at the store, canning chicken lets you make the most of your meat.
This step-by-step guide will walk you through the entire canning chicken process. You’ll learn everything you need to know to safely can chicken for your pantry.
Why Can Chicken?
There are several benefits to canning chicken at home:
-
Long shelf life – Properly canned chicken will stay safe on the shelf for 1-5 years This lets you preserve meat from a bulk purchase or homegrown chickens
-
Saves money – Buying chicken when it’s on sale and canning it saves money compared to buying fresh chicken weekly.
-
Convenience – No need to defrost meat! Canned chicken is ready-to-use, saving prep time.
-
Variety – Canned chicken works for casseroles, soups, sandwiches, salads, and more. It’s more versatile than freezing whole pieces.
-
Peace of mind – Home canned chicken provides food security. You’ll have meat on hand if you can’t get to the store.
Step 1: Get Equipment and Supplies
Canning chicken requires specific equipment to ensure safety. Here’s what you need:
- Pressure canner
- Canning jars with lids and bands (pint or quart-sized)
- Canning tools – jar lifter, funnel, bubble removal tool
- Large pot with lid for hot pack method
Don’t use a water bath canner for meat. Chicken must be pressure canned to kill bacteria and botulism spores.
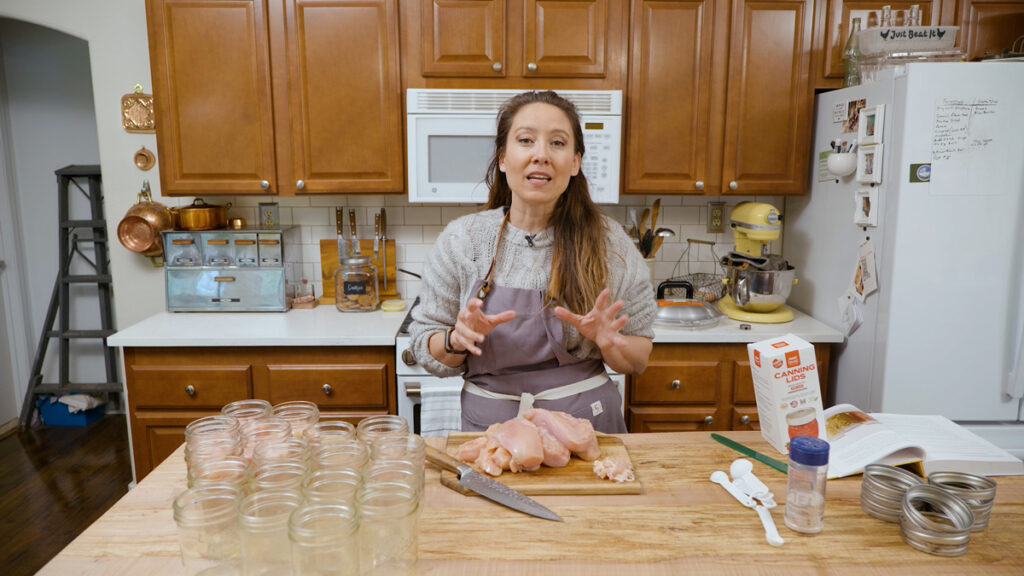
Step 2: Prepare the Chicken
Raw Pack Method
Cut chicken into small, uniform pieces. Remove skin and bones if desired Loosely pack raw chicken into jars
Cover chicken with boiling water, broth, or juice, leaving 1 inch of headspace. The liquid helps chicken retain moisture during canning.
Hot Pack Method
In a large pot, simmer chicken pieces in water, broth, or juice until they are 2/3 done. Loosely pack hot chicken and cooking liquid into jars, leaving 1 inch of headspace.
Hot pack takes a little more work but helps remove air pockets and leads to better texture.
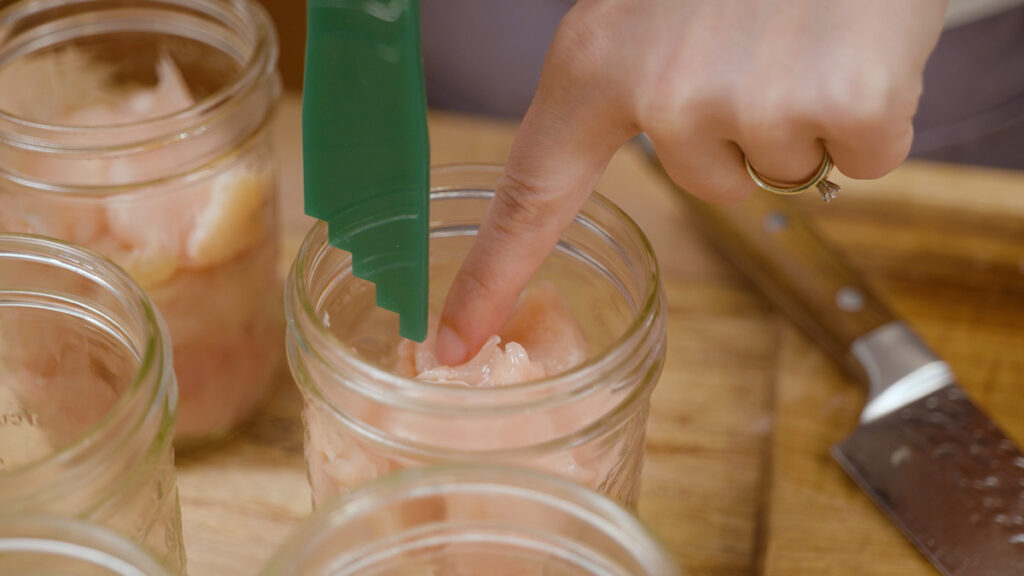
Step 3: Remove Air Bubbles and Clean Rims
Slide a bubble removal tool or non-metal utensil along the inside of the jar to release trapped air bubbles. Add more chicken or liquid if needed to maintain headspace.
Wipe jar rims with a clean, damp cloth to remove residue. Check for nicks or chips that could affect the seal.
Step 4: Apply Lids and Bands
Center lids on jar rims and screw on bands just fingertip tight. Over tightening can prevent air from venting during canning.
Step 5: Process Jars in a Pressure Canner
Place jar rack and 2-3 inches of water in the pressure canner. Load sealed jars onto the rack using a jar lifter. Fasten the lid according to the manufacturer’s instructions.
Turn burner to high and exhaust steam for 10 minutes before closing the petcock or placing the regulator. Let pressure rise until it reaches the required psi. Start timing when pressure is reached.
Process pint jars for 75 minutes and quart jars for 90 minutes at 10 psi. Increase time if you live over 1,000 ft above sea level.
When time is up, turn off heat. Allow canner to naturally depressurize 10 minutes before carefully opening the lid away from you.
Step 6: Cool and Store Canned Chicken
Use a jar lifter to transfer jars to a cooling rack, leaving 2 inches between jars. Avoid drafts.
Leave jars undisturbed for 12-24 hours. Check lid seals, then remove rings. Clean jar exteriors and label with content and date.
Store properly sealed jars in a cool, dark place. Let canned chicken sit a few weeks before use for best flavor. Refrigerate after opening.
Tips for Successful Canning
Follow these tips for safely canned chicken with the best color and texture:
-
Use fresh, high-quality meat – don’t can old chicken.
-
Chill chicken for 6-12 hours before canning raw pack.
-
Cut chicken into uniform pieces to ensure even heating.
-
Trim fat to limit floating pieces and seal issues.
-
Keep headspace consistent across jars for proper sealing.
-
Wipe rims thoroughly after filling jars.
-
Don’t over tighten bands or move jars once filled.
-
Vent pressure canner 10 minutes before pressurizing.
-
Let canner depressurize naturally; don’t rush the process.
Serving Canned Chicken
The mild flavor of canned chicken makes it endlessly versatile. Try it in these quick and easy dishes:
-
Chicken Salad – Dice and mix with mayo, celery, onion, and spices.
-
Chicken Tacos – Shred and season chicken with taco spices and topping.
-
Chicken Noodle Soup – Slice chicken and add to broth with veggies and noodles.
-
Chicken Casserole – Combine canned chicken with rice, veggies, and cream soup.
-
Chicken Enchiladas – Roll tortillas with shredded chicken, sauce, and cheese.
With the steps above, you’ll be ready to safely can chicken for quick meals all year long. Canning chicken at home saves money and provides convenient, shelf-stable meat.
Shelf Life of Canned Chicken
Canned chicken will last on the shelf for 2-5 years. However, for the best flavor and nutritional profile, its best to consume within one year.
Store canned chicken in a cool area out of direct sunlight (ideally 75°F or lower), or in a basement or root cellar.
I like to can my chicken in smaller batches 19-pint jars or less, so Im only filling one full canner. This makes the task much less daunting and I find I enjoy it much more.
11-14 pint jars of chicken will usually last my family a few months.
Bones in or Bones out?
It is perfectly fine to can chicken that has the bone in (or bone out). For me, it becomes a convenience issue. I want a jar of chicken that I can pop open and have ready to eat in a matter of minutes, so I opt for boneless and skinless chicken.
If you are canning chicken with the bone in, you will just adjust the canning times.
- Pressure Canner – I love my All-American Pressure Canner. Mine comes with a weighted gauge so I never have to worry that my dial gauge is inaccurate.
- Canning Jars & Lids – I prefer to can my chicken in wide-mouth pint jars. This is the perfect amount for a quick chicken salad for lunch or tacos for dinner for our family of four. If you have a larger family, you may want to can it in quart-sized jars. Just keep in mind a pint jar will hold approximately one pound of chicken. A quart-sized jar will hold approximately two pounds of chicken per jar. Also, I love these canning lids from ForJars (get 10% off with coupon code “Modern10” at checkout).
- Canning Tools – Canning tools are so helpful when canning, especially once the jars are hot and youre trying to get them out of the canner safely without burning yourself. Heres a great, inexpensive canning tool set.
- A copy of Everything Worth Preserving, the book for all forms of home food preservation, and step-by-step tutorials and recipes, including this recipe.
- Chicken – Im using boneless skinless organic chicken breast (purchased in bulk from Azure Standard – grab my coupon code above). This is purely out of convenience because I prefer my canned chicken to be boneless and skinless. This also saves me the time of having to debone and skin the chicken myself. However, you can break down a whole chicken and can up a mixture of breast, thigh and leg meat.
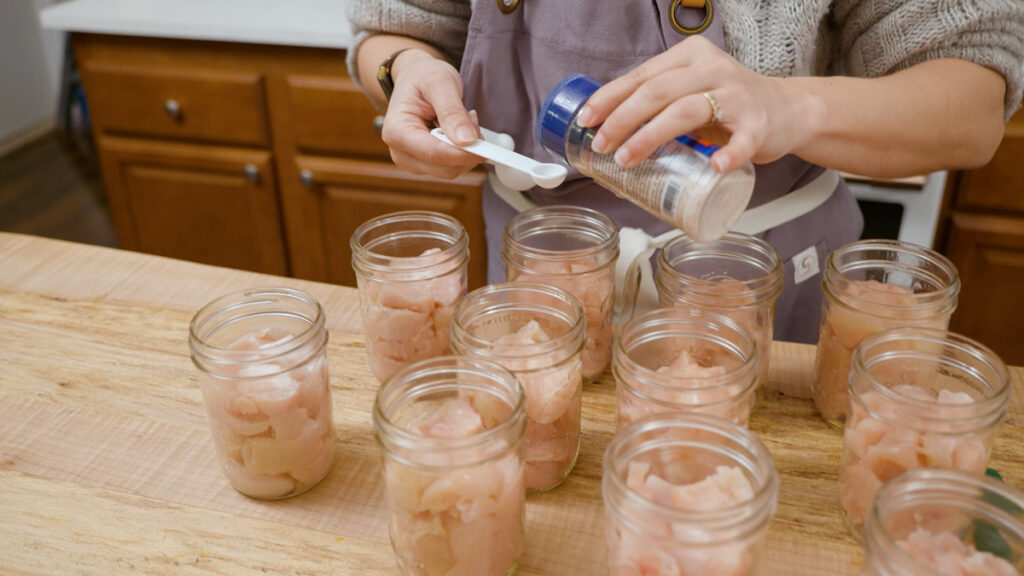
- Salt (optional) – Adding salt to your jars is optional. I like to add just enough salt to bring out the flavor of the chicken and flavor the broth that will be made during the canning process. I use ½ teaspoon salt per pint jar. If youre canning in quart-sized jars, add 1 teaspoon of salt per jar. My go-to salt is always Redmond Real Salt (get 15% off your order with coupon code “Pioneering” at checkout).
- Vinegar – This ingredient isnt for cooking with. Rather, its for wiping the rims of the jars prior to adding the canning lid. If there are any bits of chicken fat on the rim it can inhibit a proper seal. So quickly wiping the rims with a paper towel dipped in vinegar will help prevent this from happening.
Canning chicken
FAQ
How long does home canned chicken last?
What is the best way to can chicken?
There are two options for canning meat: the raw pack or hot pack method. In the raw pack method, you put the raw chicken into a jar and process it. In the hot pack method, you cook the chicken (just a little bit) before you pack it into the jars and you also add some liquid and then process it.
How to can meat for beginners?

Canning meat safely requires a pressure canner due to the low-acid nature of meat. It’s crucial to follow tested recipes and instructions carefully to avoid foodborne illness, particularly botulism. Raw meat should be precooked before canning.
Can you eat chicken straight from the can?
Yes, canned chicken is fully cooked and safe to eat straight from the can.