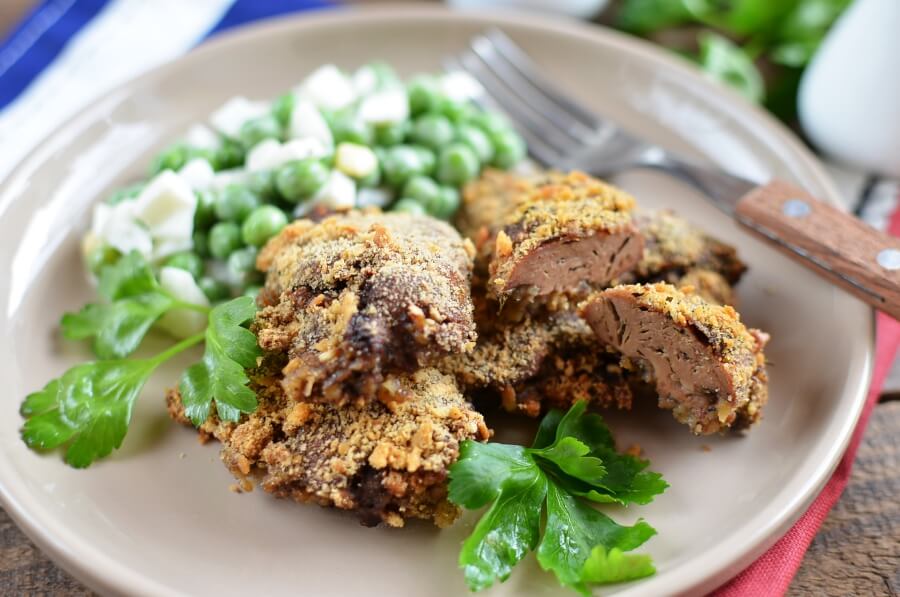
Chicken livers are an underappreciated delicacy that deserve more attention. When cooked properly, their rich, meaty flavor and silky texture make them an absolute treat. However, chicken livers are often cooked improperly, resulting in a mealy, chalky texture that turns people off. The key is knowing how to bake chicken livers correctly to bring out their very best qualities. In this comprehensive guide, we will walk through everything you need to know to bake chicken livers to tender, succulent perfection every time.
Why Bake Chicken Livers?
Baking chicken livers has several advantages over other cooking methods:
-
It cooks the livers gently and evenly, preventing them from becoming tough and rubbery.
-
The high, dry heat helps render excess fat and crisp the exterior while keeping the interior moist
-
It brings out the natural sweet, nutty flavors of the livers without the need for much added fat
-
The hands-off method allows you to focus on sides rather than constantly monitoring stove-top cooking.
For these reasons, baking is, in my opinion, the ideal technique for cooking chicken livers. When done properly, it consistently produces the best results.
Step 1: Selecting and Preparing the Livers
Success starts with high-quality ingredients. Look for chicken livers that are glossy, deep red, and firm with no soft or discolored spots. Rinse them under cold water and pat completely dry with paper towels. This is a critical step, as excess moisture will steam the livers rather than allowing them to properly bake.
Carefully trim away any fat, membranes, or greenish bile deposits, which can impart bitterness. You can soak the livers in milk or buttermilk for 30 minutes to 1 hour beforehand to help draw out bitterness.
For added flavor, marinate the livers for several hours in the refrigerator in olive oil, lemon juice, garlic, and herbs. The acidity in ingredients like lemon juice can help balance and tenderize the livers.
Step 2: Season Generously
Chicken livers have a mild flavor, so seasoning is key to bringing out their best qualities. Be generous with salt, pepper, and spices like garlic powder, smoked paprika, onion powder, cayenne, thyme, and oregano.
You want the seasoning to permeate and form a flavorful crust when baked. I like to season the livers at least 15-30 minutes in advance to allow the flavors to penetrate. A spicy marinade also adds wonderful flavor.
Step 3: Arrange in a Single Layer on a Baking Sheet
Preheat your oven to 400°F. Line a rimmed baking sheet with parchment paper or foil and lightly grease it. Arrange the livers in a single layer, evenly spaced.
Avoid overcrowding, as this will steam the livers and inhibit browning. The high heat and exposed positioning creates a crisp, caramelized exterior.
Step 4: Bake for 15-20 Minutes
Pop the seasoned livers in the preheated 400°F oven. Bake for 15-20 minutes, flipping halfway through, until browned outside but still pink inside.
An internal temperature of 160-165°F is ideal. Resist the urge to overbake, as this dries them out. Err on the side of slightly underdone. The carryover cooking will finish them off perfectly.
Step 5: Allow to Rest Before Serving
Once baked to your desired doneness, remove the livers from the oven and tent them loosely with foil. Allow them to rest for 5-10 minutes before serving.
This important step allows juices to reabsorb back into the meat, ensuring moist, tender livers. Slice or leave whole and serve while still warm along with your favorite sides and dipping sauces.
Cooking Tips for Baked Chicken Livers
-
For safety, always cook chicken livers to an internal temperature of at least 160°F.
-
Watch the livers closely towards the end of baking to prevent overcooking. You can always bake a bit longer if needed.
-
Letting them rest after baking allows for a more tender, juicy texture.
-
Cooking at a high temperature promotes browning and prevents a mushy texture.
-
A marinade adds lots of flavor. Lemon, garlic, herbs, and spice mixes all work well.
-
The livers release fat and juices during cooking, so line your baking sheet to simplify cleanup.
-
Add vegetables like onions, mushrooms, or bell peppers to roast alongside for a one-pan meal.
Serving Suggestions
Baked chicken livers work well in a variety of dishes:
-
As an appetizer, served warm or at room temperature, with crusty bread, crackers, or pickles.
-
Chopped and tossed into a fresh salad for added protein.
-
Over pasta or creamy mashed potatoes as an elevated dinner entree.
-
Pureed into a rich, smooth chicken liver pâté.
-
Used as the basis for chicken liver mousse.
-
Mixed with caramelized onions and mushrooms for liver and onions.
-
Wrapped in bacon before baking for a twist on classic rumaki.
-
Sandwiched between slices of crusty bread for an open-faced chicken liver melt.
The possibilities are endless! Baked chicken livers pair well with sweet, creamy, or acidic elements to balance their richness.
FAQs About Baking Chicken Livers
How do I prevent chicken livers from being bitter?
Soaking them in milk or buttermilk helps remove bitterness. Trim away any greenish spots and rinse well. Avoid overcooking, which makes them bitter.
What temperature should chicken livers be baked to?
Bake until they reach an internal temperature of 160-165°F. This prevents them from being underdone while still maintaining juiciness.
How long do baked chicken livers last refrigerated?
Properly stored in an airtight container, baked chicken livers will keep for 3-4 days refrigerated. Reheat gently before serving.
Can I freeze baked chicken livers?
Yes, they freeze well for 2-3 months. Let cool completely before freezing in an airtight bag or container. Thaw in the refrigerator before reheating to serve.
What are the best seasonings for baked chicken livers?
Salt, pepper, garlic, paprika, oregano, thyme, cayenne, onion, and lemon work very well. Feel free to get creative with spices and herb mixes.
Video Baked Chicken Livers Recipe
Recommended ⇒ All My ![]() Russian Recipes With Step By Step Photos
Russian Recipes With Step By Step Photos
⇓ Check Out My Newest Recipes ⇓
How to Prepare Chicken Livers For Cooking:
To prepare right chicken livers for cooking is very important to have a tasty dish! The milk is absorbing strong specific liver taste and liver will be very pleasant mild liver taste. This technique with milk good to use when cooking wild game or some fish also.
- Wash liver in cold water and dry on paper towel. Cut off sinew, fat and especially bile. On the photo, I marked N1 – bile and N2 green spots from bile. The bile must be removed very carefully (try don’t break it). If you don’t remove bile, your dish has a bitter taste and will be impossible to eat.
2. Cut the liver in bite even pieces and place in very cold milk. Leave for 30 minutes in the refrigerator. Dry in a paper towel and our liver ready to cook.
-
Preheat oven to 400ºF or 200ºC
1. Grease the pan with little butter and vegetable oil. Add black pepper and all spice to the liver. Bake 20 minutes. Don’t add salt to liver yet!
2. Cut onion into rings. Coat onion with flour.
Tip. Don’t throw away the hard end of the onion, just place in zip lock bag and keep in the refrigerator. Great use to make stock or broth!
3. Grease skillet with little butter and vegetable oil. Saute onion. When onion will be done, add black pepper, salt, and all spices.
4. Add sour cream and saute for 15-20 minutes. Taste the sauce, it needs to taste not like raw sour cream.
5. When liver will be cooked, turn off oven. Baked chicken liver sometimes has a few small pink spots, don’t worry! Mix liver in the pot and add salt and spices.
6. Add the sauce to the liver. Taste for salt and spices. Place pot in the oven for 20 minutes (oven still warm from the cooking liver). We don’t really cook the dish, we just let liver and sauce exchange flavors.
Let dish rest for 5-10 minutes before serving.
Recommended ⇒ 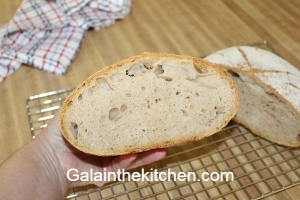 Russian No-Knead Bread Simple Recipe With Instant Dry Yeast.