Having chickens is an incredibly rewarding experience. Fresh eggs every morning, amusing antics to watch, natural pest control, and fertilizer for the garden are just a few of the benefits. However, keeping chickens safe from predators while giving them space to roam can be a challenge. An A-frame chicken tractor is the perfect solution, allowing your flock access to fresh air and grass while protecting them from harm. With the right plans, you can build your own mobile chicken coop easily and affordably.
What is an A-Frame Chicken Tractor?
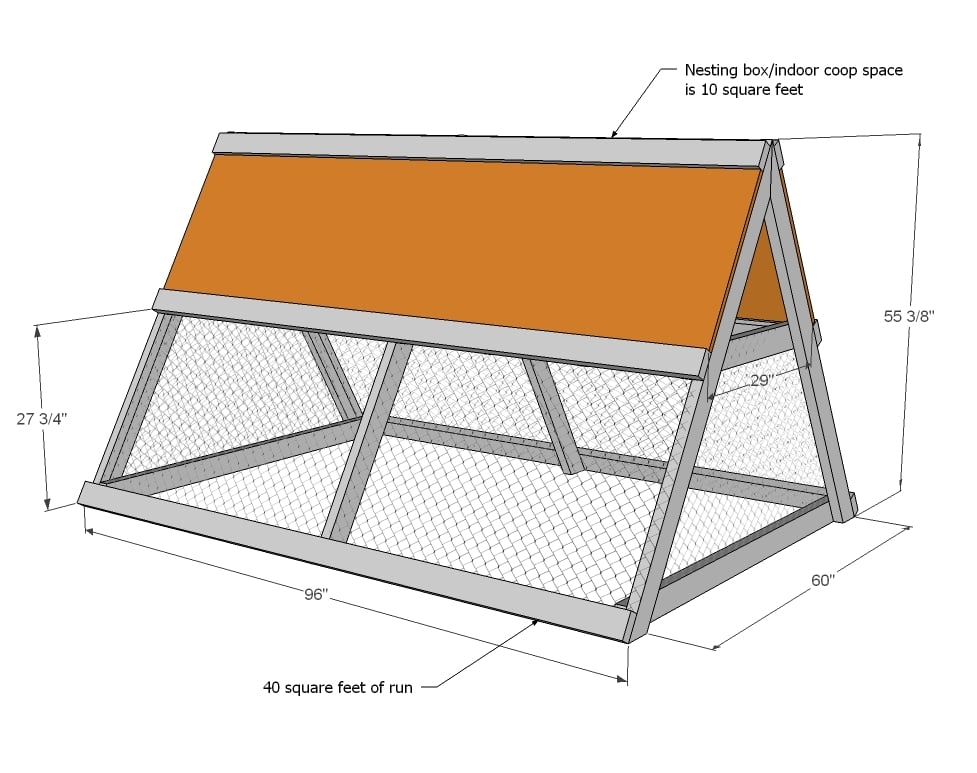
An A-frame chicken tractor is a portable chicken coop shaped like an A-frame house. It has an enclosed nesting area for sleeping and laying eggs, and an open bottom so the chickens can graze on grass and bugs. The A-frame allows you to move the coop frequently to give the flock access to fresh pasture. Wheels make it easy to tow the tractor by hand or with a lawn tractor.
Chicken tractors keep your flock safe in several ways
- The enclosed roosting area protects chickens from predators at night.
- Fencing along the sides keeps birds contained during the day.
- Frequent movement prevents predators from learning the chickens’ location.
- Elevated construction prevents digging predators from getting underneath.
A-frame tractors provide all the benefits of free-range chickens without the risks Let’s look at how to build one
A-Frame Chicken Tractor Plans
Quality chicken tractor plans take the guesswork out of construction. They provide step-by-step guidance illustrations and material lists to help anyone build a coop – even beginners with limited carpentry skills.
When selecting plans, look for the following:
- Detailed materials list with lumber dimensions and hardware specifics
- Clear diagrams and photos illustrating each construction step
- Instructions for building nesting boxes, roosting bars, ramps, wheels, and other features
- Tips for customizing the design to your needs
I recommend choosing plans with a sturdy A-frame made from wood, an enclosed roosting area, chicken wire fencing, and large wheels for easy towing. Metal roofing is ideal for durability, light weight, and ventilation. Plans designed for beginners with common tools are easiest to follow.
Many sources offer free chicken tractor plans online. However, free plans often lack the level of detail, illustrations, and guidance that ensures building success. Purchasing plans from a reputable source for $15-50 is a worthwhile investment that saves frustration.
Chicken Tractor Construction Materials
Building an A-frame chicken tractor is straightforward with basic carpentry skills and commonly available lumber and hardware. Here are the main items you’ll need:
-
Lumber: 2x4s, 2x2s, and 1x2s for the frame, roosts, nesting boxes, ramps, etc. Plywood or OSB for floors, walls and the roof.
-
Hardware cloth: 1/2″ mesh fencing to enclose the coop and prevent predators.
-
Roofing: Corrugated metal roofing panels are lightweight, weatherproof, and ventilated.
-
Fasteners: Wood screws, staples, nuts and bolts, hinges, latch.
-
Wheels: At least two large pneumatic tires for stability and ease of moving.
-
Paint/stain: Protect and decorate the wood with exterior-grade paint or stain.
Following detailed plans takes the guesswork out of buying lumber and hardware. The plans include a cut list and specify the exact amount of materials needed.
Building the Frame
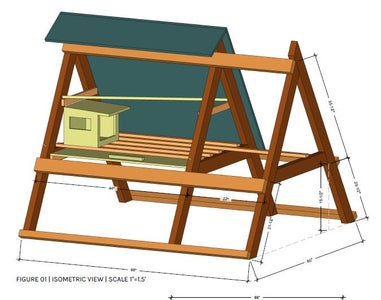
The main A-frame structure gives the chicken tractor its name. Follow these steps to build it:
-
Cut two sets of long 2x4s for the sloped sides. The angle between 25-35 degrees offers good headroom.
-
Join the 2x4s together at the top using a solid 2×4 ridge board.
-
Create end walls to enclose each end, using short 2x4s.
-
Add a plywood floor secured to the base of the 2×4 studs.
-
Use additional 2x4s running horizontally to further strengthen the A-frame.
-
Secure the frame together with wood screws and/or bolts at critical joints.
A sturdy timber frame assembled with care results in a coop that will last for years and resist sagging under its own weight.
Adding Roosting Bars
Chickens prefer elevated perches for sleeping. Install roosting bars across the inside of the A-frame:
-
Use 2x2s or 1x2s for the roosts. Round any sharp edges for comfort.
-
Place bars 12-15″ apart vertically, and 18-24″ off the floor.
-
Run bars parallel to the sloped sides, not perpendicular.
-
Notch into the 2x4s or use metal brackets to attach the roosts.
Roost placement allows birds to hop easily between perches and prevents manure from accumulating on the bars.
Building Nesting Boxes
Nesting boxes give hens a place to lay eggs in privacy:
-
Build boxes out of 2x2s and 1/4″ plywood, around 12″ square.
-
Make the front of each box easily accessible from outside the coop.
-
Line boxes with 3-4″ of litter material like pine shavings.
-
Mount boxes at least 24″ off the ground against the A-frame walls.
Having multiple next boxes reduces competition among hens and makes gathering eggs simpler.
Doors, Ramps and Wheels
Some key additional construction steps include:
-
Cut access doors into the A-frame to reach the nests and roosting space. Install hinges and latches.
-
Build a sturdy ramp with cleats for the chickens to use at night when roosting.
-
Add large pneumatic wheels at the back bottom. Use brakes to prevent rolling.
-
Create handles at the front to pull the tractor by hand.
These features allow the coop to be moved frequently and closed up securely at night.
Finishing Coop Interior
With the frame built, add these final interior elements:
-
Line the interior walls with 1/2″ hardware cloth fencing, stapled every 6″. Leave no gaps for predators.
-
Build a cage around the wheel axles to prevent accidents.
-
Consider adding ventilation windows and a hen door for free-range days.
-
Insulate the roosting area if you live in cold climates.
-
Affix roosting bars, nest boxes, feeders and waterers in place.
-
Paint or stain interior surfaces for an easier-to-clean finish.
Weatherproofing the Exterior
To make the chicken tractor durable against weather:
-
Staple 1/2″ hardware cloth across the lower A-frame to keep animals out.
-
Wrap the roosting enclosure in hardware cloth, leaving openings only for doors and ventilation.
-
Attach corrugated metal roofing using screws with neoprene washers to prevent leaks.
-
Paint or stain all exposed lumber with exterior-grade finishes.
-
Seal any gaps and joints with caulk.
These steps protect your chickens from wind, rain, and drafts while deterring predators. Proper construction is key to a long-lasting, secure chicken tractor.
Customizing Chicken Tractor Plans
While it’s best to follow plans closely the first time, you can modify certain aspects:
-
Adjust dimensions to accommodate more or fewer birds. Just ensure each hen has at least 2-3 sq. ft. of floor space.
-
Add windows, skylights or ventilation fans to improve airflow as needed.
-
Use lighter weight PVC panels instead of wood for the enclosed area to increase mobility.
-
Install solar lights, automatic door openers, or other accessories.
-
Increase wheel size, use four wheels, or add a hitch for towing.
Think through modifications carefully so they don’t compromise structure or safety. Some customization can improve functionality.
Maintaining the Chicken Tractor
A well-built A-frame chicken tractor needs minimal yearly maintenance:
-
Check for any deterioration in structural wood, and replace as needed.
-
Ensure metal roofing remains securely fastened. Replace any damaged panels.
-
Verify 1/2″ hardware cloth is stapled tightly across fencing. Repair holes.
-
Lubricate door hinges and latches. Tighten any loose screws or hardware.
-
Check that wheels turn freely and function properly.
-
Clean out interior periodically by removing roosts and litter. Disinfect all surfaces.
-
Spot treat any mold, mildew or damage, and repaint as necessary.
Annual upkeep protects your investment and keeps chickens healthy.
Benefits of an A-Frame Chicken Tractor
An A-frame chicken tractor made from quality plans offers many advantages over a fixed coop:
-
Safety: The fully-enclosed design protects against all forms of predators.
-
Durability: Constructed from weatherproof materials like timber, hardware cloth and steel.
-
Portability: Wheels and a lightweight profile lets you easily move it daily or weekly.
-
Pasture access: Chickens fertilize and enjoy fresh grass while safely contained.
-
Healthier birds: More exercise, sunshine, and natural foraging opportunities.
-
Biosecurity: Frequent relocation limits disease transmission.
-
Convenience: Easy to access, clean, maintain and gather eggs.
A chicken tractor maximizes welfare for your backyard flock. They will be happier, healthier and more productive.
Build the Coop of Your Dreams
Raising backyard chickens is an enjoyable and rewarding experience when you can keep your flock safe from harm. An A-frame chicken tractor provides the perfect combination of protection, mobility and free-range living. Follow an expert set of building plans to create the chicken run that meets your needs. Then get ready to enjoy the charm and daily production from your own small-scale poultry operation. Happy constructing!
Step 6: Finishing Touches
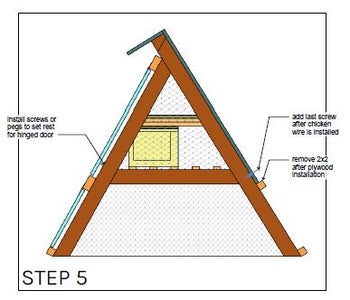
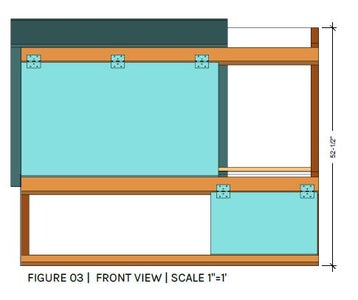
Here is my approach to hinged doors, roosting pole and laying box.
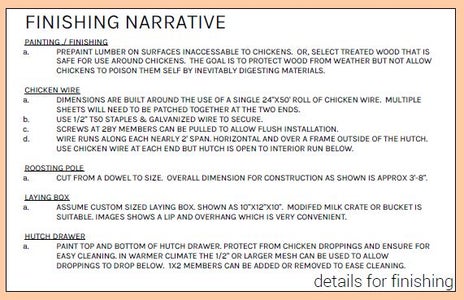
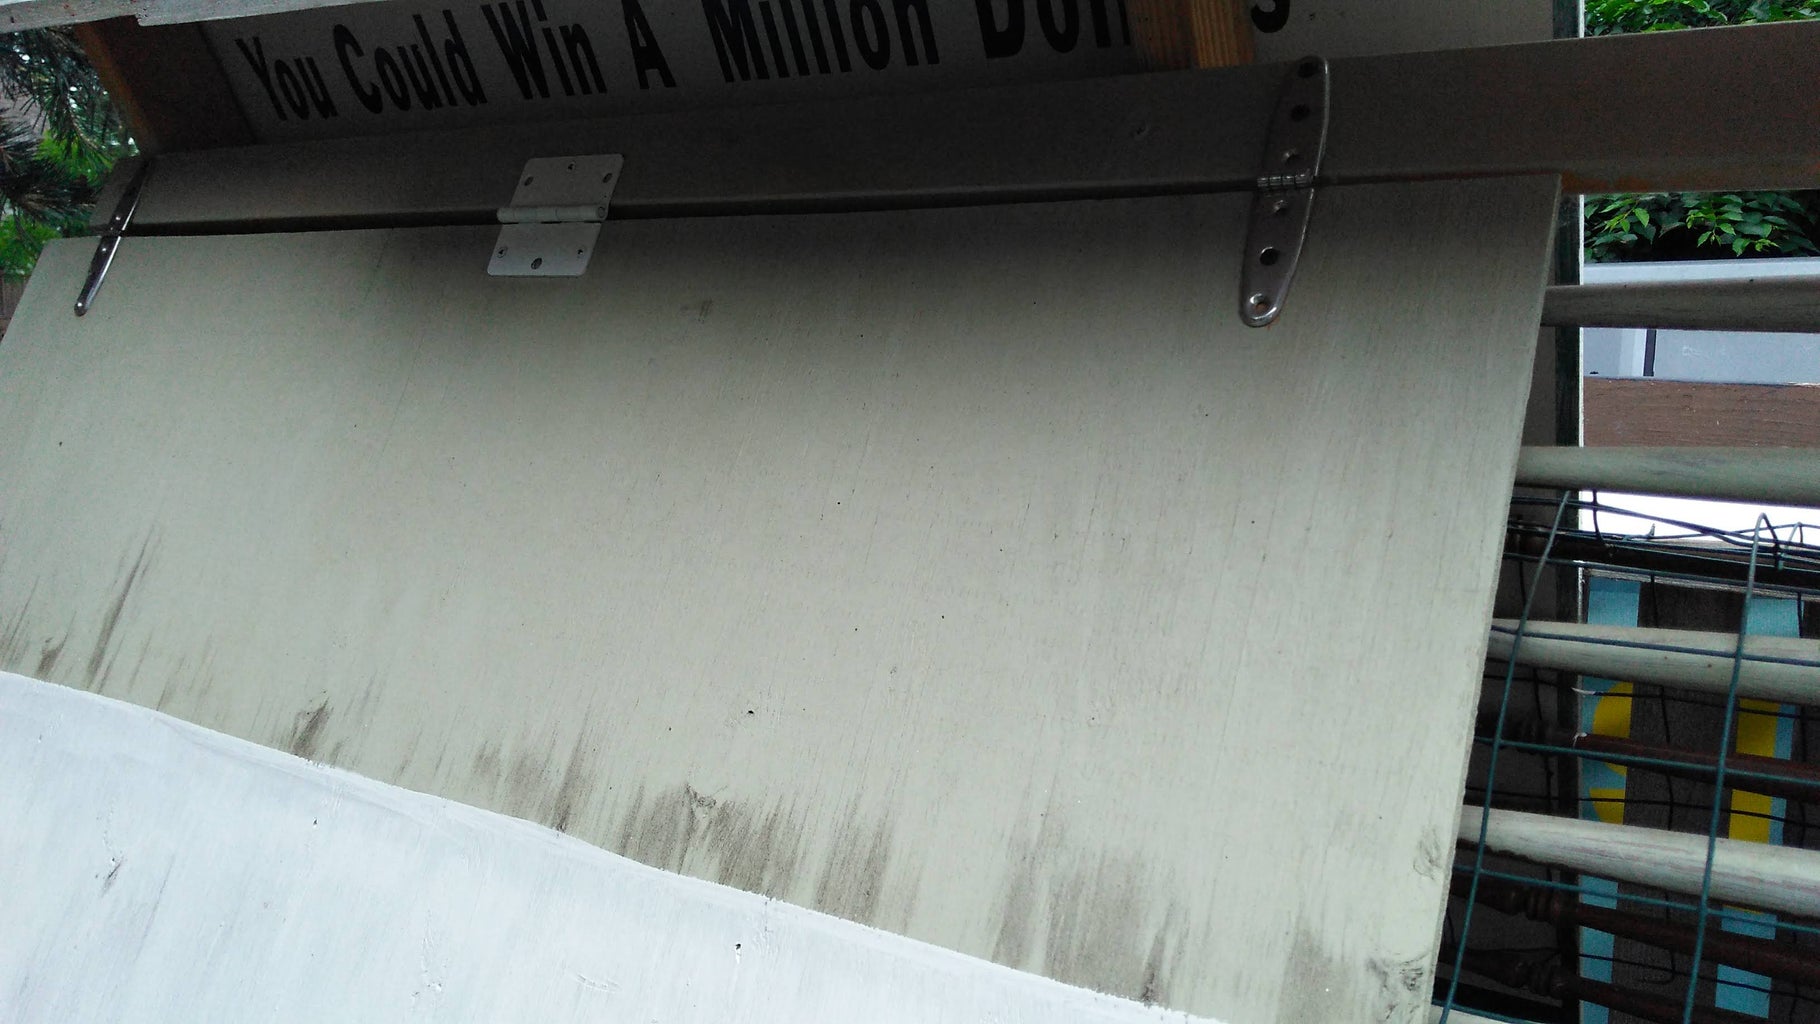
- The main door should be either 3/4″ or 1/2″ plywood if you have it available. I suggest painting the outside of the plywood to protect it from the elements.
- Door hinges work fine. I expect if youre jumping into the project you have a few laying around… also great to stop into your local Habitat Restore.
- I used an old cabinet door for this most recent version. I used a waterproof paint to protect the door and the entire hutch. The paint is use for surfaces exposed to standing water. Really important if you use found materials that arent ideal for the environment. —heres the coating I used… cant believe how popular flex seal is on tv. would probably try it on the next one
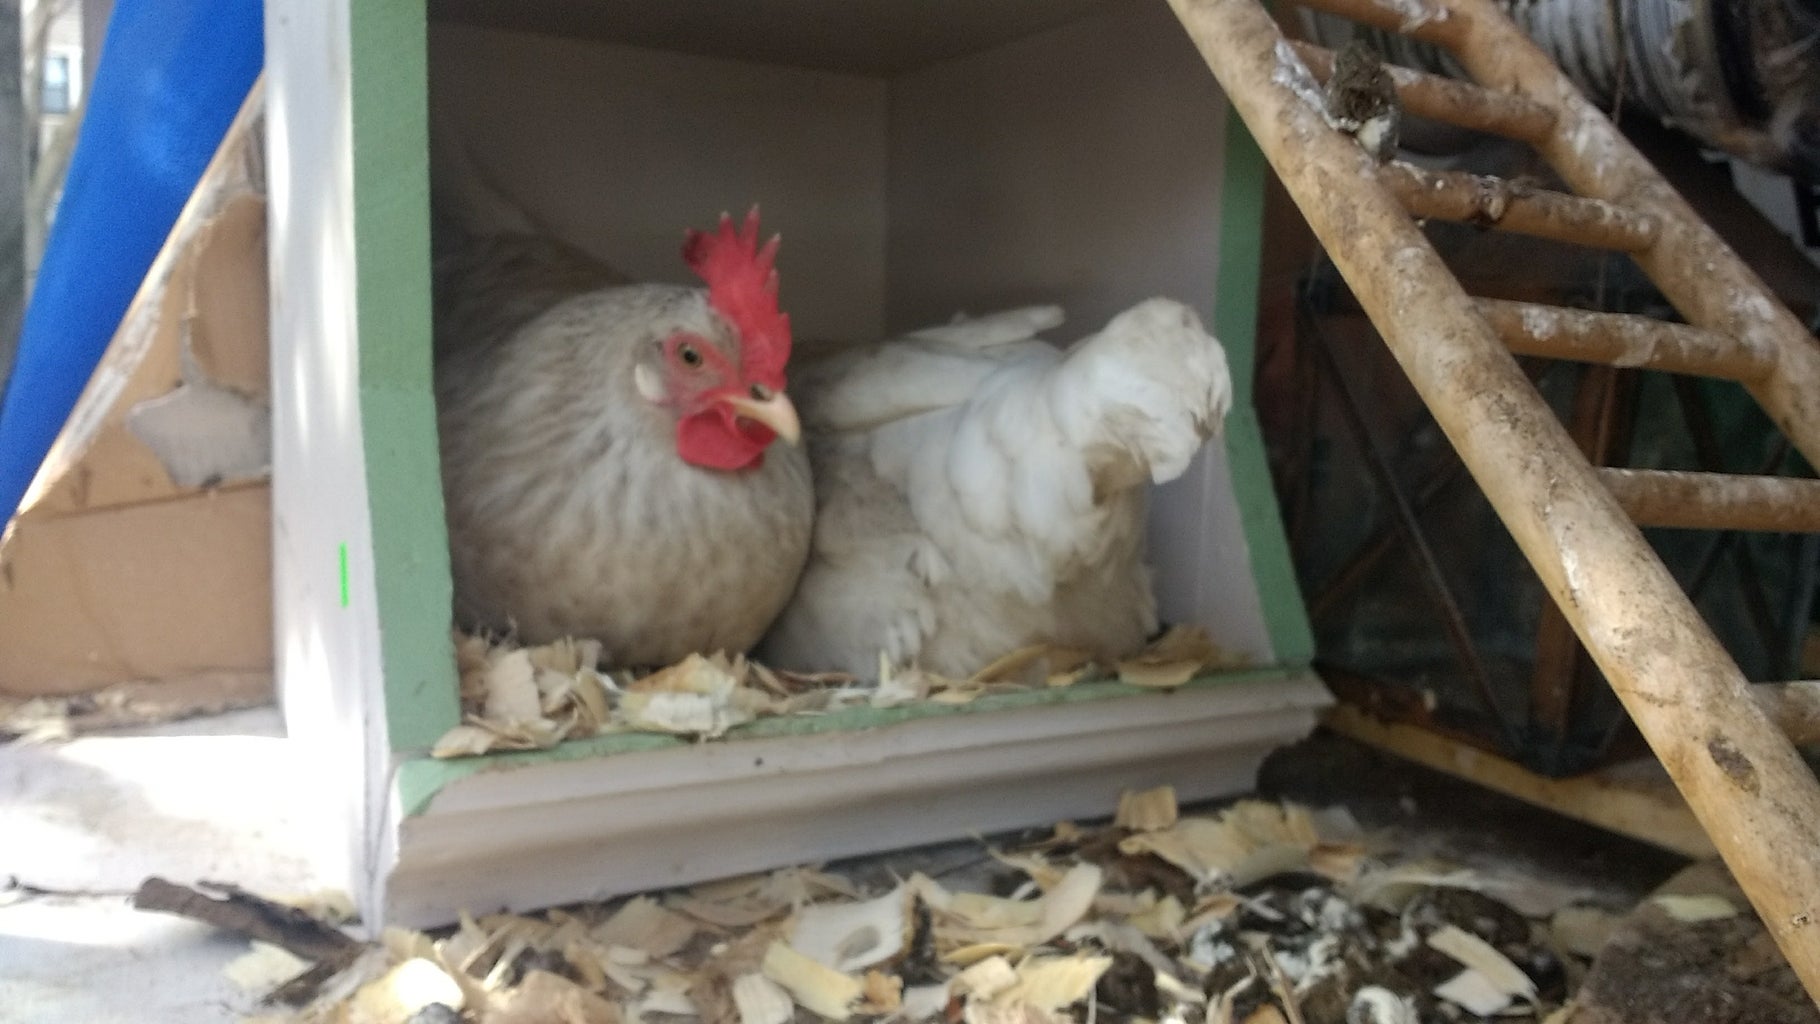
- Each time I build a coop I start with a milk crate. It works for a few weeks…
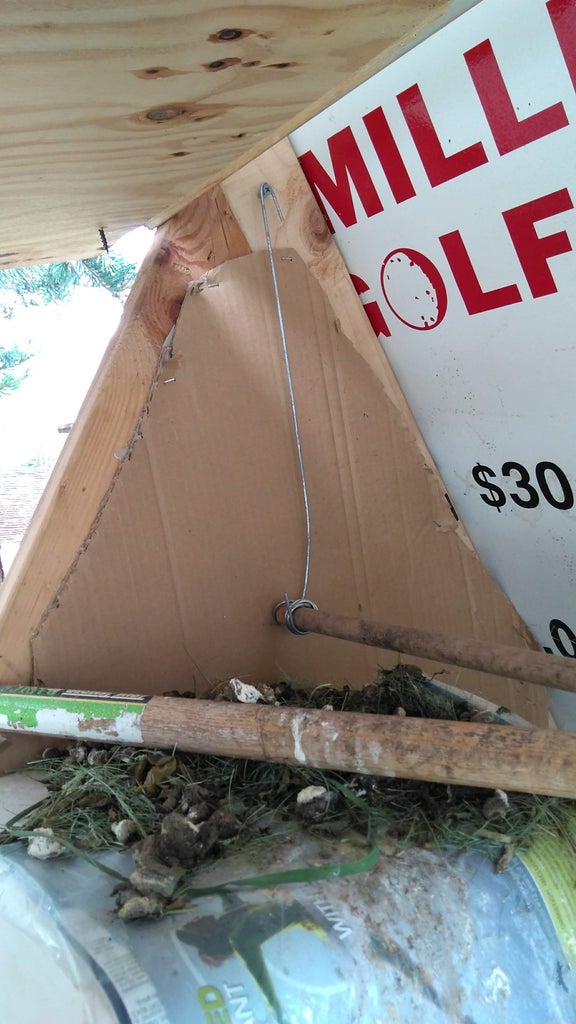
- Then I build a box. I started with a very simple box. In the photo youll see a piece of trim that holds the bedding in place.
- I used an old rake handle… really anything works.
- See how one piece is nailed on an angle.. a second hangs from wire along the center. Once the girls big enough it was necessary to add the second pole.
- A Ladder. Before I raised chickens I remember thinking I needed a little ladder for them to access the hutch. Totally unnecessary. Theyll use it but its easy for them to hop where they need to go.
- A Door to the Run. Yes the hens need to be enclosed to protect them from predators and your yard from them… they do not, however, need a door to the hutch. No one wants to wake up early and let them out with the sun. They simply wake up on their own time and start scratching!
Heres a recent post I put together for keeping chickens in cold climates – Backyard Chickens Thrive in Winter
Step 3: Building the Frame
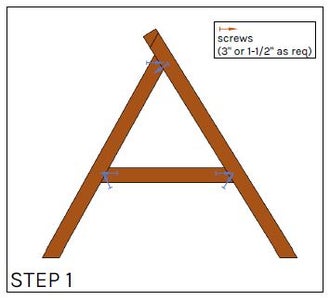
The first step is to build the A-Frame. The construction is built around a right triangle. By having 60 degree angles at each corner its easy to set the angle on a miter or circular saw to 30 degrees.
Screws are shown in each of the s. Please note that a few are at an angle or “toenailed” into the boards. These are the screws that are placed over two boards.
Chicken tractor build for pastured poultry on our homestead. #diy #chickens #growyourownfood
0