A beginner-friendly recipe for Chinese sweet and sour ribs. It provides a well-balanced condiment ratio, an approachable cooking method and delivers a restaurant standard result.
When cooking pork ribs, blanching is an essential first step. Blanching helps remove impurities, reduce unpleasant pork flavors, and tenderize the meat. Properly blanched ribs braise up succulent and delicious. Follow this guide to learn the blanching process for incredible pork ribs every time.
What is Blanching?
Blanching involves briefly cooking food in boiling water or steam to partially cook it. For meat blanching helps
- Remove blood, fat and debris from the surface
- Minimize strong “porky” tastes
- Tenderize tough cuts through partial cooking
- Kill bacteria residing on the exterior
- Allow seasonings to better penetrate
Blanching is especially useful for inexpensive ribs with more connective tissue. It helps break down the collagen while preserving moisture.
Benefits of Blanching Ribs
Here are some of the benefits blanching provides for pork ribs:
- Results in tender, fall-off-the-bone ribs by starting to break down collagen
- Removes impurities and fat bubbles on the surface
- Reduces unpleasant pork flavors and odors
- Allows seasoning and sauces to adhere better
- Gives brighter, cleaner appearance than unblanched ribs
- Produces clearer broth when ribs are braised
- Short blanch doesn’t significantly reduce nutrients
While blanching requires an extra step it elevates the flavor texture and appearance of pork ribs.
Choosing the Right Ribs for Blanching
Look for these qualities when selecting ribs for blanching
-
Good fat marbling – This keeps ribs moist during blanching. Avoid very lean ribs.
-
Lots of connective tissue – Blanching helps tenderize ribs with more collagen.
-
Uniform sizing – Blanching cooks evenly when ribs are similarly sized.
-
Meaty ribs – Bones with less meat require less blanching time.
-
Fresh, not frozen – Blanching works better on fresh, not frozen then thawed ribs.
Pork baby back ribs, St. Louis style ribs, and country-style ribs all respond well to blanching. Stay away from pre-cut riblets.
How to Blanch Pork Ribs – Step-by-Step
Follow these simple steps for properly blanched ribs:
1. Prepare the Ribs
Rinse ribs under cool water and pat dry. Remove membrane on the bone side for seasoning to penetrate. Cut ribs into individual ribs or 2-3 rib portions.
2. Bring Water to a Boil
Fill a large pot with cool water, using 1 tablespoon salt per 4 cups water. The water should cover the ribs by 1-2 inches. Bring to a rolling boil over high heat.
3. Add Ribs and Blanch
Once boiling, add ribs and blanch for 4-5 minutes. Use tongs to stir and submerge. Skim any scum or fat from the surface.
4. Drain and Cool
Drain ribs in a colander and rinse with cool water to stop cooking. Let sit 10 minutes to cool completely before the next steps.
And that’s it! With these four simple steps, you’ve prepped your ribs for braising, grilling, roasting or any recipe.
Helpful Tips for Blanching Pork Ribs
Follow these tips for successful blanched ribs every time:
-
Blanch country-style or meatier ribs slightly longer than baby backs.
-
Work in batches instead of crowding ribs to ensure even blanching.
-
Add aromatics like sliced ginger, scallions or garlic to the blanching liquid.
-
For food safety, blanch ribs right before cooking rather than in advance.
-
Reserve blanching liquid for making soup stock or gravy.
-
Pat ribs very dry after blanching so seasonings and sauces stick.
Flavor Enhancing Techniques After Blanching
Since blanching leaches some flavor, be sure to boost taste after:
-
Coat ribs with a dry rub, marinade or sauce before cooking. Let sit 30+ minutes to penetrate.
-
Brown the ribs in oil or roast in the oven at 400°F to develop flavor.
-
Braise or simmer ribs in a flavorful braising liquid like cola, wine, broth, etc.
-
Grill over indirect heat, mopping with barbecue sauce to add flavor.
-
Finish with a glaze, mop, or sauce on the grill or under the broiler.
Delicious Ways to Cook Blanch Ribs
Blanched ribs work beautifully in these recipes:
-
Braised Ribs – Braise blanched ribs low and slow in a flavorful liquid until fall-off-the-bone tender.
-
BBQ Ribs – Grill blanched ribs over indirect heat, mopped with barbecue sauce for finger-licking ribs.
-
Teriyaki Ribs – Roast or broil blanched ribs brushed with a sweet and sticky teriyaki glaze.
-
Rib Stew – Add blanched ribs to vegetable beef stew for richness.
-
Crispy Baked Ribs – Coat blanched ribs with spices and bake until caramelized and crispy.
-
Rib Soup – Simmer blanched ribs in chicken broth with vegetables and noodles.
The possibilities are endless for turning blanched ribs into succulent masterpieces!
Storing and Reheating Blanch Ribs
-
Refrigerate blanched ribs up to 2 days before finishing cooking recipes.
-
For longer storage, freeze blanched ribs in airtight packaging for 4-6 months.
-
Thaw frozen ribs overnight in the fridge before using.
-
Avoid soaking ribs in water again as that draws out flavor.
-
Reheat gently in the oven or on the grill to avoid drying out.
With blanched ribs prepped in advance, you’re ready to make amazing ribs at a moment’s notice!
Frequently Asked Questions About Blanching Ribs
Get answers to common questions about this important technique:
Should ribs be blanched before marinating?
Yes, blanch before marinating. Blanching opens up the meat structure so marinades better penetrate.
Does blanching make ribs mushy?
It shouldn’t if blanched for just 4-5 minutes. Longer blanching times can lead to mushiness.
Can I skip blanching if using tender baby back ribs?
Blanching still provides benefits like removing impurities. But a shorter time of 2-3 minutes may suffice for tender ribs.
Is it necessary to rinse ribs after blanching?
A quick rinse stops the cooking and rinses away coagulated scum for a cleaner appearance.
Can I reuse blanching liquid for stock?
Yes, reserve it for making soup stock. Strain out any solids first.
Master the Blanching Technique
While blanching requires an extra step, it elevates pork ribs to new heights of flavorful tenderness. Follow these tips for mouthwatering ribs worth bragging about. Soon you’ll be blanching ribs with the skill of a professional chef!

Step 3: Thicken the sauce
The last step involves reducing the remaining broth and turning it into a thick and sticky sauce. Remove the lid and pick out all the garlic, ginger and scallions. Turn the heat up to high and leave to boil vigorously.
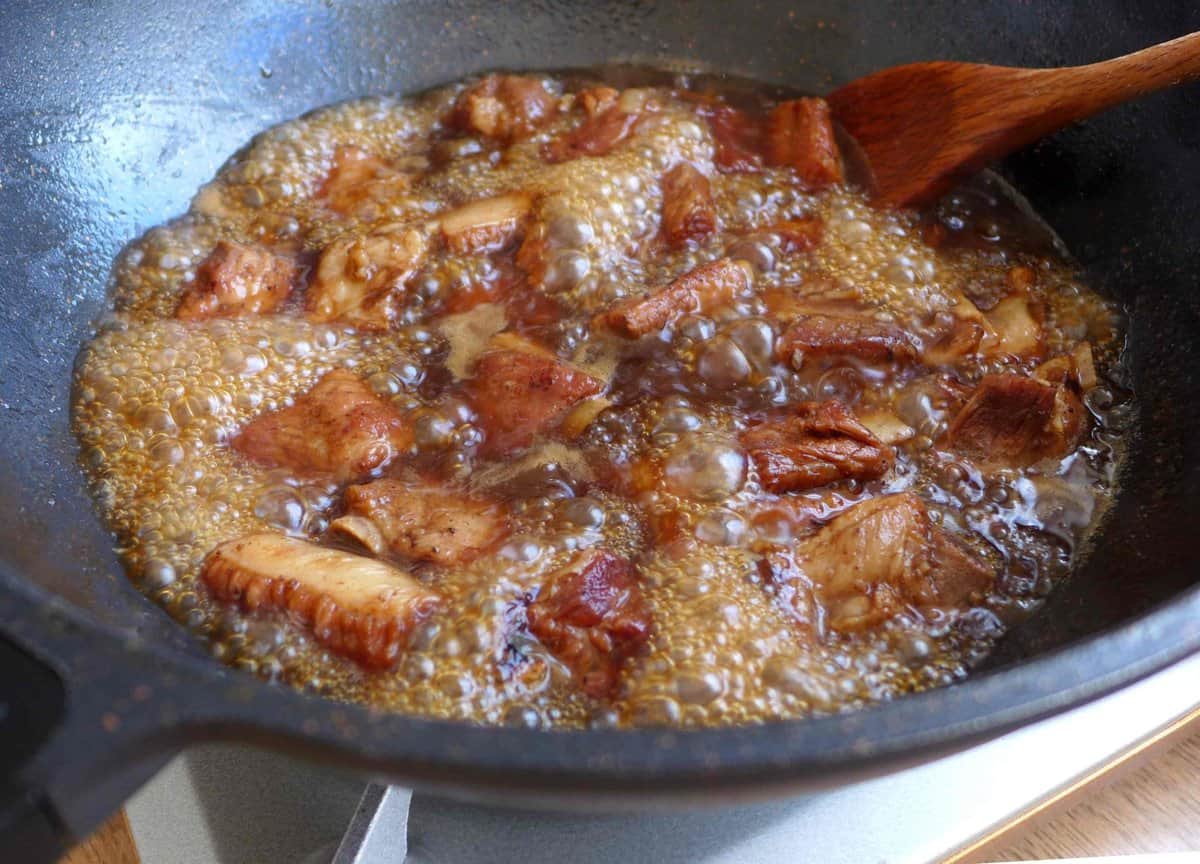
Don’t forget to add a little more black rice vinegar to boost the sourness during this step, as the vinegar that was already added has lost some of its tangy flavor from the long simmering.
Be attentive and stir the ribs from time to time. As the liquid reduces its volume, it thickens. It’s very important that you stop cooking at the right moment. If too early, the broth isn’t sticky enough to coat the ribs. But if too late, the sugar in the liquid will be overly caramelised thus getting a burnt taste.
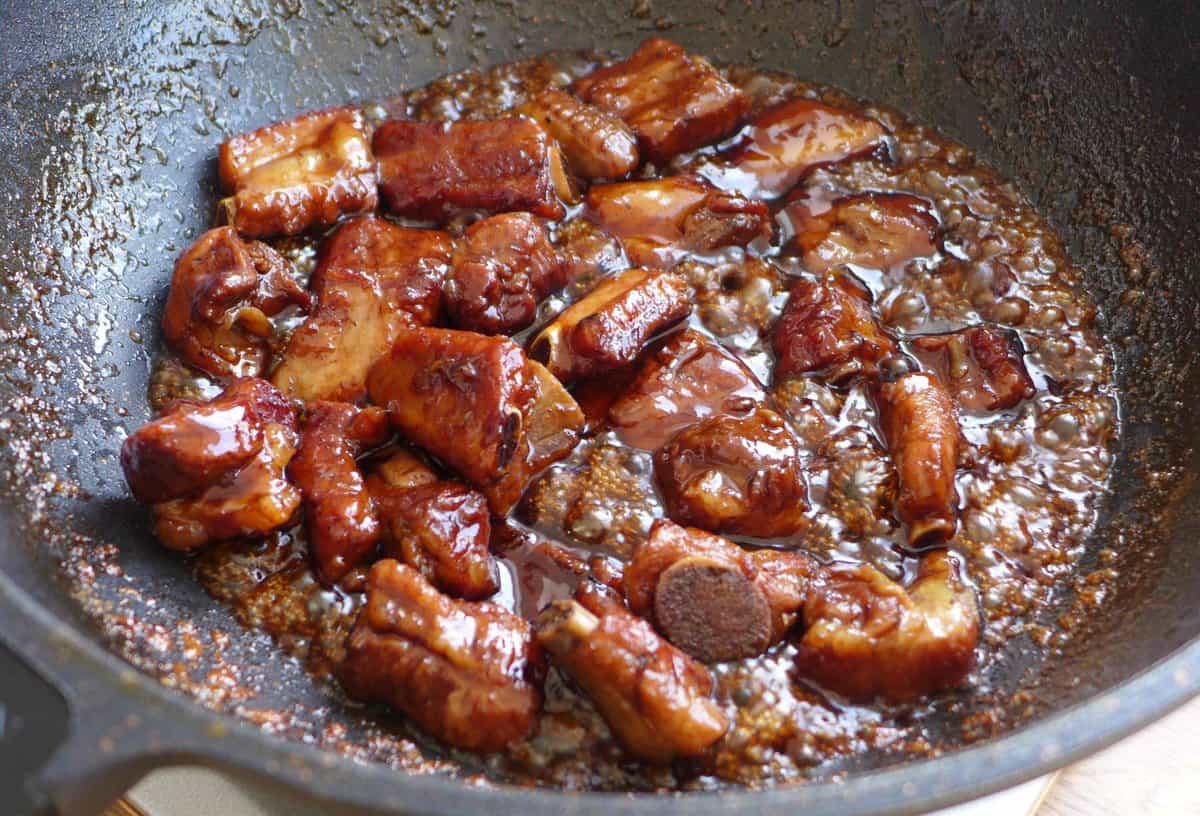
TIP: Keep in mind that the sauce will get thicker as it cools, so remove it from the heat a little before it reaches the ideal consistency (see video below for example). It took me about 8 minutes from the beginning of this step. But it may vary in your case as we use different heat sources and cookware.
Finally, sprinkle some toasted sesame seeds and chopped scallions over the ribs to garnish. Right now you have a bowl of sweet and sour ribs that look and taste just as good, if not better, than restaurant ribs!
Enjoy them hot over steamed rice with a cool vegetable dish like cucumber salad, stir-fried Chinese broccoli, or something else. Alternatively, serve them at room temperature. They make wonderful nibbles at snack time or an appetiser at parties.
Sometimes I make a big batch and freeze some for later consumption. Simply defrost them then reheat with a little water until piping hot.
Step 2: Braise the ribs
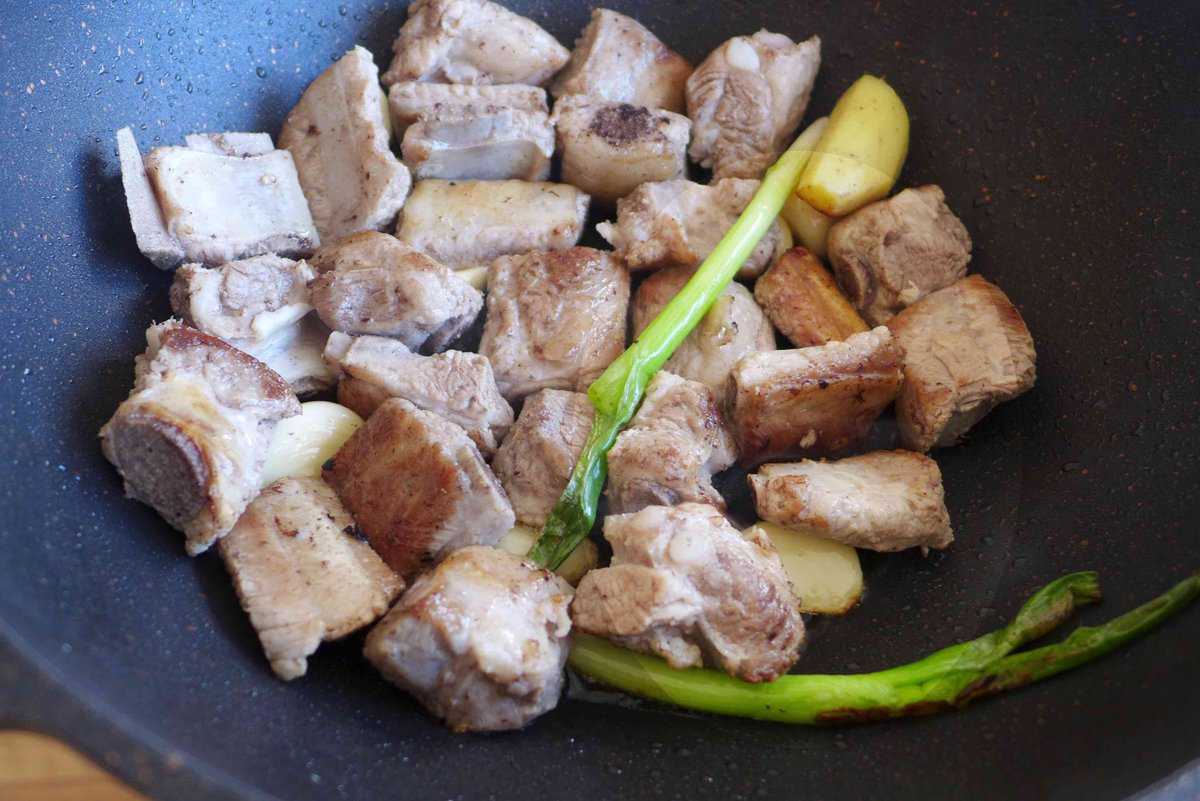
Warm up some oil in a clean wok, deep pan, or pot. Then add the drained ribs, whole garlic cloves, a piece of ginger, and scallions cut into strips. Stir fry over medium heat until the surface of the ribs become lightly golden.
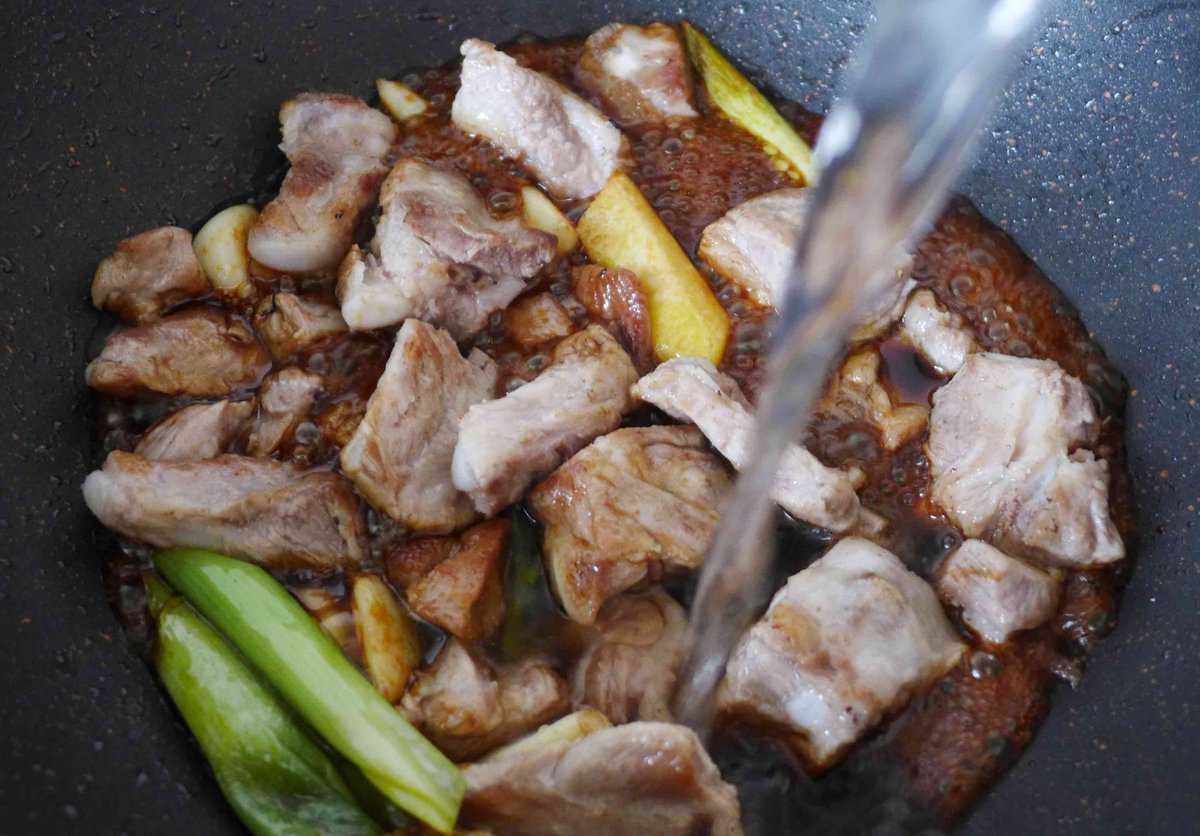
Sugar, black rice vinegar, light soy sauce, dark soy sauce, and a little salt should all be added. Then pour in hot water just enough to level with the ribs. Bring to a full boil then cover with a lid. For about 50 minutes, or until the meat is soft but not falling off the bones, let it simmer over low heat.
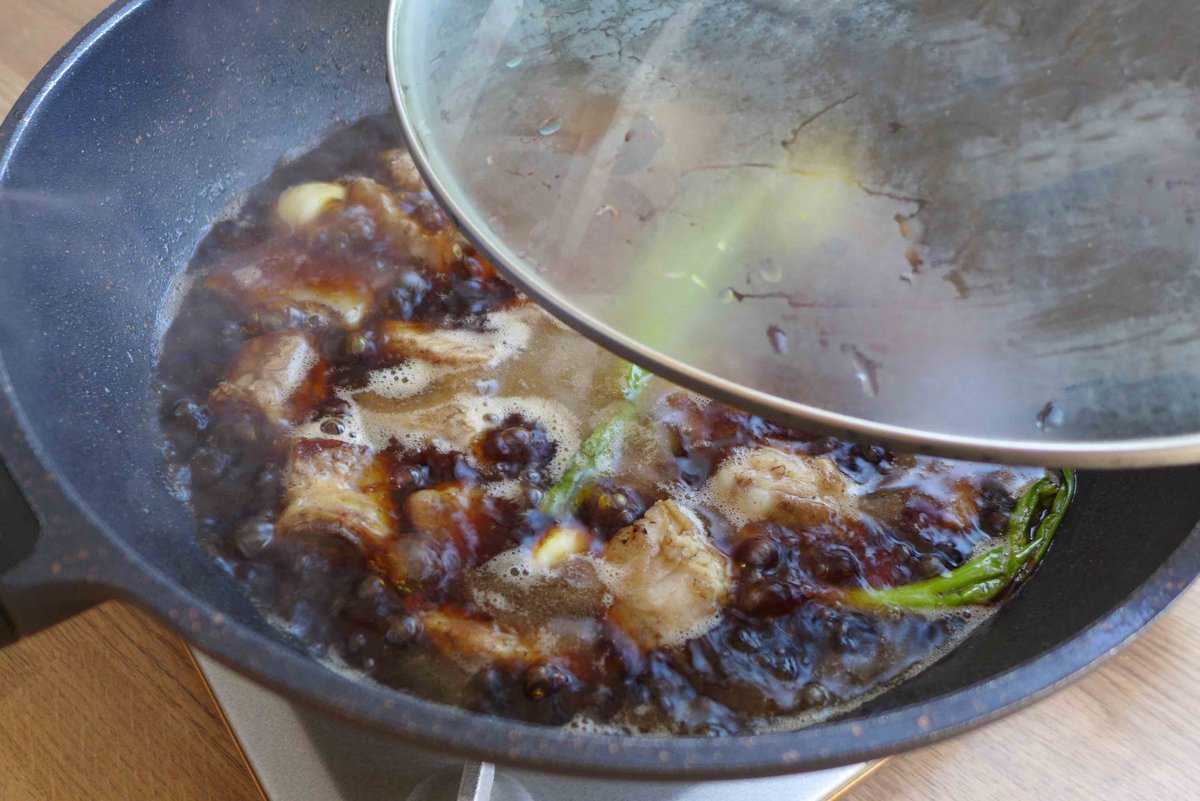
TIP: If your lid isn’t tightly fitted, too much water might evaporate during this process. I suggest you check the water level halfway through and top up a little if necessary.
