Our kitchen is a busy place around Thanksgiving and Christmas holidays. There’s family, guests, and lots of food prep underway.
We barbecue a whole turkey outdoors for our Thanksgiving and Christmas meals. It frees up space in the oven. It’s also a social thing – Dad and me outside, tending the BBQ. And, most importantly, it makes for a very delicious turkey.
If you’re new to roasting a whole turkey – or new to charcoal cooking, it might seem daunting. But it’s not difficult.
Mom taught me to put the turkey in the sink and rinse it, both inside and out. This is a step some people swear by – while others recommend skipping it.
The rationale for not rinsing is that rinsing can spread around microbes from the raw poultry – increasing the chance of contaminating other food. (That’s also what the Turkey Farmers of Canada recommends.)
Some turkeys come with the giblets placed inside the cavity. (Giblets are the liver, heart, gizzard, and neck.)
Put your hand in and feel around for the giblets. Sometimes they’re wrapped in plastic…and you definitely don’t want that roasting away inside your turkey. I’ve sometimes found the neck in the cavity, and the liver under the flap of skin where the neck used to be…so check both these places.
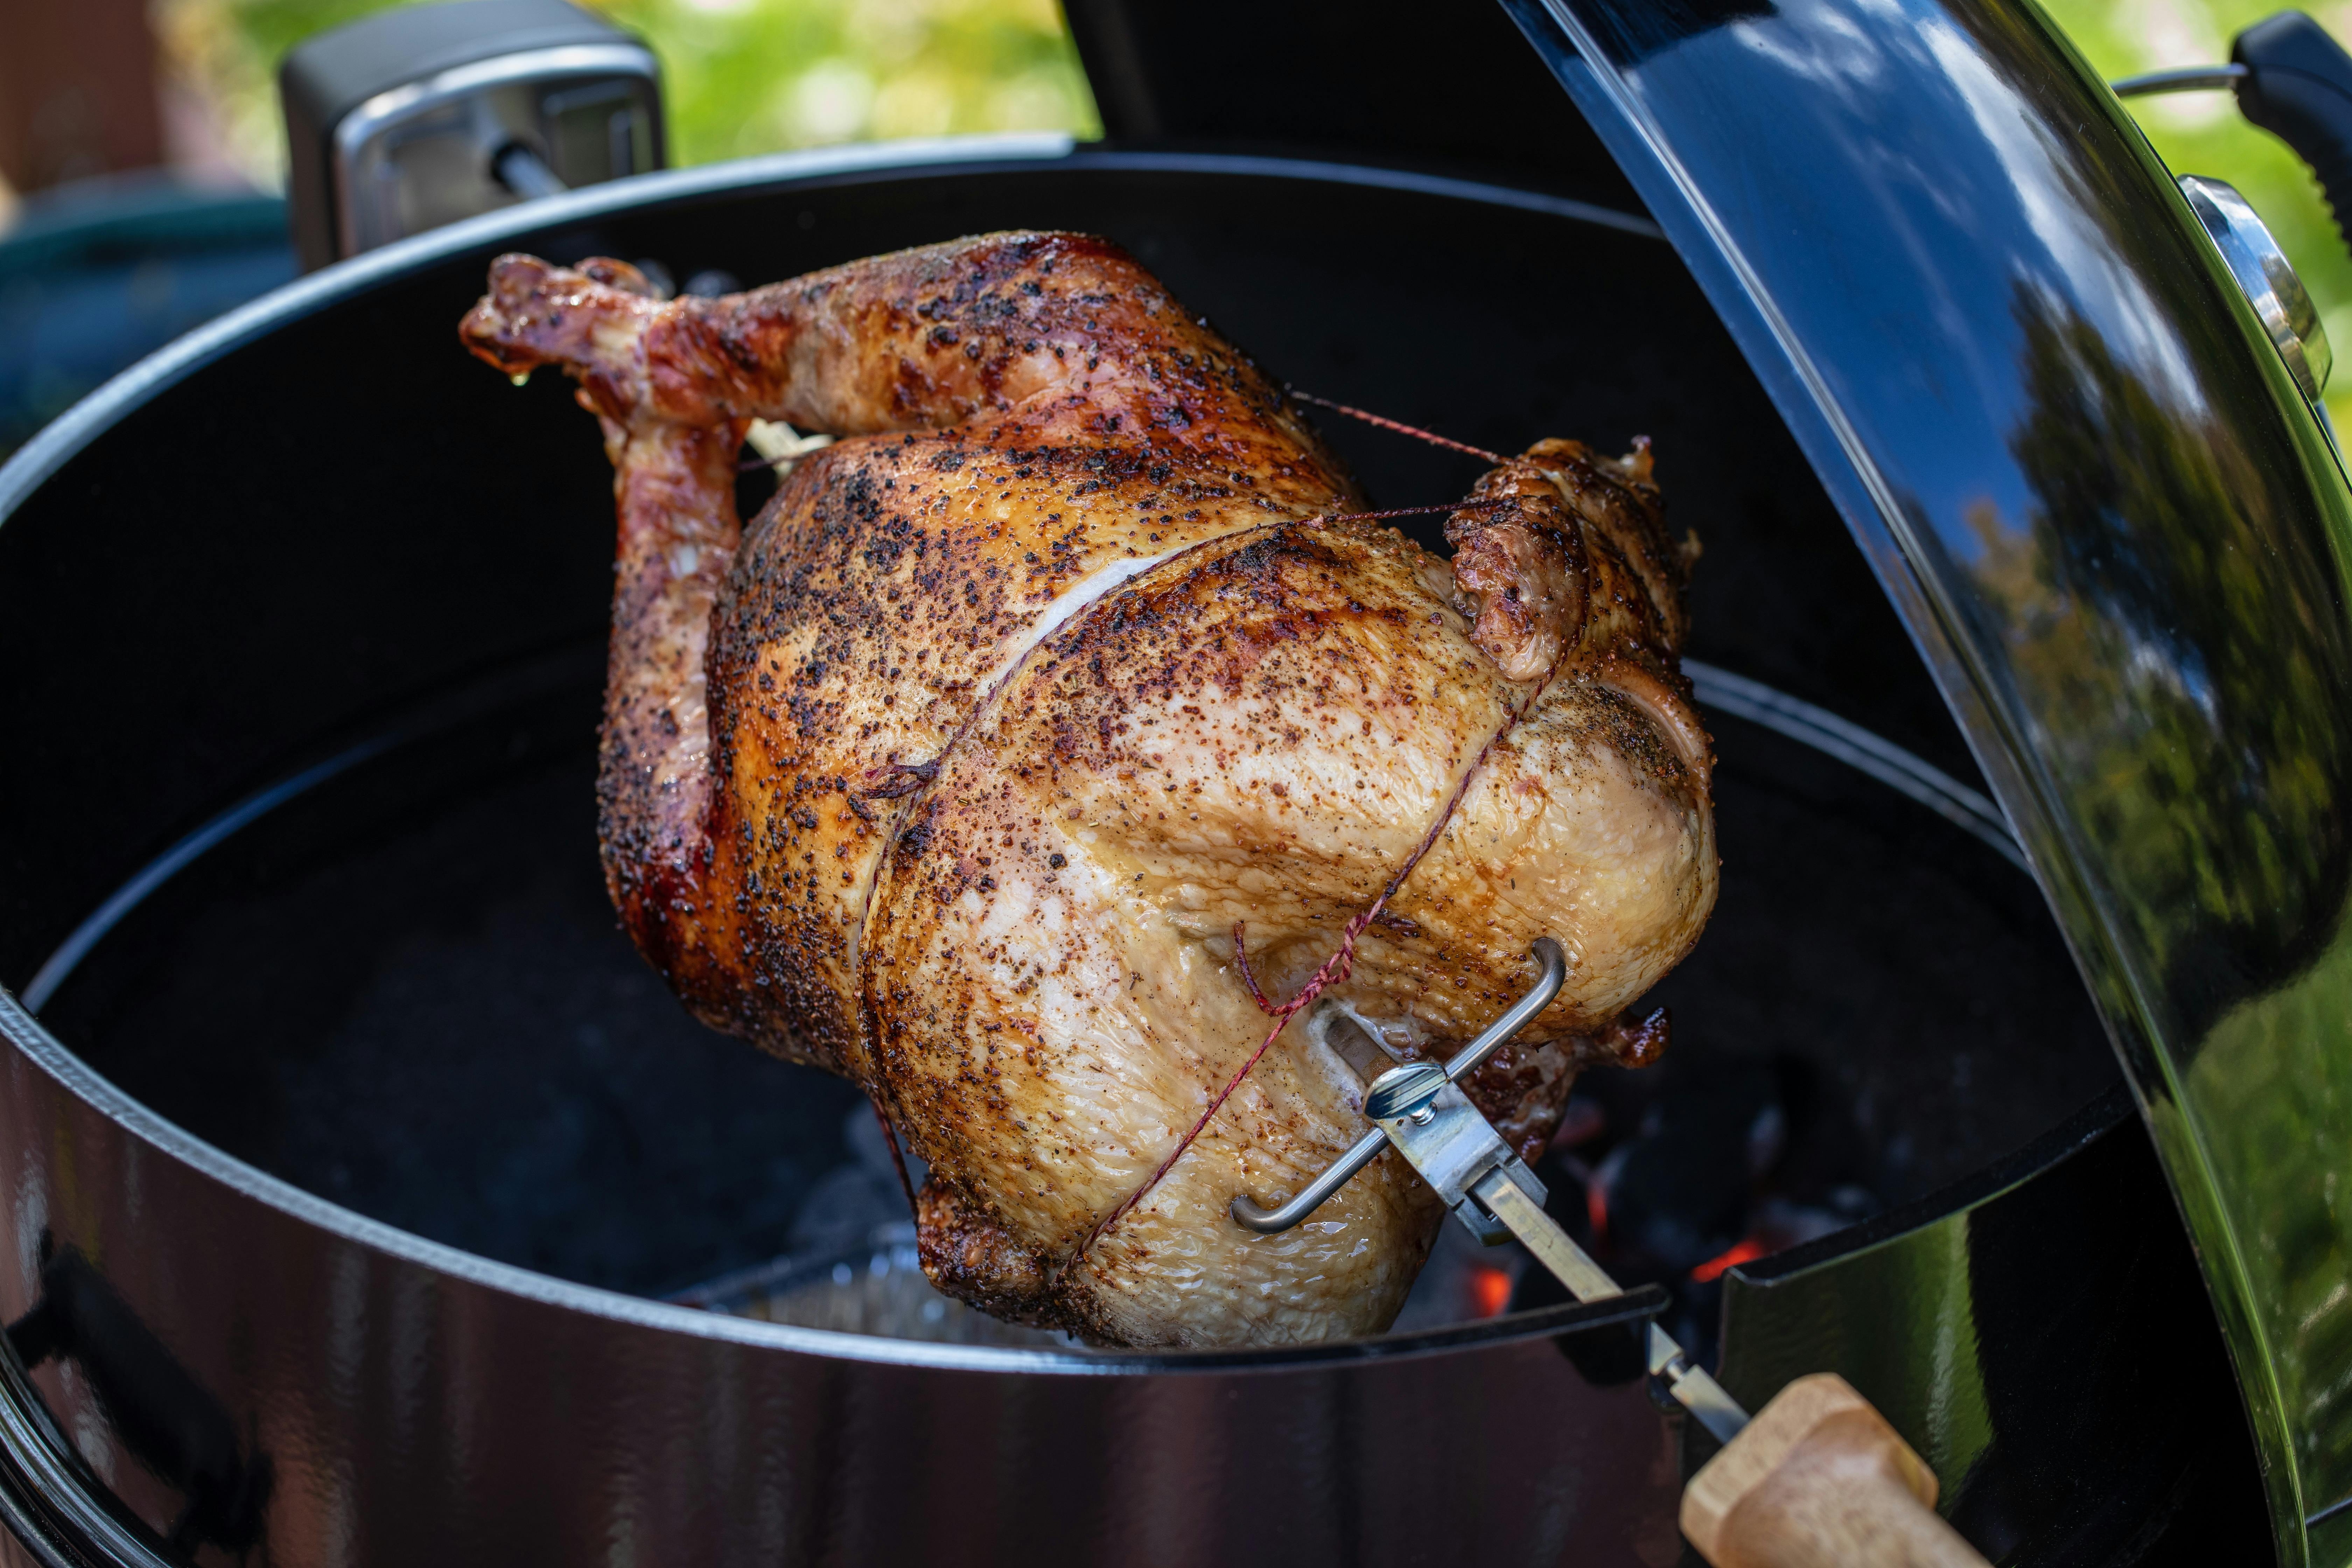
Cooking turkey on a rotisserie is one of the best ways to get moist, delicious meat with crispy skin. The constant rotation over the heat source allows the turkey to baste in its own juices while evenly cooking the breast and thighs. While roasting a turkey in the oven is the traditional method, switching to the grill can take your holiday bird to new flavorful heights.
Why You Should Cook Turkey on a Rotisserie
There are several advantages to using a rotisserie for cooking turkey:
-
Even cooking The rotisserie allows the turkey to cook evenly from all sides, preventing the common issue of overcooked breast meat and undercooked thighs when oven roasting The turkey bastes itself as it rotates, keeping the meat deliciously moist
-
Crispy skin The dry ambient heat from the grill is perfect for getting super crispy turkey skin, which is nearly impossible to achieve in a humid oven environment. The skin gets beautifully golden brown and crunchy.
-
Incredible flavor Grilling over an open flame adds delicious smoky notes to the turkey Wood chips or herbs can be added right to the coals for more flavor The drippings hitting the fire also create smoke that gets absorbed,
-
Frees up oven space: With the turkey on the grill, your oven is free for cooking side dishes. This makes timing everything for a big holiday meal much easier.
-
Lower risk of burning: With the turkey rotating on the spit, there’s less chance of one area getting burnt as can happen in the oven. You don’t have to worry about carefully rotating pans.
Trussing and Balancing the Turkey
To get optimal results, the turkey needs to be properly trussed and balanced on the rotisserie spit. Here are some tips:
-
Tuck the wing tips under the body and tie the legs together with butcher’s twine. This helps compact the turkey for more even cooking.
-
Skewer or tie any loose skin into place. You don’t want anything flopping around as the turkey spins.
-
Position the spit prongs in the center of the breast and back to balance out the weight. Pack the cavity well to distribute weight.
-
Make sure the turkey is centered and snug on the spit before tightening the prongs down. Give it a test spin to check for wobbling.
Rotisserie Cooking Times and Temperatures
Whole turkeys can take 2-3 hours to fully cook to a safe internal temperature on a rotisserie. Use these cooking guidelines for various turkey sizes:
-
12-14 lb turkey: Cook for approximately 2 1⁄2 to 3 hours until the thigh reaches 170°F and the breast 165°F.
-
14-18 lb turkey: Cook for about 3 to 3 1⁄2 hours until thighs reach 170°F.
-
18-22 lb turkey: Cook for roughly 3 1⁄2 to 4 hours until the thighs hit 170°F. Monitor temperature closely.
Always use a good instant read meat thermometer to check for doneness in multiple areas. Carryover cooking will continue to raise the temperature slightly after removing from the grill. Let the turkey rest for 30 minutes before carving.
Rotisserie Grill Setup
Properly setting up your grill is essential for rotisserie success:
-
Place a drip pan directly under the turkey to catch the juices for gravy. Use a disposable foil pan on a charcoal grill or a metal baking sheet on a gas grill.
-
For charcoal, bank all the coals to one side of the grill. This gives you indirect heat for gently roasting the turkey.
-
On a gas grill, turn the burners to medium heat. The turkey only needs to rotate over mild heat to cook slowly.
-
Add a water pan or wood chips to the cooler side for extra moisture and flavor.
-
Keep the lid closed as much as possible to contain the heat. Open vents on a charcoal grill if needed.
Preparing a Juicy, Flavorful Rotisserie Turkey
Follow these tips for the best grilled turkey you’ve ever tasted:
-
Brine the turkey: Soaking the turkey in a saltwater brine ensures juicy, well-seasoned meat. Brine for 12-24 hours in the refrigerator.
-
Rub with herbs and oil: Coat the turkey with olive oil or melted butter and rub in chopped fresh herbs like rosemary, thyme and sage. This adds great flavor.
-
Fill the cavity: Stuff the cavity with aromatics like onion, apples, citrus fruits, garlic and fresh herbs. This infuses the meat as it cooks.
-
Use a flavorful basting liquid: Combine melted butter with herbs, citrus juice or other liquids. Baste the turkey every 30 minutes while grilling.
-
Let it rest before carving: As tempting as it is, don’t carve the turkey right off the grill. Letting it rest allows juices to redistribute for better texture.
Check Your Turkey as it Roasts

Starting briquette charcoal with an electric lighter on an old cookie sheet. When it’s ready, I use tongs to place it around the drip tray.
Sometimes I re-balance the turkey and tighten the forks if I see the turkey is wiggling a bit as it turns.
Along with making sure that roast is balanced, make sure there is still enough heat from the charcoal. I replenish the charcoal at least once while roasting a turkey. I start a new batch on the cookie sheet and transfer the briquettes (using tongs) around the drip pan.
My BBQ doesn’t not have a temperature gauge. So I touch it to see if it’s hot enough.
- If I touch the top of my barbecue and it’s too hot to hold my hand there, I’m happy with the heat.
- If I can hold my hand there for a moment, it’s time for more charcoal. It’s not an exact science.
One year, Dad and a friend were responsible for the Thanksgiving turkey. They got distracted (wine tasting, maybe!) and forgot to add more charcoal. That year we had our roast at about 10 p.m.!
Basting Your Rotisserie Turkey
The great thing about cooking on a rotisserie is that the roast bastes itself as it turns.
But I baste it even more as it cooks. The reason is that turkey tends to be a dry meat. Barbecued turkey skin can be leathery, but if you baste it as cooks, you get crispy, golden, flavourful skin.
Here’s what I baste with:

The pot with liquid for basting staying warm on top of the BBQ. It’s a mix of lemon juice, butter, thyme, and salt.
- Juice of a lemon
- Butter
- Thyme
- Salt (don’t be stingy)
Rotisserie Turkey on the Grill
FAQ
How long to cook rotisserie turkey on Weber gas grill?
… on the rotisserie, keeping the lid closed, until the turkey breast reads 165º F internal with an instant-read thermometer, approximately 2 1/2 to 3 hours
How long does it take to cook a turkey on the grill?
Grill the turkey for 2.5 to 3 hours, checking the bird every 30 minutes or so.